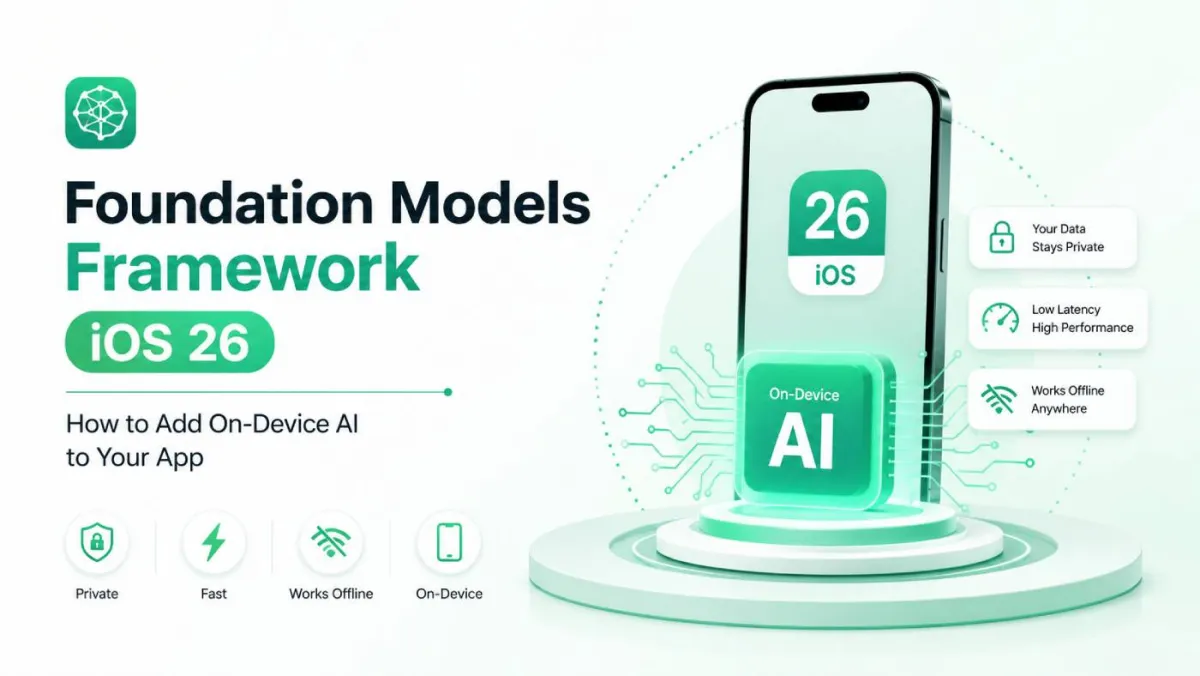
Foundation Models Framework iOS 26: How to Add On-Device AI to Your App
Imagine adding AI to your app without touching a single API key, paying a monthly cloud bill, or making your users cross their fingers for a good Wi-Fi connection. That's exactly what iOS 26 just handed you.
Apple's Foundation Models framework brings a real, on-device large language model to your Swift codebase. It runs locally on the device, responds fast, and keeps your users' data private. Whether you're building a writing assistant, a smart tagging system, or a conversational help screen, this is the API you've been waiting for.
This guide is written for Swift developers who know their way around UIKit or SwiftUI and want a thorough, honest walkthrough — not just the happy path. By the end, you'll understand:
- What Foundation Models actually is (and what it isn't)
- How to set it up correctly the first time
- How to generate text, structured data, and streaming responses
- How to connect the model to your app's own data using custom Tools
- How to handle errors, test your code, and ship something production-quality
Let's get into it.
What Is the Foundation Models Framework?
Apple Intelligence vs. Foundation Models — Know the Difference
You've probably heard "Apple Intelligence" a lot lately. It's Apple's umbrella brand for all the AI features baked into iOS 26, iPadOS 26, and macOS 26 — the writing tools in Notes, the priority inbox in Mail, the summarisation in Notifications, and so on.
Foundation Models is the developer API that sits underneath all of that. Apple Intelligence is the marketing name; Foundation Models is the thing you actually import in Xcode.
Think of it this way: Apple uses Foundation Models internally to power its own features, and as of iOS 26, they've opened a portion of that same API to third-party developers. You're not getting a dumbed-down preview toy — you're getting access to the same model that powers Apple's own apps, with some guardrails and a clean Swift interface on top.
Why did Apple wait until iOS 26 to open this up? The short answer is hardware. The on-device model needs enough Neural Engine capacity and RAM to run well, and iOS 26-eligible hardware finally clears that bar comfortably across the whole supported device range.
On-Device AI vs. Cloud AI — A Practical Comparison
Before you start, it's worth knowing exactly what you're getting — and where cloud APIs still have the edge.
| Foundation Models (On-Device) | Cloud AI (OpenAI, Gemini, Claude) | |
|---|---|---|
| Latency | Very low — no network round-trip | Varies; depends on server load |
| Privacy | Data stays on device by default | Data leaves the device |
| Cost | Free at runtime | Per-token pricing |
| Connectivity | Works offline | Requires internet |
| Model size | ~3B parameter, mobile optimised | Much larger models available |
| Customisation | Instructions + Tools | Fine-tuning, system prompts |
| Multimodal | Text only (for now) | Text, images, audio |
Estimated Server Token Load / Mo
7.5B tokensMonthly Dynamic Savings (On-Device)
$18,750The on-device model is great for tasks where privacy matters, connectivity is uncertain, or cost at scale is a concern. It's not the right tool if you need GPT-4-level reasoning, multimodal input, or a model you've fine-tuned on your own data. For those cases, a cloud API still wins — and the two aren't mutually exclusive in your app.
How Foundation Models Fits Into Apple's ML Ecosystem
Apple has several ML frameworks, and it can get confusing fast. Here's the quick version:
- Foundation Models — use this when you need general-purpose language understanding and generation out of the box, with no model file to manage.
- Core ML — use this when you've trained or converted your own model (an image classifier, a custom NLP model, a regression model) and want to run it on-device.
- Create ML — use this to train models, not to run them. The output usually goes into Core ML.
- Natural Language framework — use this for specific, lower-level NLP tasks: language detection, named entity recognition, tokenisation. It's lightweight but not a general-purpose LLM.
Quick decision rule: If you need to understand or generate free-form text and you haven't trained a specialist model, reach for Foundation Models first.
Before You Write a Single Line of Code — Prerequisites and Setup
Device and OS Requirements
Foundation Models requires Apple Intelligence, and Apple Intelligence has real hardware requirements. It won't run everywhere.
Supported devices:
- iPhone 16 and later
- iPad with an M-series chip (M1 or later)
- Mac with an M-series chip (M1 or later)
- Requires iOS 26 / iPadOS 26 / macOS 26
Why the cutoff? The on-device model needs a large Neural Engine and enough unified memory to load and run inference without destroying battery or thermals. Older devices simply don't have enough headroom.
Simulator caveat: You can compile and run Foundation Models code in the Simulator, but the model itself won't execute there — the Simulator doesn't have a Neural Engine. You'll hit .unavailable states during development, which is actually useful for testing your fallback UI, but for real inference you need a physical device.
Enabling Apple Intelligence on Your Test Device
Before your first test run, make sure Apple Intelligence is actually on:
- Open Settings → Apple Intelligence & Siri
- Toggle Apple Intelligence on
- If you see a "Downloading…" indicator, wait for it to finish — the model downloads separately in the background
- Check your device language is set to English (other languages are rolling out gradually; non-English prompts may produce degraded results right now)
The model download can take a few minutes on a first setup. If you're in a rush, connect to Wi-Fi and plug in to charge — the download prioritises both.
Xcode and SDK Setup
You'll need Xcode 26 or later to work with the Foundation Models framework.
Adding Foundation Models to your project is refreshingly simple:
import FoundationModelsThat's it. No SPM package, no CocoaPods dependency, no framework file to drag in. It's a system framework, so it's always present on supported OS versions.
One thing worth knowing: the default SystemLanguageModel doesn't require any special entitlement. You don't need to request permission from Apple before shipping. Some future specialised model variants may require entitlements, but for the standard use cases covered in this guide, you're good to go.
A Mental Model Before You Start
Foundation Models isn't magic — it's a local LLM with a session-based interface. Once that clicks, the API makes a lot of sense.
Here's the mental model:
SystemLanguageModel (the model)
    └── LanguageModelSession (a conversation)
            └── respond(to:) (one turn)
                    └── response.content (the result)
Each session maintains a transcript — a running log of everything said by both sides. The model sees the full transcript on every turn, which is why multi-turn conversation feels coherent. This also means long conversations eventually hit a context limit, which we'll cover later.
Understanding the Architecture — What Happens When You Call the Model
The On-Device Model
The Foundation Models framework runs a model that's roughly 3 billion parameters — small by cloud AI standards, but impressively capable given that it fits on a phone. Apple has heavily optimised it for Apple silicon, running across the CPU, GPU, and Neural Engine in parallel depending on the workload.
3B parameters sounds technical. In practice, it means:
- Fast responses for most tasks (typically under a second for short outputs)
- Reasonable, coherent text generation
- Good instruction-following for structured tasks
- Not as good as larger cloud models on complex reasoning or obscure knowledge
System Routing Execution Flow
Apple also had to design around thermal and battery constraints. Sustained inference heats the device and drains the battery. The framework handles this gracefully by design, but you'll still want to be thoughtful about how often and for how long you call the model in your app.
Private Cloud Compute (PCC) — The Safety Net You Rarely See
In some situations — when a task genuinely exceeds on-device capacity — the framework can transparently route to Private Cloud Compute (PCC). This is Apple's own server infrastructure, purpose-built for AI with strong privacy guarantees.
The key properties of PCC, according to Apple:
- Apple cannot see the content of requests
- Requests are not stored persistently
- The hardware and software stack is independently verifiable through attestation
As a developer, you don't directly control whether PCC is used. The system decides. What you do control is how you handle it when a network is unavailable and PCC would be needed — in that case, the call will fail, and your error handling should catch it gracefully.
Apple also surfaces PCC usage to end users through system UI when it occurs, so you don't need to build your own disclosure mechanism for this.
Guardrails and Content Safety Built In
The Foundation Models framework ships with built-in content guardrails. These are Apple's safety filters that prevent the model from generating harmful, illegal, or policy-violating content.
What this means practically:
- Most normal prompts work fine without you thinking about guardrails at all
- Prompts that try to generate harmful content throw an error rather than returning a filtered response
- You cannot disable or bypass the guardrails — they're enforced by the system
This is actually good news. You don't have to build your own content moderation layer or worry about users jailbreaking the model through your app. The safety net is already there. Your job is just to catch the error and show a friendly message when it fires.
Getting Started — Your First On-Device AI Response
Checking Model Availability Before Using It
This is the single most important habit to build with Foundation Models: always check availability before calling the model. On unsupported devices, the API will simply not work, and you need to handle that gracefully.
switch SystemLanguageModel.default.availability {
case .available:
    // Good to go
case .unavailable(let reason):
    switch reason {
    case .deviceNotEligible:
        // Show: "This feature requires iPhone 16 or later"
    case .appleIntelligenceNotEnabled:
        // Show: "Enable Apple Intelligence in Settings to use this feature"
    case .modelNotReady:
        // Show: "AI model is still downloading. Check back in a moment"
    @unknown default:
        // Handle future cases
    }
}
A reusable helper is worth writing once and using everywhere:
func isModelAvailable() -> Bool {
    if case .available = SystemLanguageModel.default.availability {
        return true
    }
    return false
}
For UX, don't hide AI features entirely on unsupported devices — show them but explain why they're unavailable. That way users know the feature exists and can look forward to it when they upgrade.
Choosing Your Model — Default vs. Specialized
Foundation Models currently offers two entry points:
SystemLanguageModel.default— The general-purpose model. Use this for writing, Q&A, summarisation, extraction, conversation, and most other tasks.SystemLanguageModel(useCase: .contentTagging)— A model variant optimised specifically for categorising and tagging content. If your primary use case is classification, this can give you more consistent results.
Think of model selection as matching the tool to the task, not chasing performance numbers. The default model is excellent for the vast majority of use cases.
Creating Your First LanguageModelSession
A LanguageModelSession is your conversation context. Creating one is simple:
let session = LanguageModelSession()That uses sensible defaults. When you want more control, the full initialiser looks like this:
let session = LanguageModelSession(
    model: SystemLanguageModel.default,
    guardrails: .default,
    tools: [],
    instructions: "You are a helpful writing assistant. Keep responses concise and friendly."
)
The four parameters:
model— which model to use (default:SystemLanguageModel.default)guardrails— content safety level (.defaultis almost always right; you can't disable them entirely)tools— custom functions the model can call (covered in depth later)instructions— a system prompt that sets the model's behaviour for the whole session
When to create multiple sessions: Create one session per distinct feature or conversation context. A writing assistant, a help bot, and a tagging feature should each have their own session with appropriate instructions. Don't reuse one session for unrelated tasks — the transcript carries context that will bleed between them.
Sending Your First Prompt and Getting a Response
Here's the minimal working version:
let session = LanguageModelSession(
    instructions: "You are a helpful assistant."
)

let response = try await session.respond(to: "What are three tips for writing better commit messages?")
print(response.content) // Just a String
In a SwiftUI view:
struct ContentView: View {
    @State private var result = ""
    @State private var isLoading = false

    private let session = LanguageModelSession(
        instructions: "You are a helpful assistant."
    )

    var body: some View {
        VStack(spacing: 16) {
            Text(result.isEmpty ? "Tap the button to ask a question." : result)
                .padding()

            Button("Ask") {
                Task {
                    isLoading = true
                    do {
                        let response = try await session.respond(
                            to: "What are three tips for better commit messages?"
                        )
                        result = response.content
                    } catch {
                        result = "Something went wrong: \(error.localizedDescription)"
                    }
                    isLoading = false
                }
            }
            .disabled(isLoading)
        }
    }
}
That's a complete, working AI feature in about 30 lines.
Generating Responses — Deep Dive Into the Response API
The respond(to:) Method — All Parameters Explained
The respond(to:) method has a few optional parameters worth knowing:
session.respond(
    to: prompt,              // String or Prompt DSL
    generating: MyType.self, // Optional: get structured output
    includeSchemaInPrompt: true, // Inject schema hints into the prompt
    options: GenerationOptions(
        temperature: 0.7,
        maximumResponseTokens: 200
    )
)prompt— a plainStringworks for most cases. The Prompt DSL is useful when you're composing complex prompts with multiple dynamic parts.generating— pass a@Generabletype here to get typed, structured output instead of a raw string. Covered in depth in the next section.includeSchemaInPrompt— when using structured output, this injects a description of your schema into the prompt so the model understands what shape to produce. Leave ittrueunless you have a good reason to disable it.options— aGenerationOptionsstruct that controls how the model generates its response.
Controlling Output Quality with GenerationOptions
GenerationOptions gives you two main controls: temperature and token limit.
Temperature is the creativity dial:
| Temperature | Character | Best for |
|---|---|---|
| 0.0–0.3 | Predictable, consistent | Classification, extraction, Q&A |
| 0.5–0.8 | Balanced | Summarisation, writing assistance |
| 1.0–1.5 | Creative, varied | Brainstorming, creative writing |
| 2.0 | Very unpredictable | Usually not what you want |
Sampling modes give you finer control:
.greedy— always picks the most likely next token. Deterministic, fast, great for structured tasks where you don't want surprises..random(probabilityThreshold:seed:)— top-p sampling. Considers only tokens whose cumulative probability reaches the threshold..random(top:seed:)— top-k sampling. Considers only the top K most likely tokens.
The seed parameter (available with .random) lets you reproduce a specific output — invaluable for testing and debugging.
maximumResponseTokens caps how long the response can be. This matters even on-device: longer responses take more time, use more battery, and generate more text than the user might actually read. Cap it to what you actually need.
Recommended settings:
| Use case | Temperature | Max tokens | Sampling |
|---|---|---|---|
| Summarisation | 0.3 | 150–300 | .greedy |
| Q&A / help | 0.5 | 200–400 | .greedy |
| Creative writing | 0.9 | 400–800 | .random |
| Classification | 0.0 | 50–100 | .greedy |
Streaming Responses with streamResponse
For anything longer than a sentence, streaming is the way to go. It dramatically improves perceived performance — the user sees text appearing immediately rather than staring at a spinner while the model finishes generating.
streamResponse returns an AsyncSequence of partial response snapshots (not individual tokens — each update contains the full accumulated content so far):
@MainActor
func streamWritingHelp() async {
    do {
        let stream = session.streamResponse(to: "Rewrite this paragraph in a more conversational tone: ...")

        for try await partial in stream {
            self.responseText = partial.content
        }
    } catch {
        self.errorMessage = "Generation failed: \(error.localizedDescription)"
    }
}
A few things to note:
- Use
@MainActorto avoid updating@Stateproperties from a background thread. - Each
partial.contentis the full text so far, not just the new chunk — so you can assign it directly to your text state. - To cancel mid-generation, cancel the
Taskthat's running the loop. The stream cleans up automatically.
Structured Output — Getting Type-Safe Data Back from the Model
This is where Foundation Models really earns its keep for production apps.
The @Generable Macro — Your New Favorite Tool
Instead of asking the model to return JSON and then frantically parsing a string, @Generable lets you define a Swift type and get the model to populate it directly.
@Generable
struct ArticleTags {
    var primaryCategory: String
    var tags: [String]
    var sentiment: Sentiment

    @Generable
    enum Sentiment {
        case positive, neutral, negative
    }
}

let response = try await session.respond(
    to: "Analyse this article: \(articleText)",
    generating: ArticleTags.self
)

print(response.value.primaryCategory) // e.g. "Technology"
print(response.value.tags)            // e.g. ["AI", "iOS", "Swift"]
print(response.value.sentiment)       // e.g. .positive
At compile time, @Generable generates a schema from your type and an auto-decoder that maps the model's output back to Swift values. No JSON parsing, no guard let, no stringly-typed fragility.
Supported property types:
String,Int,Double,Bool- Arrays of any of the above
- Nested
@Generablestructs @Generableenums (great for constrained categorical output)
What's not supported yet: Date, URL, dictionaries, and optional properties.
Guiding the Model with the @Guide Macro
@Guide lets you add hints and constraints to individual properties so the model produces better output:
@Generable
struct ProductReview {
    @Guide(description: "The product category, e.g. 'Electronics', 'Clothing'")
    var category: String

    @Guide(.anyOf(["5-star", "4-star", "3-star", "2-star", "1-star"]))
    var rating: String

    @Guide(.count(5))
    var keyPoints: [String] // Will always return exactly 5 items

    @Guide(description: "A concise one-sentence summary of the review")
    var summary: String
}
The @Guide attributes you'll use most:
description:— a natural-language hint that tells the model what this field should contain.anyOf([...])— hard-constrains the output to one of the listed strings (like an enum, but string-based).count(_:)— fixes an array to exactly N elements — great for "give me exactly 3 recommendations"
Name your properties in plain, descriptive English. The model reads property names as implicit hints, so keyThemes is better than arr2.
Streaming Structured Output with PartiallyGenerated Types
When you combine @Generable with streamResponse, the framework auto-generates a T.PartiallyGenerated type where every property is optional. Fields arrive as the model generates them:
let stream = session.streamResponse(
    to: "Analyse this article: \(text)",
    generating: ArticleTags.self
)

for try await partial in stream {
    if let category = partial.primaryCategory {
        self.category = category // Show as soon as it arrives
    }
    if let tags = partial.tags {
        self.tags = tags
    }
}
A good pattern: only render a UI section when its backing field is non-nil. Users see content progressively filling in rather than a jarring all-or-nothing appearance.
Designing @Generable Structs for Real Apps
A few practical tips from working with these in anger:
- Name properties as if writing documentation — the model uses names as hints
- Flat is usually better than deeply nested — one
@Generablestruct is simpler than three nested ones unless your data genuinely has that hierarchy - Don't put everything in one struct — if a feature needs 12 properties, consider whether you're actually asking the model to do too much in one call
- Version your types carefully — adding a new required property to a
@Generablestruct is a breaking change for existing session transcripts
Custom Tools — Giving the Model Eyes and Hands
The on-device model knows a lot about the world in general, but it knows nothing about your app's data. Tools bridge that gap.
What the Tool Protocol Is and When You Need It
Tool-calling (sometimes called function calling in cloud AI APIs) works like this: you define functions the model can call, describe what they do, and the model decides at runtime whether to call them — and with what arguments — to answer the user's request.
When you should use Tools vs. instructions:
- Instructions — for static context that doesn't change: app name, user's name, feature descriptions, formatting rules
- Tools — for dynamic runtime data: current user account info, live database queries, location, calendar events, HealthKit data
Real scenarios where Tools make a huge difference:
- "What are my upcoming appointments?" — the model needs to query your calendar data
- "Show me items I've bookmarked" — the model needs to query your CoreData store
- "What's the weather like where I am?" — the model needs the device's current location
Implementing a Custom Tool Step by Step
Conform to the Tool protocol:
struct FetchUserBookmarks: Tool {
    let name = "fetchUserBookmarks"
    let description = "Retrieves the user's saved bookmarks from the local database. Use this when the user asks about their saved items, bookmarks, or reading list."

    @Generable
    struct Arguments {
        @Guide(description: "Optional filter: 'all', 'unread', or 'recent'. Defaults to 'all'.")
        var filter: String
    }

    func call(arguments: Arguments) async throws -> ToolOutput {
        let bookmarks = try await BookmarkStore.shared.fetch(filter: arguments.filter)
        let summary = bookmarks.map { "• \($0.title) — \($0.url)" }.joined(separator: "\n")
        return ToolOutput(summary)
    }
}
The three required components:
name— no spaces or special characters; think of it as a function namedescription— write this for the model to read, not for humans reading your source code. Be specific about when the model should call this tool.Arguments— a nested@Generablestruct. Use@Guidedescriptions to tell the model what each argument means and what values are acceptable.
If your tool fails, throw an error from call(arguments:) — the session will surface it as a tool failure, which your outer do/catch will handle.
Registering and Using Tools in a Session
Pass your tools when creating the session:
let session = LanguageModelSession(
    instructions: "You are a helpful personal assistant with access to the user's bookmarks and calendar.",
    tools: [FetchUserBookmarks(), FetchUpcomingEvents()]
)
The model then decides when to call tools based on the conversation. You don't need to tell it when to call them — that's the model's job. You can inspect session.transcript to see exactly which tools were called and with what arguments, which is very useful for debugging.
Real-World Tool Examples to Inspire You
Some patterns that work well:
- CoreData query tool — let the model look up user-specific records by ID, category, or search term
- CoreLocation tool — return current coordinates so the model can give location-relevant answers
- REST API tool — fetch live data from your own backend (current prices, inventory, user settings)
- HealthKit summary tool — return aggregated stats with appropriate permission handling
What not to put in a tool:
- Heavy computation that blocks for more than a few seconds
- UI updates (tools run on a background context)
- Synchronous operations that could deadlock
Managing Conversations — Multi-Turn Dialogue and Transcript
How the Session Transcript Works
Every LanguageModelSession maintains a Transcript — a chronological log of everything that's happened in the conversation: user messages, model responses, tool calls, and tool results.
When you call respond(to:) for the second time in the same session, the model sees the entire transcript, not just the latest message. This is what makes multi-turn conversation coherent — the model remembers what was said earlier.
Resuming and Restoring Sessions
If you need to restore a conversation across app launches, you can initialise a session from a previously serialised transcript:
// Save
let transcriptData = try JSONEncoder().encode(session.transcript)
UserDefaults.standard.set(transcriptData, forKey: "saved_transcript")

// Restore
if let data = UserDefaults.standard.data(forKey: "saved_transcript"),
   let savedTranscript = try? JSONDecoder().decode(Transcript.self, from: data) {
    let session = LanguageModelSession(transcript: savedTranscript)
}
When to start fresh vs. continue: if the user's intent has clearly shifted to a new topic, start a new session. Carrying irrelevant context from a previous conversation can degrade response quality.
Session Lifecycle and Prewarming
prewarm(promptPrefix:) loads the model into memory before the user sends their first message. This eliminates the cold-start delay that users would otherwise experience on the first call:
.onAppear {
    session.prewarm(promptPrefix: "")
}
Call prewarm in .onAppear, in your ViewModel's initialiser, or even on the first keystroke in a text field — whichever feels earliest without being wasteful.
Use session.isResponding to disable your input UI and show a loading indicator while the model is generating:
TextField("Ask something...", text: $inputText)
    .disabled(session.isResponding)

if session.isResponding {
    ProgressView()
}
Don't keep multiple active sessions alive in memory if they're not in use. Each session holds model state that contributes to your app's memory footprint.
SwiftUI Integration Patterns
State Management for AI Responses
For simple, single-view AI interactions, @State is fine:
@State private var aiResponse = ""
@State private var isLoading = false
For AI state shared across multiple views — a chat history, a tagging result that feeds a list view — reach for @Observable (or ObservableObject if you're on older codebases):
@Observable
class WritingAssistantViewModel {
    var messages: [Message] = []
    var isResponding = false

    private let session = LanguageModelSession(
        instructions: "You are a writing assistant. Be concise and constructive."
    )

    @MainActor
    func send(_ text: String) async {
        isResponding = true
        messages.append(Message(role: .user, content: text))

        do {
            let response = try await session.respond(to: text)
            messages.append(Message(role: .assistant, content: response.content))
        } catch {
            messages.append(Message(role: .assistant, content: "Sorry, something went wrong."))
        }

        isResponding = false
    }
}
Always use @MainActor when updating state from async AI calls. Missing this is the most common source of purple thread-safety warnings in Foundation Models code.
Building a Streaming Chat UI in SwiftUI
A minimal but complete streaming chat view:
struct ChatView: View {
    @State private var viewModel = ChatViewModel()
    @State private var inputText = ""

    var body: some View {
        VStack {
            ScrollViewReader { proxy in
                ScrollView {
                    LazyVStack(alignment: .leading, spacing: 12) {
                        ForEach(viewModel.messages) { message in
                            MessageBubble(message: message)
                                .id(message.id)
                        }
                    }
                    .padding()
                }
                .onChange(of: viewModel.messages.count) {
                    if let last = viewModel.messages.last {
                        proxy.scrollTo(last.id, anchor: .bottom)
                    }
                }
            }

            HStack {
                TextField("Message...", text: $inputText)
                    .textFieldStyle(.roundedBorder)
                    .disabled(viewModel.isResponding)

                Button("Send") {
                    let text = inputText
                    inputText = ""
                    Task { await viewModel.send(text) }
                }
                .disabled(inputText.isEmpty || viewModel.isResponding)
            }
            .padding()
        }
    }
}
Graceful Degradation — When the Model Isn't Available
The worst thing you can do is silently fail. If the model isn't available, tell users why:
switch SystemLanguageModel.default.availability {
case .available:
    AIFeatureView()
case .unavailable(let reason):
    UnavailableView(reason: reason)
}

// UnavailableView shows:
// .deviceNotEligible → "Requires iPhone 16 or later"
// .appleIntelligenceNotEnabled → "Enable Apple Intelligence in Settings → Apple Intelligence & Siri"
// .modelNotReady → "AI model is downloading. This usually takes a few minutes."
A secondary option: if you have a cloud AI integration as a fallback, you can silently route there instead. Just make sure your privacy policy covers both paths.
Showing a Typing Indicator During Streaming
While the model is responding, show something that tells the user the app is working:
if viewModel.isResponding {
    HStack(spacing: 4) {
        ForEach(0..<3) { i in
            Circle()
                .frame(width: 8, height: 8)
                .opacity(animatingDot == i ? 1 : 0.3)
        }
    }
    .accessibilityLabel("AI is generating a response")
}
Add an accessibilityLabel — VoiceOver users need to know something is happening too.
Error Handling and Debugging
The Errors You Will Actually Encounter
In roughly descending order of how often you'll see them:
- Guardrail violation — a prompt triggered the content safety system. Catch and show a user-friendly "I can't help with that" message.
- Model unavailable — you forgot to check availability, or the state changed between the check and the call. This is why you check first.
- Context window overflow — the transcript got too long. Summarise older turns and start a fresh session with the summary as instructions.
- Tool call failure — your tool's
call(arguments:)threw an error. The session surfaces this; your catch block needs to handle it. - Network error (PCC path) — the model needed PCC and there was no internet. Retry with a user-facing message.
Writing Robust Error Handling
The minimal pattern that handles all cases:
do {
    let response = try await session.respond(to: userInput)
    displayResponse(response.content)
} catch let error as LanguageModelSession.Error {
    switch error {
    case .guardrailViolation:
        showMessage("I can't help with that request.")
    case .contextWindowExceeded:
        await resetSessionWithSummary()
    default:
        showMessage("Something went wrong. Please try again.")
    }
} catch {
    showMessage("Couldn't connect. Please check your internet connection.")
    logError(error)
}
On retry logic: Retrying on guardrail violations is pointless — the same prompt will fail again. Retrying on network errors (PCC path) makes sense with a short delay. Retrying on context overflow without clearing the transcript will just fail again.
Debugging Techniques
- Print
session.transcriptto see exactly what the model saw. This is your first stop when the model produces unexpected output. - Use a fixed
seedinGenerationOptionsto make the model produce the same output repeatedly — essential for reproducing bugs. - Check
ToolOutputin the transcript to verify your tools were called and returned what you expected. - Xcode console — Foundation Models logs useful diagnostic messages during development. Check the console output before assuming something is broken.
Testing AI Features in Your App
Why Testing AI Is Different From Testing Deterministic Code
Generative models are non-deterministic by default. The same prompt, called twice, can return different text. This means:
- Don't assert exact string matches for model output
- Do assert structure, format, and the presence of required fields
- Do test your handling of model output, not the output itself
Strategies for Unit Testing AI-Dependent Code
Abstract LanguageModelSession behind a protocol. This is the single highest-leverage thing you can do for testability:
protocol AISession {
    func respond(to prompt: String) async throws -> String
}

class ProductionAISession: AISession {
    private let session = LanguageModelSession()

    func respond(to prompt: String) async throws -> String {
        try await session.respond(to: prompt).content
    }
}

class MockAISession: AISession {
    var mockResponse = "Mocked response"

    func respond(to prompt: String) async throws -> String {
        return mockResponse
    }
}
Now your ViewModels take an AISession via dependency injection, and tests use MockAISession. You can test all your logic — state management, error handling, UI updates — without touching the real model.
Test tool logic independently: Your tool implementations are just functions. Test them in isolation without a session. If FetchUserBookmarks.call(arguments:) is well-tested, you only need to verify it's wired up correctly in the session.
Test your @Generable type decoding: You can instantiate @Generable types directly in tests and verify your app handles all valid variants correctly.
Integration and Manual Testing Checklist
Before shipping any Foundation Models feature:
- [ ] Tested on a physical Apple Intelligence-eligible device (not simulator)
- [ ] Tested with Apple Intelligence disabled — correct unavailable state shown
- [ ] Tested with the model not yet downloaded — correct loading state shown
- [ ] Tested with an empty prompt
- [ ] Tested with a very long prompt (approaching context window limits)
- [ ] Tested with a prompt designed to trigger guardrails — graceful error shown
- [ ] Tested in Airplane Mode — handles PCC failure correctly
- [ ] Re-tested after a framework/OS update during beta cycle
Performance, Battery, and Memory Considerations
Understanding On-Device Inference Costs
At rest, the model doesn't consume significant resources — it's not loaded into memory until you create a session and start generating. During inference, it uses:
- Neural Engine (primary compute)
- A chunk of unified memory (varies by device; roughly in the hundreds of MB range)
- Elevated CPU activity for scheduling and post-processing
Sustained inference — generating long responses repeatedly over many minutes — will cause the device to warm up and may trigger CPU throttling. For background tasks, the OS is even more aggressive about limiting Neural Engine access.
Optimization Strategies for Production Apps
- Call
prewarmearly — amortise the cold-start cost before the user's first tap - Cap
maximumResponseTokens— if a task needs 100 tokens, don't allow 500 - Use
.greedysampling for non-creative tasks — it's faster than.randomand the output is just as good for extraction and classification - Release sessions when offscreen — set your session to
nilwhen the feature's view disappears if you don't need conversation continuity - Batch where possible — if you need to tag 10 articles, investigate whether you can do it in one prompt rather than 10 sequential calls
Monitoring Performance in Production
- OSLog — log the time between sending a prompt and receiving the first streamed token, and the time to completion
- MetricKit — Apple's on-device analytics framework can give you real-world battery impact data from your app in the field
- Time-to-first-token vs. total generation time are different metrics and both matter for UX — streaming makes time-to-first-token the one users actually feel
Real-World Use Cases and Implementation Ideas
In-App Writing Assistant
The most natural fit for Foundation Models. Summarisation, tone rewriting, and grammar correction all work well with respond(to:) and streaming:
let rewritten = try await session.respond(
    to: "Rewrite the following in a more professional tone:\n\n\(userText)"
)
Stream the result directly into a TextEditor and users see the rewrite appear word by word — it feels genuinely magical.
Smart Content Tagging and Classification
Use SystemLanguageModel(useCase: .contentTagging) with a @Generable output type:
@Generable
struct ContentAnalysis {
    @Guide(.count(5))
    var tags: [String]

    @Guide(.anyOf(["article", "tutorial", "news", "opinion", "reference"]))
    var contentType: String
}

let analysis = try await session.respond(
    to: "Analyse this content: \(articleText)",
    generating: ContentAnalysis.self
)
You get back a typed Swift struct with exactly 5 tags and a category — no regex, no JSON parsing, no fragile string matching.
Conversational In-App Help and Onboarding
A LanguageModelSession with good instructions makes an excellent context-aware FAQ bot. Add a Tool that queries your help content database, and the model can look up specific answers rather than hallucinating:
let helpSession = LanguageModelSession(
    instructions: "You are a helpful support agent for Acme App. Use the fetchHelpArticle tool to look up answers. If you can't find a relevant article, say so honestly rather than guessing.",
    tools: [FetchHelpArticle()]
)
Data Extraction from Unstructured User Input
This is one of the highest-value, lowest-complexity wins. Instead of building (and maintaining) a fragile regex to parse a user's freeform date entry like "next Tuesday morning" or "sometime in the first week of March", let the model extract structured data:
@Generable
struct ExtractedEventDetails {
    var eventName: String
    var suggestedDate: String
    var durationMinutes: Int
}
The model turns messy natural language into clean, typed data your app can act on immediately.
Personalized Recommendations
Pass user preferences via session instructions, then use @Generable to get a ranked list back:
let session = LanguageModelSession(
    instructions: "The user prefers: \(userPreferencesSummary). Generate recommendations based on these preferences."
)

@Generable
struct Recommendations {
    @Guide(.count(3))
    var items: [String]

    @Guide(description: "A one-sentence explanation of why these match the user's preferences")
    var rationale: String
}
Combine with a CoreData Tool to fetch user history, and you have a genuinely personalised recommendation engine running entirely on-device.
Limitations, Gotchas, and What to Watch For
What Foundation Models Cannot Do (Yet)
Be honest with yourself about these before you architect your feature:
- No image or audio input — text only in the current API. Multimodal is not supported.
- No fine-tuning — you can't adapt the model on your own data. You're working with the base model, shaped by instructions and tools.
- Non-deterministic output — even with a fixed seed, output may drift slightly across OS updates. Don't build features that depend on byte-exact reproducibility.
- Finite context window — very long conversations require transcript management. Plan for this from the start.
API Stability Warnings
Foundation Models is new. The API changed several times during the beta cycle, and it may change again before the GM release and in subsequent iOS versions.
Practical steps to protect yourself:
- Wrap your Foundation Models calls behind a protocol or service layer
- Don't scatter
LanguageModelSessionand@Generabletypes throughout your codebase — centralise them - Subscribe to Apple's framework release notes and review them before each build of your app
Limitations by Region and Language
Apple Intelligence launched English-first. Other languages are rolling out gradually, but quality on non-English prompts is lower than you might expect. If your app serves a global audience, test in your target languages and build fallbacks.
For your privacy policy: even though inference runs on-device, document that your app uses on-device AI and may route to Private Cloud Compute for some requests. Refer to Apple's own privacy documentation for exact wording guidance.
App Store and Privacy Policy Considerations
Good news: no special entitlement is required. You don't need to apply for access or go through a review process before submitting.
What you do need to do:
- Declare AI feature usage clearly in your app's Privacy Nutrition Labels
- Update your privacy policy to mention on-device AI and Private Cloud Compute
- Consider whether your feature requires explicit user consent before running inference — this depends on your app's context and what data youre sending as prompt content
Frequently Asked Questions
Does Foundation Models work on all iPhones?
No. Foundation Models requires Apple Intelligence, which is only available on iPhone 16 and later, iPad and Mac models with M-series chips, and iOS 26 / iPadOS 26 / macOS 26 or later. Always check SystemLanguageModel.availability before making any API call and design fallback experiences for unsupported devices — there will be users with older hardware in your install base.
Does using Foundation Models send my users' data to Apple's servers?
Usually no. By design, inference runs entirely on-device. However, the framework can transparently route to Private Cloud Compute (PCC) for tasks that exceed on-device capacity. PCC is architected so that Apple cannot see request content, and data is not retained. As a developer, you don't directly control this routing, but Apple surfaces it to users through system UI when it occurs.
Can I use Foundation Models offline, without an internet connection?
Yes — the on-device path works fully offline. If Private Cloud Compute escalation is needed and there's no network, the request may fail. Design your error handling to surface a meaningful message in that case rather than leaving the user with a spinner that never resolves.
How is Foundation Models different from using Core ML with a custom model?
Core ML lets you import and run your own trained models — image classifiers, regression models, NLP models you've built with Create ML or converted from PyTorch/TensorFlow. Foundation Models gives you direct access to Apple's built-in large language model without managing a model file, downloading weights, or writing tokenisation logic. Use Core ML when you need a custom-trained specialist model; use Foundation Models when you need general language understanding and generation out of the box.
What happens if a user's prompt triggers the guardrails?
The session throws an error rather than returning a filtered response. Your catch block should intercept this, identify it as a guardrail violation, and surface a user-friendly message like "I can't help with that request." You cannot suppress or bypass guardrails. Design your prompt engineering and UX so that edge-case inputs produce a graceful message rather than an app crash.
Can I use Foundation Models in a background task or App Extension?
Background use is technically possible but comes with real constraints. iOS aggressively limits Neural Engine access from background processes for thermal and battery reasons. App Extensions (Share Extensions, Widgets) face additional sandbox restrictions on top of that. Test your specific use case thoroughly on device — don't assume background inference will behave like foreground inference.
How do I handle very long conversations without running out of context?
The session transcript grows with each turn and the model has a finite context window. When you're approaching the limit, summarise older turns into a condensed context string and re-initialise the session with that summary as the instructions parameter. This is the same technique production chat applications use across all LLM platforms.
Conclusion
What We Covered — A Quick Recap
That was a lot of ground. Here's the short version:
- Foundation Models gives iOS 26+ developers access to Apple's on-device LLM with a clean, type-safe Swift API
- Hardware requirements are real — Apple Intelligence-eligible devices only, and you must handle unavailability gracefully
- The core pattern:
SystemLanguageModel→LanguageModelSession→respond/streamResponse→ structured output with@Generable→ real-world data viaTool - SwiftUI integration is straightforward with
@MainActor,@Observable, andsession.isResponding - Error handling, testing, and performance aren't optional extras — they're table stakes for anything you're actually shipping
Key Takeaways for Your Next Project
- Check availability first, always. Device eligibility is a hard requirement, not a soft warning.
- Use
@Generableover string parsing. Type-safe structured output is more reliable, easier to test, and naturally composable with your data layer. - Streaming improves perceived performance dramatically. Prefer
streamResponsefor any output longer than a sentence. - Tools are the bridge to your app's data. The model alone is stateless; tools are how you make it context-aware.
- Cap tokens and use greedy sampling when you don't need creativity. Your users' batteries will thank you.
- Abstract the session behind a protocol. This makes your AI-dependent code testable and future-proofs against API changes.
Next Steps
- Install the iOS 26 beta on a supported device and run your first
LanguageModelSessioncall today - Identify one existing feature in your app where natural language understanding would reduce friction — that's your MVP integration
- Audit your error handling — make sure every unavailable state, guardrail refusal, and tool failure surfaces a meaningful message to the user
- Bookmark the official Apple documentation at developer.apple.com/documentation/FoundationModels and subscribe to the release notes for API changes before the GM release
- Join the Apple Developer Forums — post your experiments, gotchas, and patterns under the "Foundation Models" tag; the community is active and helpful
If this guide saved you some documentation diving, share it with a developer who's still figuring out where to start with Apple Intelligence. And keep an eye out for the companion tutorial: Building a Streaming Writing Assistant with Foundation Models in SwiftUI — a complete code walkthrough from blank project to finished feature.