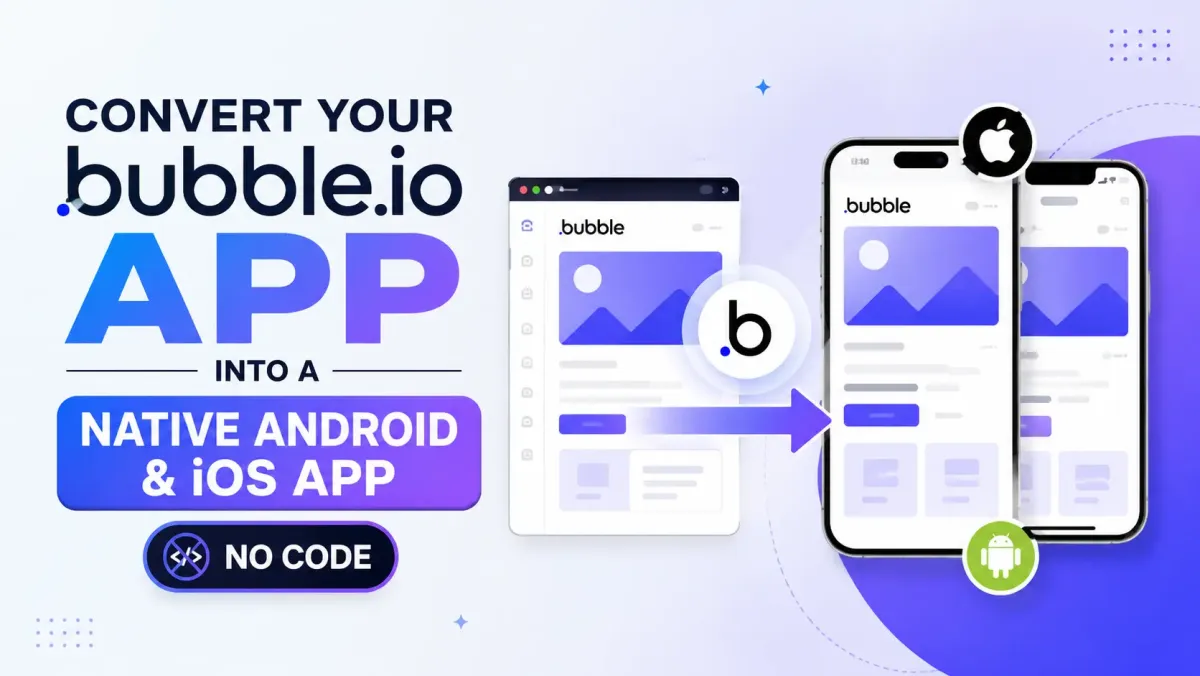
Convert Your Bubble.io App into a Native Android & iOS App (No Code)
You've built a fully functional product on Bubble.io. Your users love it on desktop. On mobile, they're pinching, zooming, and abandoning.
That gap is fixable — without rebuilding anything. Bubble.io generates a web app, not a native mobile app. The distinction matters for performance, discoverability, and access to device features like push notifications and the camera.
This guide covers every realistic option, what changed in 2025–2026, and a step-by-step path to getting your app live on the App Store and Google Play — without writing a single line of code.
What Does "Converting a Bubble.io App" Actually Mean?
Converting a Bubble.io app to a native app means wrapping your existing web app in a native mobile shell that gives it access to iOS and Android device features — push notifications, camera, GPS, offline mode — and allows it to be listed on the App Store and Google Play.
Bubble.io Is a Web App Builder, Not a Native App Builder
Bubble generates a responsive web application hosted on a domain. When a user opens it on their phone through a browser, that's a web app — not a native one. The gap is wider than it looks:
- No push notifications without a native wrapper
- No App Store or Google Play listing
- No home screen icon unless the user saves it manually
- No access to certain device hardware APIs
The useful comparison is: PWA vs. WebView wrapper vs. true native. A PWA (Progressive Web App) lives in the browser with a home screen shortcut and limited offline support. A WebView wrapper is a real native app that loads your Bubble URL inside a native shell. True native (Swift, React Native) is built from scratch. For most Bubble.io founders, the WebView wrapper is the right sweet spot.
What Is a WebView Wrapper and Why It Works for Bubble Apps
A WebView wrapper is a native app binary — an Android APK or iOS IPA — that opens and renders your Bubble URL inside a native WebView component. To the device, it's a real app. To your Bubble backend, it's a browser.
What you gain:
- App Store and Google Play listing
- Push notifications
- Hardware access: camera, GPS, file system
- Splash screen, app icon, full-screen experience
- Deep linking into specific Bubble pages
What you don't get: native rendering. The UI is still drawn by a web engine, not UIKit or Jetpack Compose. For most SaaS apps, dashboards, marketplaces, and community platforms, this is a non-issue.
Is a WebView app "truly native"? Honest answer: yes for store compliance and device feature access, no for the rendering engine. Apple and Google accept WebView apps — provided they add real value beyond a mobile browser.
When a WebView Wrapper Is Enough (And When It Isn't)
| Use Case | WebView Wrapper ✅ | True Native Needed ❌ |
|---|---|---|
| SaaS dashboard, marketplace | ✅ | — |
| E-commerce on Bubble | ✅ | — |
| Community / social platform | ✅ | — |
| Complex offline-first app | — | ❌ |
| Augmented reality features | — | ❌ |
| Real-time gaming | — | ❌ |
Your Options for Getting a Bubble.io App on the App Store in 2025
In 2025, Bubble.io developers have three main paths to the App Store and Google Play: Bubble's own native app builder (beta), a professional WebView conversion service, or DIY with Capacitor or React Native WebView.
Option 1 — Bubble's Native App Builder (Official Beta)
Bubble launched its native mobile builder — Capacitor-based — in late 2024, with a continued rollout through 2025. It wraps your Bubble app using Bubble's own toolchain, and the appeal is tight ecosystem integration with no third-party dependency.
The catch: it's still in beta for most plans, the plugin ecosystem for native features is limited, and you need the Bubble Growth plan or above to access it. Push notification reliability, App Store review handling, and debugging are areas where teams have reported friction. Solid direction — but not quite ready for founders who need it to just work today.
Option 2 — Professional WebView Conversion Service (Fastest Route)
A managed service handles everything: converting your Bubble URL into packaged Android and iOS apps, configuring native features, and — crucially — handling App Store submission. No Xcode. No Android Studio. No terminal required.
AppOfWeb.com is one such service with 8+ years of experience across Shopify, WooCommerce, WordPress, and Bubble.io. For Bubble apps specifically, they handle push notification integration, deep linking into specific Bubble pages, camera and file upload permissions, and full App Store and Google Play submission — including ongoing support as your Bubble app evolves.
Best for: founders who want to ship fast without becoming mobile build engineers.
Option 3 — DIY with Capacitor or React Native WebView
Capacitor (by Ionic) wraps web apps natively and works well with Bubble URLs. React Native WebView (react-native-webview) gives more flexibility with more setup. Either way, you need:
- A Node.js environment
- Xcode (Mac required for iOS builds)
- Android Studio
- Apple Developer account ($99/year)
- Google Play Console account ($25 one-time)
Time estimate: 3–7 days for a clean build if you're comfortable with CLI tools. Add another week or more for first-time App Store approval. This route suits developers who want full control and aren't in a rush.
What Changed for Bubble.io Mobile Apps in 2025–2026
The key changes include Bubble's expanded native builder rollout, Apple's stricter Guideline 4.2 enforcement on WebView apps, new iOS privacy manifest requirements, and Google Play's updated 20-tester policy for new developer accounts.
Bubble Platform Updates
Bubble's native mobile builder moved from alpha to wider beta in 2024 and has continued maturing through 2025. The responsive engine received updates that make WebView rendering noticeably snappier. Bubble's plugin marketplace has also expanded to include native-adjacent plugins for push notifications and biometrics. Check your current plan to confirm whether the native builder is included — pricing tiers have been updated.
Apple App Store Policy Changes
Three changes matter most for Bubble WebView apps:
- Guideline 4.2 (Minimum Functionality): Apple rejects apps it considers "thin wrappers" — apps that add no meaningful value over a mobile browser. To pass 4.2, include at least two or three native features (push notifications, biometric login, camera, deep linking) and make sure your app has real, non-trivial content.
- Privacy Manifest (PrivacyInfo.xcprivacy): Required since May 2024 for apps using certain APIs. You must declare all API usage in this file or risk rejection.
- Permission usage strings: Every iOS permission request — camera, location, notifications — needs a specific, accurate description. Vague strings fail review. More on this in the mistakes section below.
Google Play Policy Changes
- 20 closed testers for 14 days: New developer accounts must complete this closed testing phase before their app can go public. Build your tester list before starting the conversion process, not after.
- Target API level: Apps must target Android 14 (API 34) or higher.
- Data safety section: You must disclose all data your app collects, transmits, or shares — including anything flowing through Firebase, Stripe, SendGrid, or any other third-party API your Bubble app calls.
WebView Performance Baseline in 2025
Modern WebView (Chrome 120+ on Android, WKWebView on iOS 17+) has significantly closed the performance gap with native. Bubble's updated rendering engine helps. That said, heavy Bubble workflows, unoptimised images, or overloaded states will still bottleneck performance regardless of the wrapper quality. Optimise your Bubble app first — the wrapper can't fix a slow app.
Step-by-Step: How to Convert Your Bubble.io App Using a Conversion Service
To convert your Bubble.io app, you need to: prepare your app for mobile, configure native features, test the build artifacts, set up store accounts, and submit for review.
Step 1 — Prepare Your Bubble.io App for Mobile
Do this before handing anything off:
- Open your Bubble app at a 375px viewport width (iPhone SE size) and fix any layout breaks in Bubble's responsive editor.
- Audit navigation. Bottom tab bars outperform hamburger menus for core mobile flows.
- Remove browser-only dependencies: JavaScript alert dialogs,
window.print(), hover-only interactions. - Test authentication flows. Google OAuth and other social logins need to work inside a WebView context — verify your OAuth redirect URIs.
- Confirm your app is on a custom domain with HTTPS. Apple will not approve apps loading a
yourdomain.bubbleapps.ioURL.
What to send the conversion service:
- Your live Bubble app URL
- App name and bundle ID preference (e.g.,
com.yourbrand.appname) - Deep link pages you want supported
- Which native features you need: push notifications / camera / GPS / file upload
- App icon: 1024×1024 PNG, no transparency
- Splash screen assets
Step 2 — Configure Native Features
Push Notifications require Firebase Cloud Messaging (FCM) for Android and Apple Push Notification service (APNs) for iOS. The conversion service sets up the Firebase project and provides a server key. You connect notification triggers in Bubble via the API Connector or a Bubble push notifications plugin. Test the full loop: device registration → token capture → test send → confirmed delivery on a real device.
Camera & File Upload: On Android, camera permission is declared in AndroidManifest.xml. On iOS, NSCameraUsageDescription and NSPhotoLibraryUsageDescription strings must be present. Confirm your Bubble file uploader element accepts the correct MIME types.
Geolocation: navigator.geolocation works inside WebView, so Bubble's map elements and location workflows will function natively. Declare NSLocationWhenInUseUsageDescription for iOS, and always test on a physical device — simulators don't return accurate coordinates.
Deep Linking: Universal Links (iOS) and App Links (Android) route specific Bubble pages from external URLs. For example, yourapp.com/order/123 opens straight to the order detail page in the app. This requires domain verification files served from your Bubble domain.
Biometric Auth (optional): Face ID and fingerprint login via a native bridge, integrated with Bubble's authentication system via API — available in some managed conversion services.
Step 3 — Review the Build Artifacts
The service delivers an .apk or .aab for Android and an .ipa for iOS. Test before submitting:
- Android: Side-load the APK on a physical device. Test all native features.
- iOS: Via TestFlight. The service should handle TestFlight distribution or provide an Ad Hoc build.
Test on real mid-range hardware — a Pixel 6a or Samsung Galaxy A54, not just a flagship. Cover:
- Login and signup flows
- Push notification receipt
- Camera and file upload
- Deep links triggered from a browser
- Android hardware back button behaviour
- Keyboard covering input fields (scroll behaviour)
Step 4 — Set Up Store Accounts
Apple App Store:
- Enroll at developer.apple.com — $99/year
- Create an App ID with your bundle identifier in App Store Connect
- Prepare metadata: app name, subtitle, description, keywords, screenshots (6.5" iPhone + 5.5" iPhone minimum), and optionally an App Preview video
Google Play Console:
- Register — $25 one-time
- Create your app record, fill the store listing, complete the data safety section
- If your account is new, complete the 20-tester / 14-day closed testing requirement
- Prepare: feature graphic (1024×500px), at least 4 phone screenshots, privacy policy URL
Step 5 — Submit and Pass Review
iOS review typically takes 24–72 hours. Common rejection reasons for Bubble WebView apps:
- Guideline 4.2: app deemed a thin wrapper — add meaningful native features
- Missing permission usage descriptions
- Sign In with Apple not implemented when other social logins are present
- Broken demo account credentials in the review notes
Google Play review takes 3–7 days for new accounts. Watch for:
- Incomplete data safety section
- Target API level too low
- App crashing on the review device (often due to missing internet permission or network security config)
Common Mistakes When Converting Bubble.io Apps to Mobile
The most common mistakes include skipping mobile-responsive work, missing Apple's Sign In with Apple requirement, not testing on real hardware, and writing vague permission descriptions.
Mistake 1 — Submitting a Desktop-Designed Bubble App As-Is
Converting a Bubble app that was never built for mobile produces broken layouts and a near-certain App Store rejection. Spend 2–4 hours in Bubble's responsive editor before you submit for conversion.
Mistake 2 — Ignoring the Sign In with Apple Requirement
If your app offers any third-party login — Google, Facebook, anything — Apple requires Sign In with Apple as an option. Bubble has a Sign In with Apple plugin. Configure it before submission. Missing it is a guaranteed first-review rejection.
Mistake 3 — Not Testing on Physical Devices
Simulators and emulators don't fully replicate WebView behaviour, camera access, or push notification delivery. Always test the actual binary — .ipa via TestFlight, .apk via direct install — on real hardware before you submit anywhere.
Mistake 4 — Vague Permission Usage Descriptions
Apple reviewers manually check that your permission strings match your app's actual use.
- Bad: "We need camera access."
- Good: "AppName uses your camera to let you scan barcodes and upload product photos."
Mistake 5 — Skipping the Closed Testing Phase on Google Play
New Google Play developer accounts that skip the 20-tester / 14-day requirement cannot publish publicly — full stop. Recruit testers from your email list, social followers, or beta communities before you start the conversion process.
Mistake 6 — Forgetting the Privacy Policy
Both stores require a live, publicly accessible privacy policy URL — no login required to view it, and it must be specific to your app's data handling. Bubble apps often call Stripe, Firebase, and SendGrid. All of it needs to be disclosed. Use a generator as a starting point, then customise it for your integrations.
Mistake 7 — Choosing the Wrong Conversion Service
Signs of a low-quality service: no real device testing, no App Store submission support, no push notification integration, generic WebView with no customisation.
Before paying, ask:
- Do you handle App Store submission, or just build the binary?
- Can you support push notifications integrated with my Bubble backend?
- What happens if the app gets rejected?
- Do you support updates as my Bubble app evolves?
Frequently Asked Questions
Will a WebView-wrapped Bubble app get rejected by Apple for Guideline 4.2?
Most functional Bubble SaaS apps pass — rejection risk is highest for simple marketing sites. To stay safe, include at least two or three native features (push notifications, biometric login, camera, deep linking) and make sure your app has real, non-trivial content. Guideline 4.2 targets thin wrappers that add nothing a mobile browser doesn't already offer.
Does my Bubble.io app need to be on a paid plan to convert to mobile?
Your app needs a custom domain with HTTPS. Technically, a WebView conversion can work from any live URL, including a Bubble free plan. But Apple will not approve an app that loads a yourdomain.bubbleapps.io URL. A custom domain requires Bubble's Starter plan or above.
How do push notifications work with a Bubble.io WebView app?
Push notifications route through Firebase Cloud Messaging (Android) and Apple Push Notification service (iOS). The native shell registers the device and captures a push token, which gets sent to your Bubble backend via API or plugin. When you trigger a notification in Bubble, it routes through Firebase to the device. A managed conversion service handles the Firebase setup and native integration end to end.
Can I push updates to my Bubble app without resubmitting to the App Store?
Yes — this is one of the best advantages of a WebView wrapper. Since the app loads your live Bubble URL, any UI changes, new workflows, or content updates are immediately reflected for users. App Store resubmission is only needed for native-level changes: app name, bundle ID, permissions, push configuration, or the wrapper itself.
What's the difference between a Bubble PWA and a native WebView app?
A PWA cannot be listed on the App Store or Google Play. It runs in the browser, can be saved to the home screen, but can't reliably send push notifications on iOS and lacks access to certain hardware APIs. A native WebView conversion produces a real installable app, discoverable in store search, with full access to device capabilities.
How long does the full process take — from Bubble app to live on both stores?
With a professional conversion service: typically 5–10 business days for Google Play, 7–14 for iOS. Add 3–5 days if your Apple Developer account is new or you hit a first rejection. DIY routes (Capacitor, React Native WebView) typically take 2–4 weeks for developers new to the iOS/Android build pipeline.
Does AppOfWeb support Bubble.io specifically, or just e-commerce platforms?
AppOfWeb supports any web app with a stable, responsive URL — including Bubble.io. For Bubble specifically, they handle push notification integration, deep linking into specific Bubble pages, camera and file upload permissions, and complete App Store and Google Play submission. The conversion stays maintainable as your Bubble app grows.
Key Takeaways and Next Steps
Converting a Bubble.io app to native Android and iOS is straightforward in 2025 — the most reliable path for most no-code founders is a managed WebView conversion service that handles native features, device permissions, and App Store submission end to end.
Quick recap:
- Bubble.io builds web apps. A WebView wrapper bridges the gap without rebuilding anything.
- Three paths exist: Bubble's native builder (beta), a professional conversion service, or DIY with Capacitor. For most founders, the conversion service offers the best speed-to-quality ratio.
- Apple's Guideline 4.2, Privacy Manifest requirements, Sign In with Apple, and Google Play's 20-tester rule are the critical compliance items to get right.
- UI responsiveness and real device testing determine whether you sail through review or bounce back and forth with rejections.
- Once live, Bubble app updates don't require App Store resubmission. You get continuous deployment for free.
Ready to turn your Bubble.io web app into a fully native Android and iOS app — listed on the App Store and Google Play? AppOfWeb has helped 100+ businesses across Shopify, WooCommerce, WordPress, Bubble, and more make that leap. Native wrapper build, push notifications, deep linking, device permissions, and complete App Store submission — all handled.
→ Get a free quote at AppOfWeb.com
Turnaround in as little as 5 business days. No code required on your end.