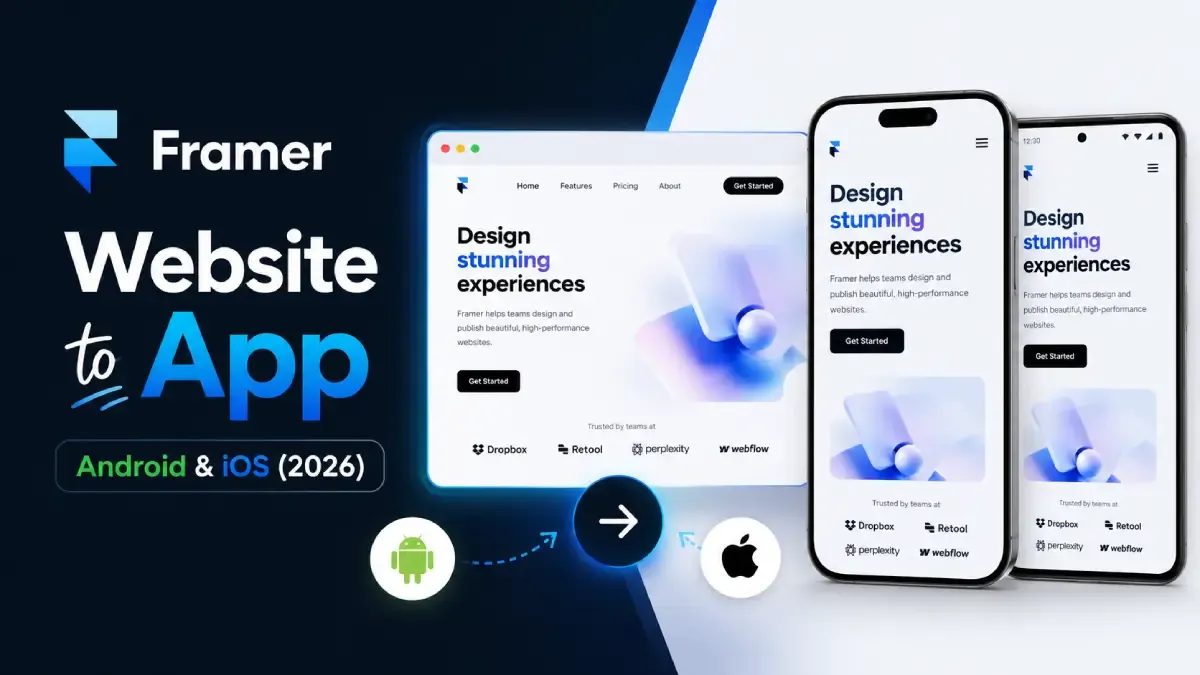
Convert Your Framer Website into an Android & iOS App (2026)
Framer makes it effortless to build a beautiful, interactive website — but your users spend 90% of their mobile time inside apps, not browsers. If you've already built in Framer, you're closer to a native app than you think.
What you'll learn in this guide:
- The three pathways from Framer site to app store listing, and how to pick the right one
- What changed on Apple and Google's platforms in 2025–2026 and what that means for you
- A step-by-step Capacitor walkthrough that gets your Framer site into both stores
- The nine mistakes that trigger App Store rejections — and the exact fixes
- Answers to the real questions developers search before shipping
This guide is for Framer designers, no-code founders, and developers who want to ship to app stores without a full rebuild.
⏱ Time to ship: ~2 hours (PWA) → 1–2 days (WebView wrapper) → 2–6 weeks (native rebuild)
Can You Actually Turn a Framer Site into a Mobile App?
Yes — you can convert a Framer website into a mobile app using three main approaches: a Progressive Web App (PWA), a WebView wrapper submitted to app stores, or a full React-based rebuild using Framer's exported code. The right method depends on how much native functionality you need and whether you require App Store distribution.
The critical distinction: an "app store app" and a "mobile-optimised site" are different things. A site in Safari or Chrome is always a site. An app in the App Store or Google Play is a product users discover, install, and keep on their home screen. That difference matters for push notifications, offline access, discoverability, and brand credibility.
Framer's code output is React — that's a meaningful advantage for Pathway 3, covered below.
The Three Conversion Pathways
| Pathway | App Store? | Native Features | Dev Skill Needed | Time |
|---|---|---|---|---|
| PWA | No (Android shortcut only) | Limited | Low | ~2 hrs |
| WebView Wrapper | ✅ Yes | Medium (via plugins) | Low–Medium | 1–2 days |
| Native Rebuild | ✅ Yes | Full | High | Weeks |
PWA installs to the home screen and runs offline but lives outside the app stores. WebView Wrapper packages your live Framer URL inside a native shell — it gets a store listing and can access device hardware through plugins. Native Rebuild uses Framer's exported React code as a starting point for a full React Native app.
One important note on iOS: Safari still does not fully support PWA installation prompts in 2026. Android handles the "Add to Home Screen" flow far more gracefully.
Which Pathway Is Right for You?
Work through this decision tree:
- Do you need an iOS App Store listing? → Yes → Pathway 2 or 3
- Do you need push notifications or device hardware (camera, biometrics)? → Yes → Pathway 2 (with plugins) or 3
- Is your budget under $500? → Yes → Pathway 1 or Pathway 2 with a no-code tool
- Is your site interaction-heavy or uses Framer CMS heavily? → Pathway 2 with caching strategies
For 80% of Framer projects, Pathway 2 (WebView Wrapper via Capacitor or Median) is the sweet spot. It ships to both stores, takes a day or two, and lets you update your app's content and design instantly — without a re-submission.
What Changed in 2025–2026 That Every Framer Developer Must Know
Several platform changes in 2025–2026 directly affect how Framer sites can be packaged as apps. Apple tightened its WebView-only app guidelines, Framer shipped native CMS and component APIs, and tools like Capacitor 7 and Median.co added features that make wrapping far more viable than it was two years ago.
Most tutorials floating around the internet are from 2022–2023 and miss this entirely. Here's the current picture.
Framer Platform Updates
- Custom domains and hosting stability — WebView apps point to a live URL. Framer's hosting uptime now directly affects your app's reliability.
- Framer CMS API (launched late 2024) — enables dynamic content inside a wrapper app without a separate backend.
- Component code export improvements — React component export quality has improved, making Pathway 3 more realistic. (Verify exact release dates via the Framer changelog before publishing.)
- Core Web Vitals optimisations — performance improvements Framer shipped matter for WebView rendering speed.
- Framer AI (2025) — AI-generated layouts are now common; be aware that AI-generated code can affect export cleanliness for Pathway 3.
Apple App Store Policy Shifts
Apple's App Review Guideline 4.2 — "Minimum Functionality" — is the single biggest risk for WebView apps. Reviewers reject apps that simply display a website. The enforcement hasn't softened; if anything, it's more consistent.
Two other iOS changes to know:
- Privacy Manifest (
PrivacyInfo.xcprivacy) — required since May 2024 and actively enforced through 2025 and beyond. Most WebView wrapper templates don't include this by default. If you use any APIs that access device signals (timestamps, disk space, user defaults), they must be declared here. Rejections for missing Privacy Manifests increased significantly in 2025. - iOS 18 WKWebView changes — updated APIs affect cookies, caching, and local storage behaviour inside wrapped apps.
The EU Digital Markets Act also introduced alternative distribution options for EU users — worth knowing about for non-US audiences, though most teams still go through the App Store.
The fix for Guideline 4.2: Add native features. Push notifications and biometric authentication via Capacitor are the fastest way to demonstrate distinct app value. More on this in the Capacitor walkthrough below.
Google Play Policy Shifts
Google is significantly more permissive of WebView apps than Apple — as long as your app provides a distinct user experience. Two things to verify:
- Target API level — apps must target Android 14/15 (API level 34/35). Capacitor handles this automatically, but check your version.
- Play Integrity API — Google replaced SafetyNet with the Play Integrity API. If your Capacitor build references SafetyNet anywhere, update it.
- Trusted Web Activity (TWA) — Google's official way to publish a verified PWA to the Play Store. It uses Chrome's rendering engine, is free, and auto-updates as your Framer site changes. Underused by Framer developers, and a genuinely good option for Android-only apps.
New and Updated Tooling
| Tool | What's new |
|---|---|
| Capacitor 7 | New plugin architecture, improved iOS/Android parity, Vite integration |
| Median.co | Rebranded (formerly GoNative.io), updated UI/UX builder and expanded plugin ecosystem |
| Bubblewrap CLI | Google's free TWA tool — underused by Framer devs |
| Expo (React Native) | Easier Framer React component integration via Expo's web renderer |
| WebViewGold | Good for non-devs; needs animation tuning with Framer's heavier sites |
Pathway 1 — Progressive Web App (PWA): The Fastest Route
A PWA is a website enhanced with a service worker and manifest file so it can be installed on a device's home screen. Framer does not natively generate a PWA manifest, but you can add one via custom code injection in under 30 minutes — giving you offline support, a home screen icon, and full-screen mode without app store submission.
When a PWA Is Enough
PWA pros: no app store fees, instant updates, no review cycle. Ideal for internal tools, marketing sites, and portfolios where you control who installs it.
PWA cons are real: iOS Safari push notification support is still inconsistent in 2026, there's no App Store listing, users must be taught to "Add to Home Screen," and iOS enforces a 7-day storage eviction policy for sites not frequently visited.
How to Enable PWA Behaviour in Framer
- Create
manifest.jsonwith fields:name,short_name,start_url,display: standalone,theme_color, and icon paths at 192×192px and 512×512px. - Inject the manifest link via Framer's Custom Code panel →
<head>tag injection:<link rel="manifest" href="/manifest.json">. - Register a Service Worker via a small
<script>tag injected in<body>. - Use Workbox via CDN for caching strategies — no build step required.
- Test with Lighthouse in Chrome DevTools. Target a PWA score above 90.
PWA Limitations You Must Accept
You cannot access the camera, Bluetooth, or NFC from a PWA. There's no App Store search discoverability. On iOS, the storage eviction policy means infrequent users may lose cached data.
If any of those block your use case, Pathway 2 is your answer.
Pathway 2 — WebView Wrapper Apps: Store-Ready Without a Rewrite
A WebView wrapper app is a thin native shell that loads your website inside a browser component. When built with Capacitor, you get full access to native device APIs — push notifications, camera, biometrics — while your Framer site remains the UI layer. It's the fastest path to both the Apple App Store and Google Play.
Think of it as a picture frame for your website: the frame is native, the content is your Framer site.
Top WebView Wrapper Tools for Framer in 2026
| Tool | Type | iOS | Android | Price | Best For |
|---|---|---|---|---|---|
| Capacitor 7 | Open source CLI | ✅ | ✅ | Free | Devs who want control |
| Median.co | SaaS + CLI | ✅ | ✅ | $99/mo | Teams wanting support |
| Bubblewrap (TWA) | CLI | ❌ | ✅ | Free | Android-only PWA route |
| WebViewGold | Code template | ✅ | ✅ | ~$69 one-time | Non-devs, budget builds |
| MobiLoud | SaaS | ✅ | ✅ | $350+/mo | Agencies |
Framer's JS-heavy animations (Framer Motion, GSAP) can cause frame drops on mid-range Android devices. Before settling on a tool, test on a low-end device. The ?app=true URL parameter technique — serving a lighter animation variant to app users — works with all of the tools above.
Step-by-Step: Wrap Your Framer Site with Capacitor
Step 1 — Prerequisites & Environment Setup
You need:
- Node.js 20+, npm or pnpm
- Android Studio (Hedgehog or later)
- Xcode 16+ — Mac required for iOS; there is no official Windows/Linux workaround
- CocoaPods (optional but recommended):
sudo gem install cocoapods - Your Framer site published to a public URL
Pre-flight checklist:
- ☐ Node.js installed
- ☐ Xcode installed (Mac only)
- ☐ Android Studio installed
- ☐ Framer site published to production URL
- ☐ Apple Developer account ($99/yr)
- ☐ Google Play developer account ($25 one-time)
Step 2 — Publish Your Framer Project
The wrapper will point to your live Framer URL, not a static export. Simply publish your Framer site to its hosted URL or custom domain.
Advanced alternative: export as code from Framer via File → Export → Code, deploy to Vercel or Netlify, then point Capacitor at that URL.
Two Framer-specific requirements:
- Enable HTTPS on your custom domain. Capacitor's network security config requires HTTPS on Android API 28+.
- In Framer, go to Site Settings → SEO and confirm your
robots.txtdoesn't block the/apppath if you use path-based routing for app users.
Step 3 — Initialise a Capacitor Project
npm init @capacitor/app my-framer-app
cd my-framer-app
npm install @capacitor/core @capacitor/cli
npm install @capacitor/android @capacitor/ios
npx cap init "MyAppName" "com.yourcompany.myapp" --web-dir www
The --web-dir www flag tells Capacitor where to find local assets. Since you're loading a remote URL, create an empty www/index.html redirect. The appId must use reverse domain notation and must match your app store listing exactly.
Step 4 — Configure the WebView to Load Your Framer URL
// capacitor.config.ts
import { CapacitorConfig } from '@capacitor/cli';

const config: CapacitorConfig = {
  appId: 'com.yourcompany.myapp',
  appName: 'My Framer App',
  webDir: 'www',
  server: {
    url: 'https://your-framer-site.framer.app',
    cleartext: false,
    androidScheme: 'https',
  },
  plugins: {
    SplashScreen: {
      launchShowDuration: 2000,
      backgroundColor: '#FFFFFF',
    },
  },
};

export default config;
androidScheme: 'https' prevents mixed-content warnings. The SplashScreen plugin is a UX essential — without it, users see a white flash on launch. Add an allowNavigation array for any external links your Framer site opens (Stripe payment pages, OAuth providers, etc.).
Step 5 — Add Native Plugins
This is what separates a real app from a browser shortcut — and it's critical for passing App Store review. Add at least two native features.
Push Notifications:
npm install @capacitor/push-notifications
npx cap sync
Requires Firebase Cloud Messaging (FCM) setup on Android and APNs configuration on iOS. See the Capacitor Push Notifications docs for full config — it's not a one-liner, so follow the official guide.
Camera:
npm install @capacitor/cameraOn iOS, add NSCameraUsageDescription to Info.plist. Without it, your app crashes on any camera access attempt.
Haptics (@capacitor/haptics) and Status Bar (@capacitor/status-bar) are low-effort additions that add genuine native feel and help match your Framer brand colours.
Step 6 — Build for Android
npx cap add android
npx cap sync android
npx cap open android
In Android Studio: Build → Generate Signed Bundle/APK → Android App Bundle (.aab). The Play Store has required .aab format since August 2021.
Create a keystore file for signing and do not commit it to git. Set minSdk to 24 (Android 7) for broad compatibility; set target SDK to 35 (Android 15).
Framer-specific gotcha: custom fonts sometimes fail to load inside the WebView due to CORS headers on Framer's CDN. Verify your Android manifest includes <uses-permission android:name="android.permission.INTERNET" /> and check your CDN headers.
Test on an emulator and at least one real device before submitting.
Step 7 — Build for iOS
npx cap add ios
npx cap sync ios
npx cap open ios
In Xcode: select your team (requires Apple Developer account) → Product → Archive → distribute via App Store Connect.
Privacy Manifest — don't skip this. Add PrivacyInfo.xcprivacy to your Xcode project and declare any required reason APIs your plugins use. Review rejections for missing Privacy Manifests increased significantly in 2025.
App icons: Framer can export at the correct sizes, but verify iOS requires a 1024×1024px icon with no alpha channel. Transparency causes a rejection.
Test with at least five internal testers in TestFlight before submitting to App Store review.
Step 8 — Submit to the Stores
Google Play:
- Create your listing in Play Console → Internal testing → Closed testing → Production (staged rollout recommended)
- Complete the app content questionnaire honestly
- Provide 2–8 phone screenshots; device frames matching your Framer design work well
- Review typically takes 1–3 days for new apps
Apple App Store:
- Create your listing in App Store Connect
- App Privacy details must match your
PrivacyInfo.xcprivacydeclarations - Review typically takes 24–48 hours; first submissions often return with feedback
- If you get a Guideline 4.2 rejection: add a native onboarding screen, native push opt-in flow, or native settings panel to demonstrate distinct app value. Then resubmit with a note explaining what native features you added.
No-Code Alternative: Median.co
If you want to skip the CLI entirely, Median.co (formerly GoNative.io) handles most of the above through a dashboard. Enter your Framer URL, configure navigation, icons, and splash screen, then download the generated Xcode and Android Studio projects — or have Median build the IPA for you (which means you don't need a Mac for iOS builds).
Median's plugin library covers push notifications, in-app purchases, and biometric login without writing code. The $99/month SaaS fee is worth it for teams that would otherwise spend two days debugging the Capacitor setup.
Be aware that Median's compatibility with Framer's JS-heavy animations and cookies requires some configuration — check their Framer-specific notes in the dashboard before assuming everything "just works."
Pathway 3 — Full Native/Hybrid Rebuild: When to Upgrade
A full native rebuild makes sense when your app needs deep OS integration — ARKit, HealthKit, real-time Bluetooth — that WebView plugins can't reliably provide. Because Framer exports clean React components, you can migrate your design system and interactions into React Native using Expo, preserving your visual language while gaining full native performance.
This is a 4–12 week project. Don't start here.
What Exports Well from Framer
Use File → Export → Code in Framer to get React components. Exports well: layout, typography, static components, and Framer Motion animations (equivalent: react-native-reanimated in React Native). Exports poorly: scroll-linked animations, scroll snapping, hover states.
The migration workflow: export → audit components → manually convert Framer Motion to Reanimated 3 → rebuild navigation with Expo Router.
Bringing Your Design Tokens Along
Extract colour, typography, and spacing tokens from Framer's Variables panel. Export as JSON, import into a React Native theme.ts file. Style Dictionary is a solid tool for transforming tokens to multiple platforms — this keeps your brand consistent between web and native without maintaining two separate design systems.
When This Path Is Worth It
Ship Pathway 2 first. Validate the product. If you hit any of these — 120fps custom animations, ARKit/HealthKit/CoreBluetooth, a revenue model requiring native in-app purchases, or a team with existing React Native experience — then rebuild. Spending six weeks on a native app before you know your users want it is the most expensive mistake in this space.
Common Mistakes That Kill App Store Approvals
The most common reason Framer WebView apps get rejected from the App Store is Apple Guideline 4.2. Reviewers reject apps that simply mirror a website — adding native features like push notifications, offline mode, or biometric login is the fastest fix.
- Submitting a bare WebView with no native features — Add at minimum push notifications and biometric login via Capacitor plugins before submitting.
- Missing Privacy Manifest (
PrivacyInfo.xcprivacy) — Add the file to your Xcode project and declare all required reason APIs your plugins use. This became a significant rejection driver in 2025. - Using HTTP instead of HTTPS for your Framer URL — Android API 28+ blocks cleartext traffic by default. Always use HTTPS.
- App crashes on launch because your Framer URL is down or slow — Add an offline/error screen using Capacitor's network plugin; cache the shell with a service worker.
- App icon with transparency — iOS requires a 1024×1024px icon with no alpha channel. Export from Framer but verify no transparency exists.
- Janky animations inside the WebView — Add
will-change: transformto heavy animation elements; disable parallax and heavy scroll triggers via a?app=trueURL parameter, then use Framer's conditional rendering based on URL parameters. - Shipping with your Framer staging URL — Use
capacitor.config.tsenvironment switching. Never ship with.framer.appdevelopment URLs. - Not testing on a real device — Test on at least one physical iPhone and one Android device. Emulators miss GPU and memory constraints that matter for Framer's animation engine.
- Wrong screenshot sizes — Generate screenshots for iPhone 6.9" and iPad Pro 13" as minimum; use Framer's presentation features to create pixel-perfect mockups.
Frequently Asked Questions
useScroll and heavy MotionValue chains can cause frame drops on mid-range Android devices. Test on a low-end Android device before shipping; add ?app=true to serve a lighter animation variant to app users.macos-latest runner), use Median.co's build service, or hire a freelancer for the iOS submission step only.@capacitor/biometrics. If you use OAuth providers (Google, GitHub), whitelist your app's custom URL scheme in the OAuth console and configure Capacitor's capacitor-community/browser plugin for in-app browser OAuth flows.Key Takeaways
Converting your Framer website into a mobile app is entirely achievable in 2026 — the tools are mature, the pathways are well-documented, and the 2025–2026 platform changes actually make it more viable, not less. Choose the right pathway for your use case and you won't waste a week rebuilding something you could have shipped in a day.
- ✅ Pathway 1 (PWA): Best for internal tools and non-store use cases. Fastest to ship. No iOS push notifications.
- ✅ Pathway 2 (Capacitor or Median): The recommended default for most Framer-to-app projects. Ships to both stores. Instant content updates via your live Framer URL.
- ✅ Pathway 3 (React Native rebuild): For apps that need deep OS integration or 120fps native animations. Validate with Pathway 2 first.
- ⚠️ Biggest pitfall: Submitting to Apple without native features. Add push notifications and biometrics before submitting.
- 📅 2025–2026 key change: Privacy Manifest (
PrivacyInfo.xcprivacy) is now required for all iOS apps — don't skip it.
Ready to Ship Your Framer App?
Whether you're starting from scratch or have a Framer site ready to wrap, the Capacitor walkthrough above gives you everything you need to go from browser to app store.
→ Get Started with AppOfWeb