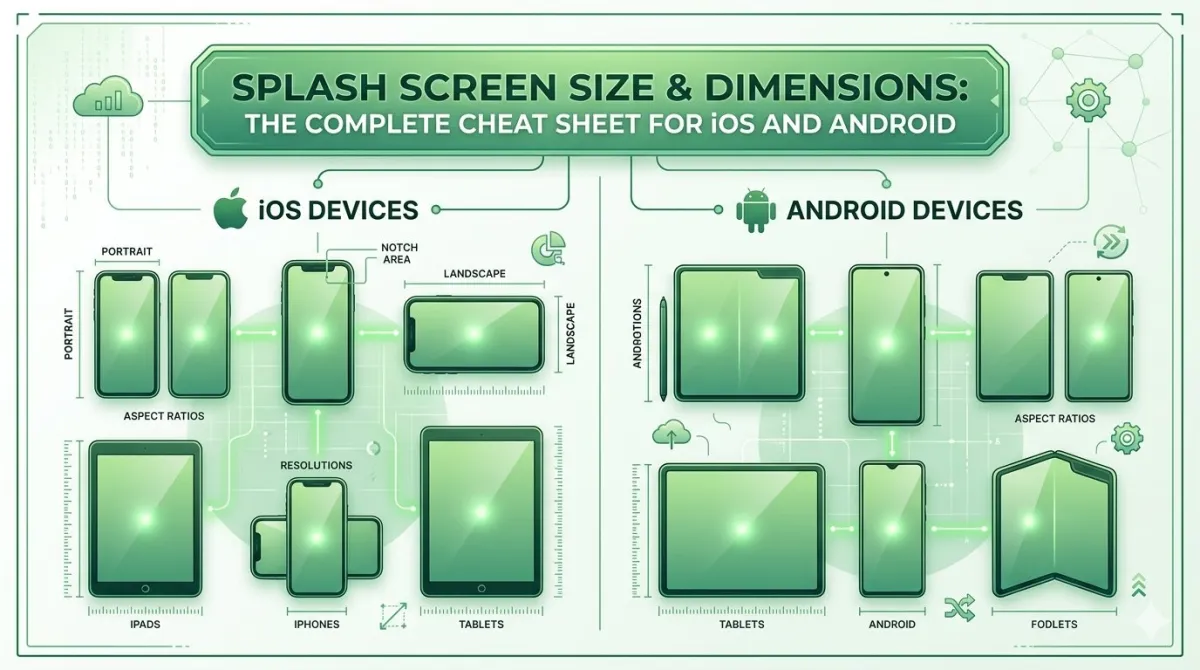
Splash Screen Size & Dimensions: The Complete Cheat Sheet for iOS and Android in 2026
You've built a beautiful app. The UI is polished, the features work, and you're ready to ship. Then someone on your team asks: "Hey, what size should the splash screen be?"
Cue the browser tabs. Twenty minutes later you've got five different answers, two of them outdated, and one that's for a platform you're not even targeting.
Sound familiar?
This guide fixes that. You'll get the exact splash screen dimensions for every major iOS and Android device in 2026, plus the why behind the specs, common mistakes to avoid, and expert-level tips to make your launch screen actually shine.
Let's get into it.
What Is a Splash Screen (And Why Does It Matter)?
Before we throw numbers at you, a quick level-set.
A splash screen (also called a launch screen) is the first visual a user sees when they open your app — that brief moment between tapping the icon and the app being ready to use. Done well, it makes your app feel fast and polished. Done badly, it feels sluggish or looks broken.
Here's what you need to know at the top level:
- On iOS, Apple calls it a Launch Screen and recommends building it using an Xcode Storyboard rather than a static image set — it adapts to any device automatically.
- On Android 12+ (API 31+), the OS now controls the splash screen via the SplashScreen API — no more custom
SplashActivityhacks. - Both platforms use points/dp (density-independent pixels), not raw pixels, for layout — but you still export assets at multiple pixel densities.
- A splash screen that matches your first app screen creates the illusion of an instant launch, which users love.
- Getting the dimensions wrong can cause stretching, cropping, or App Store/Play Store submission rejections.
Part 1: iOS Splash Screen Sizes & Dimensions
How iOS Launch Screens Actually Work in 2026
Apple's approach has evolved significantly. Here's the current state of play:
- Apple mandates the use of a LaunchScreen.storyboard file — static image-only launch screens have been deprecated for years.
- A single storyboard with Auto Layout constraints scales your design across every iPhone and iPad screen automatically.
- Despite this, many cross-platform frameworks (React Native, Flutter, Capacitor) still require you to export static splash images at specific sizes — so the pixel dimensions below are very much still relevant.
- Apple's Human Interface Guidelines are clear: the launch screen is not a branding opportunity. It shouldn't look like an advertisement or a splash screen from 2012.
- All modern iPhones use @3x scale (3 pixels per logical point). iPads use @2x.
Current iPhone Screen Resolutions (2025–2026 Lineup)
These are the devices your users are actually on right now:
| Device | Screen Size | Resolution (px) | Scale | Points |
|---|---|---|---|---|
| iPhone 17 Pro Max | 6.9 in | ~1320 × 2868 | @3x | 440 × 956 pt |
| iPhone 17 Pro | 6.3 in | ~1206 × 2622 | @3x | 402 × 874 pt |
| iPhone 17 / 17 Air | 6.1 in | ~1179 × 2556 | @3x | 393 × 852 pt |
| iPhone 16e | 6.1 in | ~1179 × 2556 | @3x | 393 × 852 pt |
| iPhone 16 Plus | 6.7 in | ~1290 × 2796 | @3x | 430 × 932 pt |
| iPhone 15 / 16 | 6.1 in | ~1179 × 2556 | @3x | 393 × 852 pt |
| iPhone SE (3rd gen) | 4.7 in | 750 × 1334 | @2x | 375 × 667 pt |
Key takeaways for iOS static image exports:
- If you must export static launch images (e.g., for a framework), export at @1x, @2x, and @3x — where @1x is the base point size.
- The largest canvas you realistically need to design at is 1320 × 2868 px (the iPhone 17 Pro Max).
- Always design in points, then multiply for pixel exports. Designing at 393 × 852 pt gives you 1179 × 2556 px at @3x.
- Safe area matters — the Dynamic Island on Pro models eats into the top ~59 pt. Keep critical logo elements centred and away from edges.
iPad Launch Screen Dimensions
iPads add landscape orientation to the mix, which trips up a lot of developers:
| Device | Portrait (px) | Landscape (px) | Scale |
|---|---|---|---|
| iPad Pro 13" (M4) | 2064 × 2752 | 2752 × 2064 | @2x |
| iPad Pro 11" (M4) | 1668 × 2420 | 2420 × 1668 | @2x |
| iPad Air 13" | 2064 × 2752 | 2752 × 2064 | @2x |
| iPad Air 11" | 1668 × 2420 | 2420 × 1668 | @2x |
| iPad mini (7th gen) | 1488 × 2266 | 2266 × 1488 | @2x |
| iPad (10th gen) | 1640 × 2360 | 2360 × 1640 | @2x |
Things to watch with iPad:
- A storyboard handles orientation changes automatically. Static images don't — you need separate portrait and landscape versions.
- If your app is iPad-only or universal, don't skip iPad launch screen assets.
- Apple's multitasking features (Split View, Stage Manager) mean your launch screen may appear at non-fullscreen sizes on iPad — another reason storyboards win here.
The Recommended iOS Approach: Xcode Storyboard
If you're building a native iOS app, here's the bottom line:
Step 1: Use LaunchScreen.storyboard
Xcode generates this automatically for new projects. It's a standard UIViewController with Auto Layout — design your logo, background colour, and any static elements here.
Step 2: Set a background colour
Use a solid colour or gradient via the storyboard's background attribute. Match your app's primary brand colour.
Step 3: Add your logo as an Image View
- Constrain it to the centre of the safe area.
- Set a fixed width constraint (e.g., 200 pt wide) and let the height be proportional.
- Use a vector PDF or @1x/@2x/@3x PNG set in your asset catalogue.
Step 4: Mark the storyboard as the launch screen file
In your Info.plist, set UILaunchStoryboardName to LaunchScreen. Xcode usually handles this for you.
⚠️ Warning: Don't add any custom class code to your LaunchScreen.storyboard — it won't run. The launch screen must be 100% static layout.
iOS Launch Screen for Cross-Platform Frameworks
Using React Native, Flutter, or Expo? You'll likely need to provide static sized images. Here are the standard sizes that most frameworks request:
| Size Name | Portrait (px) | Landscape (px) |
|---|---|---|
| Default (non-Retina) | 320 × 480 | 480 × 320 |
| @2x (Retina) | 640 × 960 | 960 × 640 |
| iPhone 5 / SE | 640 × 1136 | 1136 × 640 |
| iPhone 6/7/8 | 750 × 1334 | 1334 × 750 |
| iPhone Plus | 1242 × 2208 | 2208 × 1242 |
| iPhone X/11/12/13 | 1125 × 2436 | 2436 × 1125 |
| iPhone 14/15/16/17 | 1179 × 2556 | 2556 × 1179 |
| iPhone 17 Pro Max | 1320 × 2868 | 2868 × 1320 |
- For Expo/React Native, check your specific framework's documentation — generators like
expo-splash-screenwill handle resizing if you start from a large base image (1284 × 2778 px or larger). - For Flutter, the
flutter_native_splashpackage accepts a single source image and generates all required sizes automatically. - Start with the largest size and work down — never upscale a small image.
Part 2: Android Splash Screen Sizes & Dimensions
The Android 12+ SplashScreen API — What Changed Everything
Android 12 (API 31) introduced the SplashScreen API, and it fundamentally changed how splash screens work on Android.
- Before Android 12: developers created a custom
SplashActivitywith a timed delay — a widely-used but messy hack. - From Android 12 onward: the OS handles the splash screen automatically, pulling from your app's theme attributes.
- The
androidx.core:core-splashscreencompat library (version1.0.1) brings this behaviour back to Android 5.0 (API 21) and newer. - The old
Handler.postDelayed()andThread.sleep()approaches are officially dead. Google strongly discourages artificial delays. - If you're still targeting API 30 or below only, you need manual handling — but almost nobody is in 2026.
Android Splash Screen Icon Dimensions
The SplashScreen API uses your adaptive icon as the splash icon. Here are the exact dimension specs from Android's official documentation:
App Icon (No Background)
- Total drawable area: 288 × 288 dp
- Visible area (within circular mask): 192 dp diameter circle
- Everything outside the circle is masked — so keep your logo inside that 192 dp circle.
App Icon (With Icon Background)
- Total drawable area: 240 × 240 dp
- Visible within mask: 160 dp diameter circle
Branded Image (Bottom of screen)
- Exact size: 200 × 80 dp
- This appears at the bottom of the splash screen and is optional but great for brand recognition.
- Set via
android:windowSplashScreenBrandingImage(API 31+ only).
Animated Icon (AVD)
- The animated icon must be an AnimatedVectorDrawable (AVD) XML file.
- Icon area: 432 dp (4× the 108 dp adaptive icon area).
- Inner visible area: 288 dp (4× the 72 dp masked area of an adaptive icon).
- Maximum animation duration: 1,000 ms — Google recommends keeping it under this.
- Animation delay cannot exceed 166 ms.
Android Pixel Density Reference
Android doesn't have fixed resolutions — there are hundreds of device sizes. Instead, you design in dp (density-independent pixels) and export assets at these density buckets:
| Density Qualifier | Scale Factor | Splash Icon (px) |
|---|---|---|
mdpi (baseline) | 1× | 288 × 288 |
hdpi | 1.5× | 432 × 432 |
xhdpi | 2× | 576 × 576 |
xxhdpi | 3× | 864 × 864 |
xxxhdpi | 4× | 1152 × 1152 |
Pro tip: Use a vector drawable (SVG → VectorDrawable) for your splash icon instead of rasterised PNGs. It scales perfectly to any density without needing multiple exports and is the format the SplashScreen API is optimised for.
Setting Up the Android SplashScreen API
Here's a quick reference implementation:
Step 1: Add the dependency
dependencies {
    implementation "androidx.core:core-splashscreen:1.0.1"
}
Step 2: Define your splash theme
<!-- res/values/themes.xml -->
<style name="Theme.App.Starting" parent="Theme.SplashScreen">
    <item name="windowSplashScreenBackground">#FFFFFF</item>
    <item name="windowSplashScreenAnimatedIcon">@drawable/splash_logo</item>
    <item name="windowSplashScreenAnimationDuration">500</item>
    <item name="postSplashScreenTheme">@style/Theme.MyApp</item>
</style>
Step 3: Apply in your manifest
<activity
    android:name=".MainActivity"
    android:theme="@style/Theme.App.Starting">
Step 4: Install in MainActivity
class MainActivity : AppCompatActivity() {
    override fun onCreate(savedInstanceState: Bundle?) {
        val splashScreen = installSplashScreen()
        super.onCreate(savedInstanceState)
    }
}- For API 31+ with an animated icon, add a
res/drawable-v31/folder and put your AVD file there. - For older APIs, place a static vector drawable in
res/drawable/.
Part 3: Common Mistakes & Pitfalls
Even experienced developers stumble on this stuff. Here are the most common traps — and how to avoid them.
Mistake 1: Using Oversized or Underdesigned Static Images
- Uploading a 5 MB PNG as a launch screen image causes unnecessary app bloat and slow first-load on older devices.
- Conversely, using a tiny 512 × 512 px image and upscaling it produces pixelation on high-density screens.
- Fix: Use vector assets wherever possible. For PNG exports, a well-compressed @3x image at your design resolution should stay under 300 KB.
Mistake 2: Ignoring the Safe Area and Dynamic Island
- Placing your logo at the very top of the screen guarantees it'll be hidden behind the Dynamic Island on Pro models, or the notch on older devices.
- Fix: Centre your logo vertically and horizontally, and keep all content at least 60 pt away from the top edge.
Mistake 3: Treating the Splash Screen as a Branding Canvas
- Apple explicitly states in its Human Interface Guidelines: the launch screen is not a branding opportunity. A screen stuffed with taglines, version numbers, and marketing copy will feel slow and feel wrong.
- Google takes a similar position — the SplashScreen API shows your icon on a plain background precisely because simplicity is the point.
- Fix: Logo + background colour. That's it. Save the storytelling for your onboarding flow.
Mistake 4: Adding Artificial Delays on Android
- Using
Thread.sleep()orHandler.postDelayed()to keep the splash screen visible longer is explicitly discouraged by Google and was a pre-API-31 anti-pattern. - It makes the app feel slow even if it isn't — which frustrates users and leads to lower ratings.
- Fix: Use the SplashScreen API's built-in
keepOnScreenConditionto hold the screen only while you load real data, then let the OS dismiss it naturally.
Mistake 5: Skipping iPad or Landscape Versions
- Publishing an iPhone-only splash setup for a universal app means iPad users see a stretched or letterboxed mess.
- Fix: Always provide landscape storyboard layouts if your app supports landscape rotation. If you must use static images, export both orientations for each iPad size.
Mistake 6: Using the Wrong Colour Space
- Using RGB colour profiles instead of sRGB or Display P3 can cause your brand colours to look slightly washed out on modern OLED iPhone screens.
- Fix: Export assets in sRGB for broad compatibility. If you want to leverage P3 wide colour on modern iPhones, test on a physical device — the simulator won't show colour space differences accurately.
Expert Tips & Best Practices
Tip 1: Design at 1× and Scale Up
Design your logo and layout at base (1×) dimensions in points (iOS) or dp (Android), then export at 2× and 3× for pixel assets. This workflow prevents the "designed at the wrong size" confusion that trips up junior designers.
Tip 2: Match Your First Screen to Your Splash Screen
- The smoothest launch experiences create visual continuity between the splash and the first app screen.
- Use the same background colour and position your logo close to where your app's header will appear. The transition feels seamless rather than jarring.
Tip 3: Test on Real Devices, Not Just Simulators
- The Xcode Simulator and Android Emulator both have known rendering quirks with launch screens, especially around timing and colour accuracy.
- Test on at least one current-generation iPhone and one Android device before shipping.
- Pay particular attention to cold start vs warm start behaviour on Android — they can look noticeably different.
Tip 4: Use Vector Assets Wherever You Can
- On Android,
VectorDrawableXML files scale to any density perfectly, meaning one file serves all screen sizes. - On iOS, PDF vector assets in your asset catalogue with "Preserve Vector Data" checked give you the same advantage.
- This reduces app bundle size and eliminates blurriness on future high-density displays you haven't even designed for yet.
Tip 5: Keep Animation Short and Purposeful
- If you're using Android's animated icon feature, keep it under 500 ms for most use cases. A logo that takes a full second to animate feels like the app is loading slowly, even when it isn't.
- Avoid looping animations on splash screens — they're meant to be transitional, not decorative.
Tip 6: Dark Mode Support
- Both iOS and Android support system-wide dark mode, and your splash screen should too.
- On iOS: set your background colour using a named colour in your asset catalogue with both Light and Dark appearances defined.
- On Android: create
res/values-night/themes.xmlwith awindowSplashScreenBackgroundthat matches your dark theme. - Nothing looks worse than a brilliant-white splash screen at 2 AM when the rest of your app is dark-themed.
Frequently Asked Questions
Q1: Do I still need to provide static splash screen images for iOS in 2026?
For native iOS apps built in Xcode, no — the storyboard approach is the only officially supported method, and it handles all device sizes automatically. However, if you're using a cross-platform framework like React Native, Flutter, or Capacitor, you likely will still need to provide static image assets at specific sizes, because those frameworks generate the native project files and may require them. Always check your specific framework's documentation.
Q2: What's the minimum image size I should design my splash screen at?
If you're designing for iOS, start at the iPhone 17 Pro Max resolution of roughly 1320 × 2868 px — that's the largest current device. For Android, design in dp (not pixels) and export using vector drawables to avoid needing multiple PNGs altogether. If you must use raster images for Android, design at xxxhdpi (4×) and scale down.
Q3: Can I show a GIF or video on my splash screen?
Short answer: not directly on either platform in the traditional sense. On Android, the SplashScreen API supports AnimatedVectorDrawable (AVD) — not GIFs or video. On iOS, the storyboard is static. For anything richer (like a Lottie animation), you'd implement that in your app's first view controller after the system splash screen dismisses, which gives the visual appearance of an animated intro.
Q4: My Android splash screen looks fine on API 31+ but broken on older devices. Why?
The windowSplashScreenAnimatedIcon attribute is only supported on API 31+. On older APIs, it falls back differently. The fix is to create a separate res/drawable-v31/ folder for your animated icon, and put a standard static vector drawable in res/drawable/ for older devices. The core-splashscreen compat library handles most of the heavy lifting, but asset versioning is still your responsibility.
Q5: How long should a splash screen be displayed?
As short as possible. The splash screen should disappear the moment your app is ready to use — not after a fixed timer. Apple's Human Interface Guidelines say the launch screen should give the impression that your app is "fast and responsive." On Android, Google's guidance caps animated icon duration at 1,000 ms, but recommends shorter. If your app needs extra loading time, show a proper loading screen inside your app, not an extended splash.
Q6: Does the splash screen affect App Store or Google Play submission?
Indirectly, yes. On iOS, if you submit an app without a launch screen file (LaunchScreen.storyboard), it will be rejected. Apple made this mandatory in 2020 and hasn't relaxed that requirement. On Android, there's no explicit Play Store rejection for splash screen formatting, but a crash during app launch (which a misconfigured SplashScreen theme can cause) will get flagged in Play's pre-launch report.
Q7: Should my splash screen logo be the same as my app icon?
Generally, yes — consistency is the goal. The Android SplashScreen API literally uses your adaptive app icon by default. On iOS, while you have more control, showing a version of your app icon (or your full wordmark) creates the visual connection between the icon the user tapped and the app that's opening. Showing something completely different is confusing.
Conclusion
Here's the short version of everything we covered:
iOS in 2026:
- Use LaunchScreen.storyboard for native apps — it adapts to every iPhone and iPad automatically.
- The current largest iPhone screen is the iPhone 17 Pro Max at ~1320 × 2868 px.
- Design in points, not pixels. Export @2x and @3x for raster assets.
- Keep the launch screen simple: logo, background colour, and nothing else.
Android in 2026:
- Use the SplashScreen API (API 31+) with the
core-splashscreencompat library for backward compatibility. - Your splash icon should be a VectorDrawable sized at 288 × 288 dp (without background) or 240 × 240 dp (with background).
- Animated icons must be AnimatedVectorDrawable format, under 1,000 ms.
- No artificial delays. Let the OS handle dismissal.
Universal advice:
- Support dark mode on both platforms.
- Test on real devices, not just simulators.
- Keep animation short, purposeful, and under 500 ms where possible.
- Continuous is better than jarring — match your splash to your first app screen.
Your next step: Open your project right now and check which approach your splash screen is using. If you're still using the old Android SplashActivity pattern or iOS static image-only launches, you've got a quick win waiting for you. The modern APIs are genuinely better — faster, cleaner, and a lot less maintenance.
Got a cross-platform setup that's giving you grief? Let us know.
Last updated: May 2026. Specifications reflect iOS 26 / iPhone 17 lineup and Android API 36.