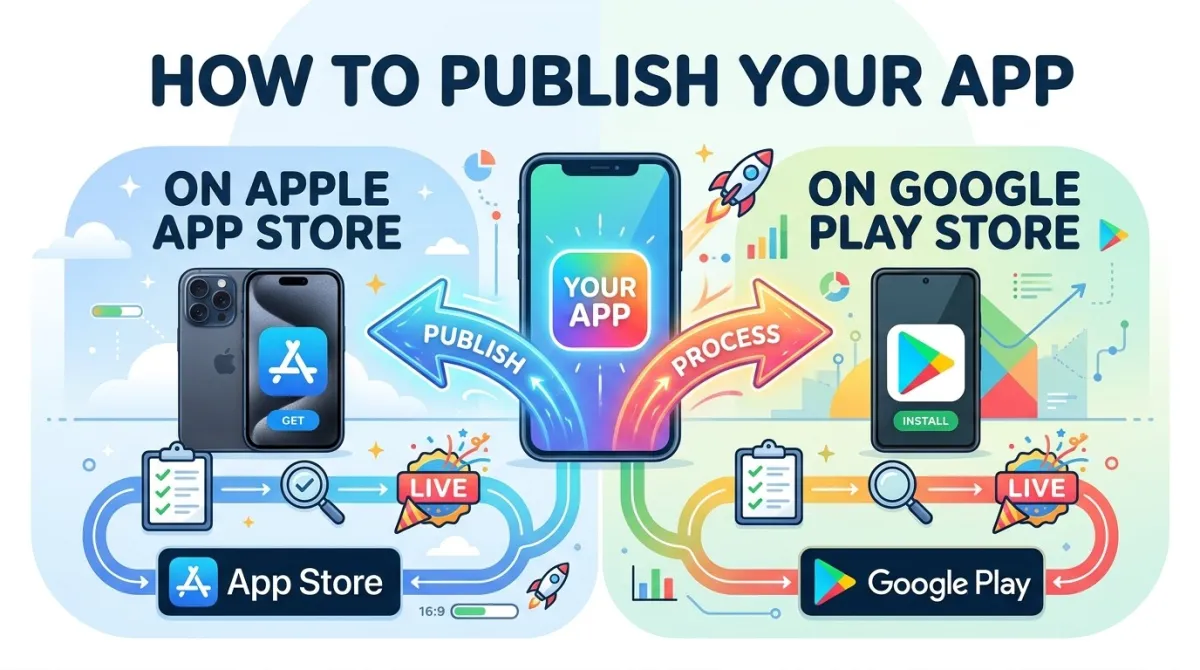
How To Publish Your App On Apple App Store And Google Play Store (Complete Guide)
Estimated reading time: 18–22 minutes
Jump to a section:
- Before You Touch Either Store
- How To Publish on the Apple App Store
- How To Publish on Google Play Store
- App Store Optimization (ASO)
- Post-Launch: Monitoring & Updates
- Common Mistakes & Rejections
- Expert Tips
- FAQs
So You've Built an App — Now What?
You did it. Months of late nights, mountains of coffee, and more Stack Overflow tabs than you'd care to admit — and the app is finally built. It works. You're proud of it.
Then you look at the publish button and realise: getting the app built was the easy part.
Now you've got two completely different stores, two sets of rules, two review processes, and about a thousand ways to get rejected. (If you haven't actually built an app yet and are looking for a shortcut, check out our guide on how to convert your website to an iPhone app). Most guides online either cover one store or skim through both so quickly that you finish reading and still have no idea what to actually do.
This guide is different. We're covering both stores — Apple App Store and Google Play — from start to finish, step by step, for 2025. By the end, you'll know:
- Exactly what you need before you even open either portal
- How to set up your listings, upload your build, and get through review
- How to help people actually find your app after it's live
- How to keep it healthy, updated, and compliant long-term
All policies referenced here are based on Apple's App Review Guidelines and Google Play's Developer Program Policies, including changes introduced in 2024–2025. Where things change frequently, we'll flag it.
Ready? Let's go.
Before You Touch Either Store
Is Your App Actually Ready? (The "Ship-Ready" Test)
Before you create a single account or fill in a single form, be honest with yourself: is this app actually ready to be reviewed by a real human at Apple or Google?
Here's a quick checklist:
- No placeholder screens or broken flows. If a reviewer taps a button and hits a "Coming Soon" screen, that's a rejection. Every path in the app needs to work.
- Test on real devices, not just simulators. Aim for at least iOS 16+ and Android API Level 33+ (the 2025 Play Store minimum). Things that look fine in a simulator have a fun habit of falling apart on actual hardware.
- Crash-free rate above 99%. If your app crashes reliably on certain actions, fix it before submitting. Reviewers will find it.
- Accessibility basics covered. Both Apple and Google now factor accessibility into their review quality signals. Run through your app with VoiceOver (iOS) and TalkBack (Android) — they shouldn't be completely broken.
- Performance is reasonable. Especially on Android, Google tracks cold launch time, memory usage, and battery impact through Android Vitals. An app that cooks someone's phone battery will get flagged.
[ SHIP-READY DIAGNOSTIC ]
-----------------------------------------------------------
[✓] Placeholder screens removed
[✓] Tested on physical hardware (iOS 16+ / Android 33+)
[✓] Crash-free rate > 99.0% verified
[✓] Accessibility targets met (VoiceOver / TalkBack)
[✓] Android Vitals (Cold Launch / Memory) in bounds
-----------------------------------------------------------
STATUS: CLEARED FOR SUBMISSION
If you can tick all of those, you're cleared for takeoff.
Legal & Compliance Groundwork
Not the fun part, but skip it and you'll regret it. Here's what both stores require before they'll accept your submission:
Privacy Policy (mandatory for both stores)
You need a publicly accessible privacy policy URL — even if your app collects absolutely no data. In that case, your policy can simply say: "This app collects no personal data." A Google Doc with a public share link is fine. No live URL = instant rejection.
Terms of Service
Required if your app has user accounts, paid subscriptions, or any user-generated content (comments, posts, uploads, etc.).
Data Safety / Privacy Nutrition Labels
Both stores require you to declare what data your app (and any SDKs inside it) collects. Apple calls these "Nutrition Labels." Google calls it the "Data Safety section." Either way, they're not optional, and a mismatch between what you declare and what your app actually does is one of the top rejection reasons in 2025. Audit every third-party SDK you've included — yes, that means Firebase, Mixpanel, Amplitude, all of them.
Age Rating & COPPA
If your app could be used by children under 13 (US) or under 16 (EU/GDPR), you have additional legal obligations beyond just checking a box. Take this seriously.
Intellectual Property
Make sure you actually have the rights to every font, image, piece of music, and third-party library in your app. This sounds obvious until you realise you grabbed a stock photo off Google Images three months ago.
What Accounts and Tools You Need
Here's how the two platforms compare at the account level:
| Apple App Store | Google Play Store | |
|---|---|---|
| Account cost | $99/year | $25 one-time |
| Where to sign up | developer.apple.com | play.google.com/console |
| Tools required | Mac + Xcode + App Store Connect | Android Studio (or similar) + Play Console |
| Identity verification | D-U-N-S number for org accounts | Government ID for all accounts (since Nov 2023) |
| Verification time | Several business days for orgs | Up to 3 business days |
| Two-factor authentication | Mandatory | Mandatory |
A few things worth calling out:
- Wondering about hidden fees? See our complete breakdown of How Much Does It Cost to Publish an App on the App Store in 2026?
- Google's identity verification is relatively new. If you're creating a Google Play account for the first time, budget up to 3 business days for this process before you can do anything useful.
- App ownership transfers are painful on both platforms. If you're building for a client, sort out who owns the account before you start — not after you've already published.
- Set up two-factor authentication the moment you create your account. Both stores will lock you out if you don't, and recovering an account without 2FA set up is a nightmare.
How To Publish on the Apple App Store
If you have not created apple developer account yet then check: How to create an apple developer account
Step 1 — Set Up Your App Store Connect Record
Head to appstoreconnect.apple.com, sign in, go to "My Apps," and hit the "+" button to create a new app.
You'll need to fill in:
- Platform: iOS, iPadOS, macOS, etc. — pick all that apply to your build.
- App name: Maximum 30 characters. This is what appears on the App Store and it's permanent. Choose carefully.
- Primary language: The default language for your listing.
- Bundle ID: Must match exactly what's in your Xcode project. There is no fixing this later.
- SKU: An internal reference code that's never shown to users. Can be anything — most people use something like
com.yourcompany.appname-001.
⚠️ Bundle ID warning: This is the one field you absolutely cannot change after your first submission. Triple-check it before you click save.
Once the record is created, choose your release type:
- Automatic: Goes live the moment Apple approves it.
- Scheduled: You pick a specific date and time.
- Manual release (recommended): Apple approves it, but it doesn't go live until you click the button. Perfect if you want to coordinate with a marketing launch.
Step 2 — Configure App Information & Metadata
This is where your listing comes together. Take your time here — these fields directly affect whether people find your app and whether they download it.
App Store Listing Fields
App Name (30 chars) and Subtitle (30 chars)
These are your most valuable ASO real estate. Include your most important keyword here, but make it read naturally. "Photo Editor — Collage Maker" works. "Photo Editor Best Free Download 2025 HD Collage" does not.
Description (4,000 chars)
The first three lines are visible before someone taps "More." Front-load your value proposition there. Worth noting: Apple does not index your description for search, so this is written for humans, not algorithms.
Promotional Text (170 chars)
The one field you can update any time without submitting a new app version. Use it for seasonal announcements, feature highlights, or limited-time offers.
Keywords (100 chars total)
Comma-separated, no spaces after commas, and don't repeat words already in your title — Apple won't count them. These 100 characters directly influence your App Store search ranking, so research them properly. Tools like AppFollow, Sensor Tower, or AppTweak are useful here.
Support URL and Marketing URL
Both must link to live, working pages. A dead link is an instant rejection. Check them right before you submit.
Visuals — Screenshots and Preview Videos
- You need screenshots for at least the 6.7" iPhone (iPhone 15 Pro Max) and, if you support iPad, the 12.9" iPad Pro — other sizes can inherit from these.
- Screenshots must show the actual app UI. Lifestyle frames around them are fine, but the screen content must be accurate and real.
- App Preview videos (optional, but worth it for conversion): up to 30 seconds, must start with real app footage. No pricing claims allowed in the video.
- If you can, localise your screenshots for top markets. Even a translated screenshot can noticeably lift conversion rates.
Step 3 — App Privacy (Nutrition Labels)
This is the section that trips up the most developers — especially those who haven't audited their third-party SDKs.
You need to declare every category of data your app collects: location, identifiers, usage data, purchases, contacts, health data, and so on.
The tricky bit: you're responsible for what your SDKs collect, not just your own code. If you've integrated Firebase Analytics, for example, that SDK collects device identifiers linked to a user's identity. You need to declare that.
If your app uses tracking (targeting ads, measuring across apps or websites), you also need to implement Apple's App Tracking Transparency (ATT) prompt. Failing to do this when required will get your app rejected.
💡 Tip: Before you fill in this section, go to the privacy documentation page for every SDK you've included and make a list of what each one collects. It takes an hour and saves you a rejection.
Step 4 — Age Rating Questionnaire
Apple gives you a questionnaire about your app's content and calculates the rating for you (4+, 9+, 12+, or 17+). Answer honestly.
If your app has any gambling-adjacent mechanics — loot boxes, spin wheels, random prize mechanics — be aware these may trigger additional review. Apps that misrepresent their content aren't just rejected; they can be removed entirely after the fact.
Step 5 — Pricing, Availability & In-App Purchases
Set your base price (or free). Apple auto-converts prices across regions — review key markets manually because the conversion sometimes produces awkward price points.
A few important notes on in-app purchases:
- Any digital goods sold inside an iOS app must use Apple's payment system. This includes subscriptions, premium features, virtual currency — all of it. External payment links are generally not permitted (there are narrow exceptions following legal rulings, but consult Apple's current guidelines before assuming you qualify).
- In-app purchases must be created and approved in App Store Connect before your app can reference them. Build in extra time for this.
- You can restrict your app to specific countries if needed — useful for compliance or phased rollouts.
Step 6 — Build Your App & Upload via Xcode
Time to get your hands slightly dirty.
- In Xcode: Product → Archive. Make sure you're using a Distribution certificate and the correct provisioning profile.
- Once archived, go to Xcode Organizer → Distribute App → App Store Connect.
- Alternatively, use Transporter — Apple's standalone upload tool — if you prefer not to do it through Xcode directly.
Before you upload, make sure:
- Your build version number is higher than any previously uploaded build.
- App Thinning is enabled — this reduces the download size for users, which matters on metered connections.
Check how to get a TestFlight invitation code if you plan to do beta testing for quality assurance before putting it live.
Or see how to invite testers to TestFlight so they can test realtime and give feedback.
Step 7 — Submit for Review
In App Store Connect, select your uploaded build, attach it to your app record, and work through any fields flagged with a red warning badge — every one of those must be resolved before you can submit.
Use the "Notes for the Reviewer" field. This is a commonly skipped step that causes completely avoidable rejections. Explain any unusual flows, provide sandbox login credentials (every time — don't assume), and give context for any features that might look odd without explanation.
Then choose your review type:
- Standard review: typically 24–48 hours.
- Expedited review: for critical bug fixes only — Apple may decline if the reason isn't compelling.
After you submit, watch the status move: Waiting for Review → In Review → Ready for Sale (or Rejected with a reason).
How To Publish on Google Play Store
Step 1 — Create Your Google Play Developer Account
Go to play.google.com/console and sign in with a Google account.
- Pay the one-time $25 registration fee.
- Complete identity verification — required for all accounts created after November 2023. You'll need a government-issued ID, and processing can take up to 3 business days.
🚨 New account requirement (2024/2025): If your account was created after November 13, 2023, you cannot publish directly to production. You must first run a closed testing track with at least 12 real, opted-in testers for a minimum of 14 days. Only after that is production access unlocked. This catches a lot of new developers by surprise — plan for it.
👉 Never set up a Google Play Console account before? Follow our complete step-by-step guide to creating your Google Play Console developer account — it covers identity verification, the $25 fee, and every screen you'll encounter.
Step 2 — Create Your App in Play Console
Dashboard → All Apps → Create App.
Choose:
- App or game
- Free or paid (paid requires a merchant account)
- Default language
- App name (max 50 characters)
Agree to the developer policies and US export laws (yes, you have to read them — or at least scroll past them convincingly).
You'll land on the app's Dashboard, which uses a task checklist. Every item on that checklist needs to be completed before the submission button becomes available.
Step 3 — Store Listing
Text Fields
Short description (80 chars)
This appears in search results. Make it punchy and make it count — users see this before they even open your listing.
Full description (4,000 chars)
Unlike Apple, Google Play does index this text for search. Keywords in the first paragraph carry the most weight. Write it for humans first, then check that your important terms appear naturally.
App name (50 chars)
You have more room than Apple here — use it wisely.
You can also create Custom store listings for specific countries or audiences — useful for tailoring your pitch to different markets.
Graphic Assets
| Asset | Specs | Notes |
|---|---|---|
| Feature graphic | 1024×500 px | Prime real estate — displayed at the top of your listing |
| Screenshots (phone) | Min 2, max 8 | Mandatory |
| Screenshots (tablet, TV) | Optional per device type | Strongly recommended for tablet-optimised apps |
| Icon | 512×512 px PNG | No rounded corners — Google applies them automatically |
| Promo video | YouTube URL | Must be publicly viewable; "unlisted" is fine, "private" is not |
Step 4 — App Content Ratings (IARC)
Google uses the IARC (International Age Rating Coalition) questionnaire — one form gives you ratings across multiple regions simultaneously. It's actually more efficient than Apple's system.
Be accurate about features like user-generated content, in-app messaging, and social functionality — these affect both your rating and which territories your app is available in. You can't skip this step.
Step 5 — Data Safety Section
Similar to Apple's Nutrition Labels, Google's Data Safety section asks you to declare:
- What data you collect
- Whether it's shared with third parties
- Whether users can request deletion of their data
This appears prominently on your listing — users do read it, and Google cross-references it against your actual app behaviour using automated testing. If there's a mismatch, your app can be removed. Don't guess — know what your app and its SDKs actually collect. For a section-by-section walkthrough with real declaration examples, see How to Fill Out Google Play's Data Safety Form (2026, With Examples).
Step 6 — Set Up Testing Tracks Before Production
Google Play uses a track system to move your app from internal testing toward a public launch:
| Track | Who can access | Time requirement |
|---|---|---|
| Internal Testing | Up to 100 testers | Available almost immediately after upload |
| Closed Testing (Alpha) | Specific invited groups | 12 testers, 14 days minimum for new accounts |
| Open Testing (Beta) | Anyone who opts in | None — great for real-world bug discovery |
| Production | All users | Unlocked after closed testing requirements are met |
One important note: the track system is one-directional. You move internal → closed → open → production. Plan your rollout sequence before you start uploading builds.
Google Play Testing Tracks Progression
Step 7 — Prepare and Upload Your App Bundle
AABs only. Google Play no longer accepts APK uploads for new apps — Android App Bundle (AAB) format is mandatory. If you're still building APKs, update your build process now. Check our guide on APK vs AAB to understand the key differences and why Google requires bundles.
Make sure your app targets the current Android API level — Google updates its minimum requirements annually and enforces them. Check your Play Console dashboard for the current requirement. ⚠️ Important: Google has set an August 31, 2026 deadline for Target SDK 35 compliance — apps that don't meet it risk being removed from the Play Store entirely.
About your keystore: Sign your AAB with a release keystore, and — this is critical — back it up somewhere safe and never lose it. Without your keystore, you cannot publish any future updates to the same app. It's not recoverable.
The safer option is Play App Signing: you give Google an upload key, and they manage the actual signing key for distribution. If you ever lose your upload key, you can replace it. Highly recommended.
Step 8 — Release to Production
Navigate to Production → Create new release → upload your AAB. Write your release notes in every language you support — "Bug fixes" is not a release note; tell your users what actually changed.
Then choose your rollout percentage. You don't have to go straight to 100%:
- 10% rollout: watch your crash rate and Android Vitals for 24 hours.
- If stable: 50% → 100%.
- If not stable: halt the rollout and fix the issue.
Before you finalise, check the pre-launch report — Google automatically runs your app on real physical devices and flags crashes, accessibility issues, and security problems. Take the warnings seriously.
Review typically takes 1–7 days, depending on your app's category and permissions.
App Store Optimization
Why ASO Matters as Much as the Submission Itself
Publishing your app is step one. Getting anyone to actually find it is the real challenge.
The App Store and Google Play each host millions of apps. Most of them never get discovered by anyone who wasn't already looking for them specifically. App Store Optimization (ASO) is the practice of optimising your listing so that you show up when people search for things you're relevant to — it's SEO for app stores.
And it's not optional if you want organic growth.
Keyword Strategy for Each Platform
The two stores treat keywords very differently:
Apple App Store:
Only three fields are indexed for search — App Name, Subtitle, and the Keywords field. Your description is not searchable. That means you have approximately 160 characters of keyword real estate total (30 + 30 + 100). Every character matters. Don't repeat words that are already in your title; Apple won't count them twice. Research high-volume, lower-competition terms and fit as many as possible across these three fields.
Google Play:
The title, short description, and full description are all indexed. Keyword repetition across these fields (in moderation — don't stuff) reinforces your ranking signals. Your 4,000-character description is actually a keyword opportunity on Android.
ASO Search Indexing Differences
For keyword research, tools like AppFollow, Sensor Tower, and AppTweak are the industry standard. In a pinch, the stores' own search suggest feature gives you real user search terms for free.
One more thing: localise your keyword strategy for each major market. Don't just translate — re-research keywords in each language independently. What users search for in German is not always a direct translation of what users search for in English.
Ratings, Reviews & Conversion Rate Optimization
Here's a stat that should motivate you: apps with higher ratings rank higher in search results. Ratings aren't just vanity metrics — they're a ranking signal.
Prompt users for reviews at the right moment:
- After they complete a task successfully
- After they've used the app a few times
- Never on first launch, and never after something goes wrong
On iOS: Use SKStoreReviewRequestAPI — the native in-app review prompt that Apple provides. You can trigger it up to three times per year per user.
On Android: Use the In-App Review API — same idea, keeps users inside the app rather than sending them to the Store.
Respond to reviews, especially negative ones. Prospective users read your responses. A thoughtful reply to a 1-star review says "this developer cares" far louder than the review itself.
Test your store listing visuals: Google Play supports native store listing experiments (test icons, screenshots, feature graphics). Apple offers Product Page Optimization for the same purpose. Run these — even a 5% improvement in conversion rate compounds significantly over time.
Post-Launch: Monitoring, Updates & Staying Compliant
Launch day is not the finish line. It's more like the starting gun for a completely different race.
How to Monitor Your App's Health After Launch
On Apple:
App Store Connect Analytics shows impressions, downloads, sessions, crashes (via MetricKit), and subscription metrics. Check it regularly.
On Google Play:
The Android Vitals dashboard is your most important tool. It tracks ANR rate (App Not Responding), crash rate, and slow rendering. If your numbers go above Google's bad behaviour thresholds, Google can actively deprioritise your app in search results.
For both platforms:
Set up Firebase Crashlytics (free, works on both iOS and Android) before you launch. It gives you real-time crash reports with stack traces, so you know exactly what broke and where.
Track your rating week-over-week. A sudden drop almost always correlates with a specific OS update or app version — and if you're not watching, you won't catch it until the reviews pile up.
Publishing App Updates — The Right Way
- Version numbers: Use semantic versioning (major.minor.patch — e.g., 2.1.3). Increment correctly and never reuse a version number.
- Release notes: Write them for your users, not yourself. "Fixed crash on startup for iOS 17 users" is helpful. "Performance improvements" is not.
- Staged rollouts on Google Play: Use them for every significant update. Roll to 10%, monitor Android Vitals for 24 hours, then expand.
- Phased release on Apple: Apple offers a 7-day phased rollout (1% → 2% → 5% → 10% → 20% → 50% → 100%). Use it.
- Policy compliance is ongoing. Both stores update their policies regularly. Subscribe to the Apple Developer News email and the Play Console newsletter so you're not caught off guard.
Apple 7-Day Phased Release Schedule
The Most Common Reasons Apps Get Rejected (And How to Avoid Them)
Apple-Specific Rejection Traps
- Locked features with no reviewer access. If a reviewer can't get past your login screen, they'll reject the app. Always provide test account credentials in the reviewer notes — every single submission.
- Non-compliant payment implementation. Using Stripe, PayPal, or web checkout for digital goods inside an iOS app. Physical goods and services are exempt, but digital content is not.
- Misleading metadata. Screenshots or descriptions that don't match the current build. Reviewers test what you describe.
- Missing or broken privacy policy link. Common, and completely avoidable.
- Submitting an unfinished app. Beta labels, "Coming Soon" placeholders, or broken flows all fail under Apple's Minimum Functionality guideline (2.1).
Google Play-Specific Rejection Traps
- Skipping the 14-day closed testing requirement. The production submission button literally won't appear until you've completed it. This is not optional for new accounts. Read our full breakdown of what Google Play's 12-tester closed testing requirement actually means — including how to find testers and how to pass it first time.
- Uploading an APK instead of an AAB. New app submissions require the Android App Bundle format.
- Data Safety mismatches. Declaring "no data collected" when you've bundled an analytics SDK. Google's automated testing will find this.
- Targeting an outdated API level. Google enforces minimum API targets annually and will reject or demote apps that don't comply.
- Unnecessary permissions. Requesting location, contacts, or SMS access in an app where those aren't core to the use case raises red flags immediately.
Mistakes That Apply to Both Platforms
- Losing your signing credentials. Losing your Apple Distribution certificate private key or your Android keystore means you cannot push updates to your app — ever. Back them up immediately in a secure location (a password manager with encrypted storage is fine).
- Going straight to 100% rollout. Releasing to all users at once with no rollback plan is high-risk. Use phased rollouts.
- English-only metadata in non-English markets. Publishing without localised metadata in markets where users don't primarily speak English significantly suppresses your discoverability.
- No post-launch monitoring plan. A critical bug can silently tank your ratings and retention while you celebrate the launch. Set up crash monitoring before you go live.
What Experienced Developers Do Differently
Before You Submit
- Build your submission checklist into your CI/CD pipeline. Run automated accessibility audits, memory profiling, and lint checks on every build. Catch issues before they reach a reviewer.
- Create a dedicated reviewer test account in your backend — one with all features unlocked, no paywalls, no restrictions. Document its credentials and paste them into the reviewer notes field on every single submission. Don't assume the reviewer remembers from last time.
- Submit mid-week, outside major holidays. Anecdotally, review times are shorter and attention is sharper during quiet periods. Submitting on December 23rd is an act of optimism.
Metadata & ASO Strategy
- Treat your first publish as a hypothesis. Schedule an ASO audit at 30, 60, and 90 days post-launch using your actual keyword ranking and conversion data — then iterate.
- Use all available character limits. Leaving keyword field characters unused on Apple, or a short description under 70 characters on Google, is leaving ranking potential on the table.
- Localise for your top three markets on day one. Don't wait until you have the budget and resources — localised metadata at launch compresses your time-to-traction in those markets.
Release Management
- Coordinate your submission with your marketing campaign. Use Manual Release on Apple and a future publish date on Google so your listing goes live exactly when your campaign does — not two days earlier.
- Keep a "golden" signed build archived for every version. If a critical regression appears in a newer version, you may need to roll back.
- Version-gate new high-risk features behind a remote config flag. This lets you disable a feature server-side without submitting a new build, which is a lifesaver when something breaks in production.
Long-Term Compliance
- Audit your app against both stores' policy updates at least quarterly. Both platforms publish changelogs for their policies.
- When you integrate a new third-party SDK, re-review your privacy declarations on both platforms immediately. SDK updates can change data collection behaviour without making it obvious in their changelogs.
- Respond to Android Vitals signals within 48 hours of a spike. Teams that do this maintain better store standing and avoid the algorithmic demotion that comes with persistently poor metrics.
Frequently Asked Questions
Q1: Can I publish the same app on both stores at the same time?
Yes — neither platform requires exclusivity. Most developers submit to both simultaneously.
The timelines do differ: Apple typically reviews in 24–48 hours, while Google Play can take 1–7 days. This means your Android version may go live a few days after your iOS version. Plan your launch communications accordingly.
Also worth knowing: the two stores have no connection to each other. Metadata updates, version numbers, and release schedules are managed completely independently.
Q2: How much does it cost to publish an app on each store?
- Apple App Store: $99/year for an individual developer account; $299/year for an enterprise account. Note: the enterprise program is for distributing apps internally within a company — it's not for publishing on the public App Store.
- Google Play: $25 one-time, lifetime fee per developer account.
Neither fee guarantees approval. You're paying for access to the program, not a pass through review.
Q3: What happens if my app is rejected? Can I appeal?
Yes, on both platforms.
Apple: Reply directly to the rejection message in App Store Connect's Resolution Center with questions or clarifications. This often resolves misunderstandings without a full resubmission. If you believe the rejection is unfair or inconsistent with published guidelines, you can escalate to Apple's App Review Board.
Google Play: Appeal through the Play Console Help Center. Reference the exact policy section you believe you comply with and provide clear, specific context.
On both platforms: do not resubmit immediately without addressing the cited issue. Repeated rejections for the same reason can flag your account.
Q4: Do I need a Mac to publish an iOS app?
Traditionally, yes — Xcode only runs on macOS, and you need Xcode to build and archive an iOS app.
There are exceptions: if you use cross-platform frameworks like React Native or Flutter, cloud build services (Codemagic, Bitrise, GitHub Actions with macOS runners) can handle the build step without you owning a Mac directly.
App Store Connect itself is browser-based and works on any OS. The Mac requirement is specifically for the build step.
Q5: How long does app review take in 2025?
- Apple: Typically 24–48 hours for most apps. Apps with special entitlements (HealthKit, NFC, etc.) may take 3–5 business days.
- Google Play: 1–3 days for most apps. Apps in sensitive categories (children's content, finance, VPN) or with dangerous permissions can take up to 7+ days.
Both platforms offer faster processing for critical bug fixes. Apple has an Expedited Review request; Google Play updates generally process faster than new app submissions.
Q6: Can I publish a free app and add paid features later?
Yes, on both platforms. You can launch as free and introduce in-app purchases or subscriptions in a later update.
One planning note: in-app purchase items must be created and approved in each platform's console before your app build can reference them. Factor that into your update timeline — it adds a review cycle on top of your app review.
Also worth knowing for Apple specifically: once you make a paid app free, you cannot make it paid again. Going free is permanent for that listing. Plan accordingly.
Q7: What's the difference between an individual and an organization developer account?
Individual accounts are tied to a personal Apple ID or Google account. Simpler to set up, but harder to transfer if the person behind the account leaves.
Organization accounts require additional verification (Apple needs a D-U-N-S number; Google requires business documents) but allow team-based access with role management. On Apple, you can assign granular permissions: Admin, App Manager, Developer, Marketing, Finance. Individual accounts can't do any of that.
If you're building anything for a company, agency, or team — or if you anticipate the account outlasting any one individual — use an organization account.
You're Ready to Ship — Here's What to Do Next
Let's recap the whole journey:
- Set up your developer accounts — and budget time for identity verification.
- Sort out the legal basics — privacy policy, terms of service, data declarations.
- Build clean, tested, accessible builds — test on real devices, fix crashes before submitting.
- Optimise your metadata — name, keywords, description, and screenshots determine whether anyone ever finds your app.
- Submit through each store's portal — follow every checklist item, fill in the reviewer notes.
- Monitor after launch — set up crash reporting before go-live, watch your Android Vitals and App Store Connect analytics.
Key things to remember:
- Budget a 2–3 day buffer before your target launch date. Things always take longer than expected, especially if you get a rejection on your first submission.
- Your metadata is as important as your code. Plenty of great apps are invisible because no one optimised the listing.
- Compliance is ongoing. Both stores update their policies. Subscribe to their developer newsletters.
- Staged rollouts are your safety net. Always use them for production releases.
Start today:
- Create your developer accounts now — the verification clock starts ticking before you're ready to submit.
- Run through the pre-submission checklist against your current build.
- Set up Firebase Crashlytics (or your crash monitoring tool of choice) before launch, not after.
Good luck. Your app deserves to be found.
Quick Reference Links:
- App Store Connect
- Google Play Console
- Apple App Review Guidelines
- Google Play Developer Policy Center
Last verified: May 2025