How to Create a Google Play Console Developer Account in 2026 (Step by Step)
So you've built an Android app — or you're about to — and now you need to actually put it on the Google Play Store. That means getting yourself a Google Play Console developer account.
Here's the thing: most guides you'll find online are out of date. They skip the identity verification step that Google quietly made mandatory for new accounts in 2025, and they don't mention the stricter business verification requirements that caught a lot of developers off guard. If you follow one of those old guides, you might hit a wall halfway through and wonder what went wrong.
This guide covers everything as it actually works in 2026 — including the ID verification step, the D-U-N-S number requirement for organisations, and the updated payment profile flow. By the time you're done reading, you'll have a fully verified, active developer account ready to publish your first app.
What Is Google Play Console and Why Do You Need a Developer Account?
A Quick Overview of Google Play Console
Google Play Console is the backend dashboard where Android developers manage their apps on the Play Store. Think of it as the control room for your app's entire lifecycle — from first upload to ongoing maintenance.
From the Play Console you can:
- Publish and update your Android apps
- Manage your store listing (title, screenshots, description)
- Monitor crash reports and Android Vitals
- Run A/B tests on store listings
- Set up monetisation through in-app purchases or subscriptions
- Review user ratings and respond to them
It's used by solo indie developers, small studios, agencies managing apps for clients, and large enterprises alike.
What You Can and Cannot Do Without a Developer Account
Without a developer account, you can still browse the public Play Store, download apps as a regular user, sideload APKs on your own device, and build apps locally in Android Studio. What you cannot do is publish anything, manage store listings, or access developer analytics.
For freelancers: this matters because you'll need either your own developer account or access to a client's account (via the user permissions feature) to do any publishing work. You can't publish under a client's brand using your own account — the app will show up under whichever developer name is on the account.
Individual Account vs. Organisation Account — Which One Do You Need?
This is the most important decision you'll make in this whole process, because you cannot change your account type after registration. There's no migration path. Choose wrong and you'll need to create a new account, re-publish all your apps, and lose your review history.
Here's how to decide:
+-------------------------------------------------------------+
|               WHICH ACCOUNT TYPE DO YOU NEED?               |
+-------------------------------------------------------------+
                               |
             Is this for a registered legal entity?
                 /                           \
             [YES]                           [NO]
               |                               |
        +-------------+                 +--------------+
        | Organisation|                 |  Individual  |
        |   Account   |                 |   Account    |
        +-------------+                 +--------------+
               |                               |
       Requires D-U-N-S Number         No D-U-N-S Needed
     Company name shown on Store     Personal name on Store
| Feature / Requirement | Individual Account | Organisation Account |
|---|---|---|
| Who it's for | Solo developers, indie makers, freelancers | Companies, startups, agencies |
| Legal requirement | Personal Google account | Registered business entity |
| Business verification | Not required | D-U-N-S number required |
| Store listing shows | Your personal name | Company/brand name |
| Best for | Personal projects, side apps | Apps published under a brand |
⚠️ This choice is permanent. Take a minute to think it through before clicking anything.
What You Need Before You Start (Prerequisites Checklist)
Gather all of this before you sit down to register. Having everything ready saves you 30–60 minutes of interruptions and reduces the chance of something going wrong mid-process.
1. A Google Account
You need a standard Google or Gmail account in good standing. A couple of things to watch out for:
- Don't use a Google Workspace account that's tied to a company you don't fully own. If you lose access to that Workspace account later, you lose access to all your published apps — permanently.
- Consider creating a dedicated Google account just for your developer identity. It keeps things clean and reduces risk.
2. A Valid Payment Method
Google charges a one-time, non-refundable registration fee of $25 USD. This is not an annual fee — you pay it once and your account stays active.
Accepted payment methods include credit cards and debit cards (availability varies by country). Google Play balance works in a few regions. Prepaid cards and virtual cards are often rejected, so stick with a standard bank-issued card if you can.
The $25 covers your account, not individual apps. Publish one app or a hundred — same fee.
3. Government-Issued Photo ID (New in 2025–2026)
This one surprises people who followed older guides. All new individual accounts now require identity verification using a government-issued photo ID.
Accepted documents typically include a passport, national ID card, or driver's licence — though exact requirements vary by country. The name on your ID must match the name on your Google account exactly. If there's a mismatch (even a middle name difference), verification will fail. Fix your Google account name first if needed.
4. Business Verification Documents (Organisation Accounts Only)
If you're registering as an organisation, you'll need:
- A D-U-N-S number from Dun & Bradstreet (more on how to get one below)
- Your legal business name exactly as it appears in registration records
- Your registered business address
- Details of an authorised representative who can confirm the registration
Getting a D-U-N-S number is free but takes 2–5 business days through the standard process, so start this early.
5. A Phone Number for 2-Step Verification
You'll need a real, SMS-capable phone number during registration. VoIP numbers (like Google Voice) are frequently rejected. Use a physical SIM.
6. A Stable Internet Connection and Compatible Browser
Use Google Chrome (latest version) for the smoothest experience. Temporarily disable any pop-up blockers before you start. The whole process takes around 20–45 minutes, not counting ID verification processing time.
Step-by-Step: How to Create Your Google Play Console Developer Account
Step 1 — Sign In to Google Play Console
Head to play.google.com/console and click "Go to Play Console".
Sign in with the Google account you want permanently associated with this developer account. This link is forever — you cannot transfer a developer account to a different Google account later.
What If You're Already Signed Into Multiple Google Accounts?
This is a common trip-up. Chrome lets you be signed into several Google accounts at once, and it's easy to accidentally register with the wrong one.
Before you click anything, check the account avatar in the top-right corner of your browser. If it's not the right account, click it, choose "Switch account", and sign in with the correct one. Do this before you hit the Play Console URL, not after.
Step 2 — Begin the Developer Account Registration
Once you're signed in, you'll see a welcome screen. Click "Get started".
The first real decision: choose Personal (individual) or Organisation. This is the account type choice we talked about in the prerequisites section — and remember, it's permanent.
If you're a solo developer publishing your own apps, choose Personal. If you're registering on behalf of a company or want apps listed under a brand name, choose Organisation.
Step 3 — Enter Your Developer Profile Information
This is where you fill in your public-facing details.
- Developer name: This is what users see next to your app on the Play Store. It can be your real name, a studio name, or a brand name. Choose carefully — changing it later requires submitting a formal request to Google, and it's not instant. Don't use trademarked names you don't own.
- Email address: This is publicly visible on your store listings. Use a support or business email rather than a personal inbox you might stop checking.
- Website (optional): Worth adding. It adds credibility to your store presence.
- Phone number: Used for account recovery, not shown publicly.
Best Practices for Your Developer Name
Your developer name has a quiet but real effect on whether users trust your app. Apps from "John Smith" and apps from "Pixel Labs" give users different impressions, even if both are perfectly good.
A few tips:
- Keep it consistent with how you present yourself on other platforms (your website, the App Store, social media)
- Short, memorable names work better than long generic ones like "Best Mobile App Solutions Ltd"
- If you're building a portfolio of apps under a brand, use the brand name rather than your personal name
Step 4 — Complete Identity Verification (Individual Accounts)
After entering your profile info, Google will prompt you to verify your identity. Click "Verify now".
How the ID Verification Process Works
You'll be redirected to a third-party identity verification provider (Google has used services like Persona for this). The process goes like this:
- Upload a photo of the front and back of your ID
- Take a selfie or complete a short live video check
- Submit and wait
Processing is usually instant or within a few hours. In some regions it can take up to 3 business days, so don't panic if it doesn't resolve immediately.
Common ID Verification Errors and How to Fix Them
| Problem | Fix |
|---|---|
| Name on ID doesn't match Google account | Update your Google account name first, then re-submit |
| Blurry or cropped photo | Retake in good lighting with all four corners of the ID visible |
| Expired ID | Use a different valid document |
| Stuck in "pending" for more than 3 days | Contact Google Play support through the Help Center |
Step 5 — Complete Business Verification (Organisation Accounts Only)
For organisation accounts, you'll be asked to enter:
- Your legal business name (exactly as registered — no abbreviations)
- Your D-U-N-S number
- Your business address and authorised representative details
Google may contact the listed representative directly to confirm the details. Make sure whoever you list is expecting a potential call or email from Google.
How to Get a D-U-N-S Number If You Don't Have One
A D-U-N-S number is a unique 9-digit identifier for businesses, issued by Dun & Bradstreet. Getting one is free through the standard process, but it takes 2–5 business days.
Here's what to do:
- Go to dnb.com and search for your business first — you may already have one without knowing
- If not, request a new D-U-N-S number through their free registration process
- While you wait, prepare everything else — your store listing, app assets, screenshots, etc.
- Expedited options are available for a fee if you're in a hurry
Step 6 — Set Up a Google Payments Merchant Account
If you plan to sell paid apps or offer in-app purchases, you'll need to set up a Payments Merchant Center account. Navigate to Settings → Payments profile and enter:
- Your legal name (individual or business)
- Your physical address
- Tax information (Google will prompt you for the relevant form based on your country)
- Bank account details for receiving payments
Understanding Google's Tax Requirements by Region
- US developers: W-9 form required
- Non-US developers: W-8BEN (individuals) or W-8BEN-E (entities) may be required
- EU-based businesses: VAT registration may apply
ℹ️ You don't need a Payments Merchant account to publish free apps. Skip this step for now if you're starting with a free app and come back when you're ready to monetise.
Step 7 — Pay the One-Time $25 Registration Fee
On the final step, you'll be prompted to pay the $25 USD fee. Enter your credit or debit card details, review the billing summary, and confirm payment.
Save your receipt. It's your proof of registration and may be useful for tax records.
What Happens After Payment
Your account enters a verification and activation queue. Most accounts are activated within a few minutes to a few hours. Some accounts are held for additional review — up to 3 business days — particularly for brand-new accounts. This is normal. You'll receive an email when your account is active.
Step 8 — Explore and Configure Your New Developer Dashboard
Once your account is activated, you'll land on the Play Console home screen. Here's a quick orientation:
- All apps — where you'll create and manage app listings
- Inbox — policy notices, review status updates, important alerts
- Policy status — shows whether your account or any apps have policy issues
- Settings — account details, permissions, payment profile
Essential Settings to Configure Right Away
Don't skip these before you do anything else:
- Developer page: Add your bio, logo, and featured graphic. This is what users see when they click your developer name on the Play Store.
- Contact details: Set your public email to a support inbox, not a personal one.
- 2-Step Verification: Enable it immediately. Google may restrict publishing capabilities on accounts without it, and accounts without 2SV are far more vulnerable to hijacking.
- User management: If you're working with a team, go to Users and permissions to invite team members and assign roles (Admin, Release Manager, Finance, etc.)
After Account Creation — What to Do Next
Understand Google Play's Developer Policies Before You Build
Before you write a single line of app code, spend 20 minutes reading the Developer Program Policies. It sounds boring, but it's genuinely useful.
Policy violations can get your app removed or your account terminated. And because the $25 fee is non-refundable, a terminated account means you've lost both the fee and any work you put in. The main areas to know:
- Content policies — what types of content are and aren't allowed
- Monetisation policies — rules around in-app purchases and subscriptions
- Data safety requirements — what you need to disclose about data collection
Set Up Your First App Listing (Before You Have an APK)
Here's something most developers don't know: you can create a draft app listing in Play Console before your app is even finished. This lets you reserve your app name (names are first-come, first-served) and start filling in the store listing details early.
Get started on:
- App title
- Short description (80 characters)
- Full description (4,000 characters)
- Category and content rating
Learn the App Review Process Timeline
New apps typically go through review in 1–3 days. Updates to existing apps are often reviewed faster. Expect longer reviews if your app deals with sensitive content, requests unusual permissions, or falls into the health or finance categories.
You can track review status directly in your Play Console dashboard.
Prepare Your App for Submission
When your app is ready, you'll need:
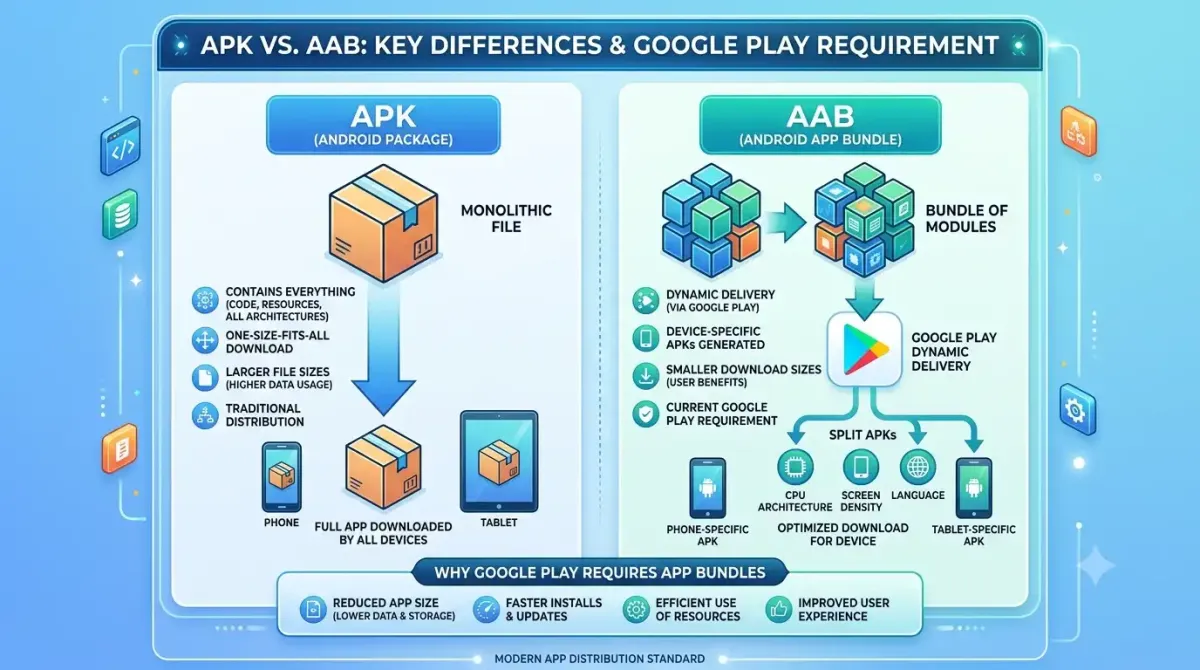
- A signed Android App Bundle (AAB) file — Google no longer accepts APKs for new apps (this changed in August 2021)
- At least 2 screenshots per device type
- A feature graphic (1024 x 500 px)
- A privacy policy URL
- A completed Data Safety section — this one is mandatory and must be accurate (see our step-by-step guide to filling out Google Play's Data Safety form)
Common Mistakes to Avoid When Creating Your Developer Account
Mistake 1 — Using a Temporary or Shared Google Account
If you lose access to the Google account tied to your developer account, you lose access to all your published apps. There's no recovery path. Use an account you fully own and will keep for the long term.
Mistake 2 — Choosing the Wrong Account Type
There's no migration from individual to organisation. If you realise later you should have picked the other type, you'll need a brand new account and you'll have to re-publish everything — losing your review history in the process.
Mistake 3 — Entering a Developer Name You'll Want to Change
Developer name changes aren't self-service. You have to submit a formal request to Google and wait for approval. Pick something you're happy with from the start.
Mistake 4 — Skipping 2-Step Verification
Google may limit your publishing capabilities on accounts without 2SV enabled. More importantly, accounts without it are a prime target for account takeovers. Enable it the moment your account is created.
Mistake 5 — Not Reading the Developer Program Policies First
Policy violations can result in app removal or permanent account termination. A terminated account also forfeits the $25 fee — Google won't refund it. Read the policies. It takes less time than you think.
Troubleshooting — Google Play Console Account Issues
"Your account registration could not be completed"
This error usually means one of three things:
- Payment failed — try a different card, or check with your bank whether the charge was blocked
- Name mismatch on ID — your Google account name and ID name must match exactly
- Region restriction — a small number of countries have limited access to Google Play publishing; check the supported locations list
Identity Verification Stuck or Rejected
If your verification was rejected, Google will email you with a reason. Common fixes:
- Re-submit with a different document (e.g., switch from driver's licence to passport)
- Correct the name mismatch on your Google account and resubmit
- If you believe the rejection is an error, contact Play Console Support to appeal
Payment Declined or Not Processing
- Try a different card
- Avoid prepaid cards and virtual cards — they're frequently declined
- Contact your bank if the charge appears to be getting blocked on their end
Account Suspended or Flagged After Creation
Common triggers include using a VPN during registration or a billing address that doesn't match your account details. To appeal, go to the Play Console Help Center and submit an account appeal. Be thorough in your explanation.
Can't Add Team Members or Change Permissions
Only the account owner can manage user permissions. Confirm you're signed in with the account that originally registered. To invite users: Settings → Users and permissions → Invite new user.
Frequently Asked Questions
How much does it cost to create a Google Play Console developer account in 2026?
The registration fee is $25 USD, paid once. There are no annual fees. Your account stays active as long as it remains in good standing.
Once you start earning, Google takes a 15% service fee on your first $1 million in annual earnings, then 30% beyond that. For subscriptions, the rate is 15% after a subscriber's first year.
Google's Service Fee
$75,000Google's Cut Rate
15.0%Your Take-Home Pay
$425,000How long does it take to get a Google Play developer account approved?
| Stage | Typical time |
|---|---|
| Payment and basic setup | A few minutes to a few hours |
| Identity verification (individual) | Usually instant to 24 hours; up to 3 business days in some regions |
| Organisation verification | 2–7 business days, depending on D-U-N-S status |
| First app review after activation | 1–3 business days |
Can I have more than one Google Play developer account?
Officially, Google allows one developer account per person or entity. Creating multiple accounts for the same individual is a policy violation and can result in both accounts being terminated.
If you're a freelancer or agency managing apps for multiple clients, use the user permissions feature. Your clients each have their own developer accounts, and you get added as an authorised user with the appropriate role.
Do I need a business entity to create a Google Play developer account?
No. Individual accounts are fully supported. You can publish apps and earn money from them as an individual developer without any registered business. A business entity is only required if you choose the Organisation account type.
What happens if I fail the identity verification step?
Google will send you an email explaining why the verification failed. From there you can:
- Re-submit with a different document
- Correct any name mismatch on your Google account and resubmit
- Contact Play Console Support to appeal if you think the rejection was an error
Can I change my developer name after account creation?
Yes, but it's not immediate. You submit a change request through Play Console settings, and Google reviews it. Your existing apps remain live under the old name until the change is approved.
Is the $25 fee refundable if my account gets rejected or suspended?
No. Google's terms are clear: the $25 registration fee is non-refundable regardless of what happens to your account afterwards. This is another reason to make sure everything is set up correctly before you pay.
Conclusion
Summary — What You've Learned
Here's a quick recap of everything covered in this guide:
- The difference between individual and organisation accounts — and why the choice is permanent
- Every prerequisite you need before starting (Google account, government ID, $25, D-U-N-S for organisations)
- The 8-step process from visiting Play Console to having a fully configured developer dashboard
- The most common mistakes and how to avoid them
- Troubleshooting fixes for the issues most likely to slow you down
Key Takeaways
- Choose your account type carefully — individual vs. organisation cannot be changed later
- Identity verification is now mandatory for new individual accounts — have your government ID ready before you start
- The $25 fee is one-time and non-refundable — set up your Google account correctly before you pay
- Enable 2-Step Verification immediately after your account is created
- Read the Developer Program Policies before building your first app — it'll save you a lot of headaches later
Your Next Steps
- ✅ Create your developer account using the steps above
- ✅ Draft your first app store listing (you can do this before your app is finished)
- ✅ Review the Data Safety section requirements
- ✅ Explore the pre-launch report and Android Vitals tools in your new dashboard
This guide is reviewed and updated regularly to reflect changes to Google Play Console. Last reviewed: July 2026.