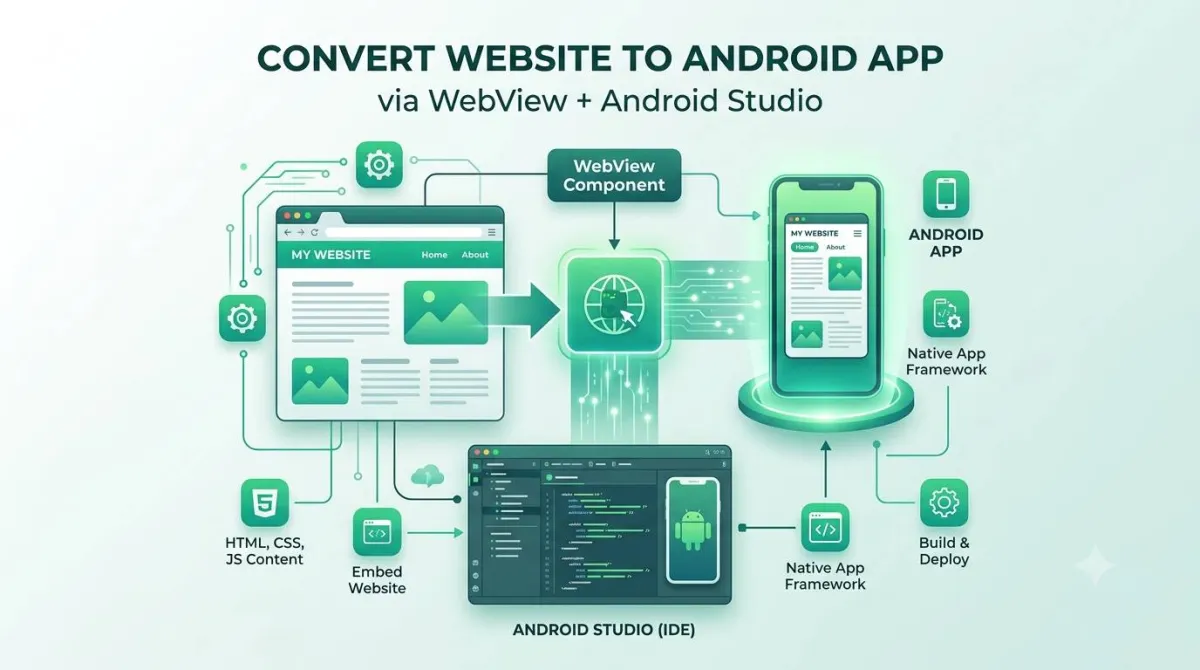
Convert Website to Android App Using WebView + Android Studio
So you've got a website and you want an Android app — but you don't want to rebuild everything from scratch. Good news: you don't have to.
Using Android's built-in WebView component, you can wrap your existing website inside a native Android app, list it on the Play Store, and have it working on real phones — without rewriting a single line of your web code.
This guide covers the full journey: from first project setup all the way to a signed, Play Store–ready app. You'll find working code in Java, Kotlin, and Jetpack Compose. You'll also find the security stuff, the performance stuff, and the "why did my app get rejected?" stuff that most tutorials quietly skip.
Whether you're a solo developer, an agency, or a founder who just learned what an APK is this morning — this is your guide.
01What Is a WebView App (and Is It Right for You in 2026)?
How Android's WebView Actually Works
android.webkit.WebView is a system component built into every Android device. Under the hood, it's powered by Chromium — the same engine that runs Google Chrome. So when your app loads a URL, it's basically rendering your website inside a Chrome-like window, minus the address bar and browser buttons.
Three things often get confused here:
One handy thing about WebView: it's updated separately from the Android OS via the Play Store system updates, which means most users are running a reasonably modern Chromium version regardless of their Android version.
WebView App vs PWA vs Native vs Cross-Platform
Before you write a single line of code, it's worth a quick sanity check on whether WebView is even the right tool.
| Approach | Cost | Time to Launch | Performance | Offline Support | App Store Approval |
|---|---|---|---|---|---|
| WebView (DIY) | Low | Fast (days–weeks) | Good if site is fast | Limited | Possible, with conditions |
| WebView (No-Code) | Low–Medium | Very fast (hours) | Same as above | Often included | Usually handled for you |
| PWA | Low | Fast | Good | Good | No Play Store listing |
| Flutter / React Native | Medium–High | Weeks–months | Near-native | Full control | Straightforward |
| Full Native Rebuild | High | Months | Best | Full control | Straightforward |
✅ When WebView Is the Right Call
- ✓ Content sites, blogs, news sites
- ✓ SaaS dashboards and admin panels
- ✓ E-commerce product catalogs
- ✓ Internal company tools or portals
- ✓ Any situation where your website already does the heavy lifting
❌ When WebView Is the Wrong Call
- ✗ Games or anything needing smooth animations at 60fps
- ✗ Apps that heavily use the camera (AR, video editing, photo filters)
- ✗ Offline-first apps (note-taking, fitness tracking)
- ✗ Apps needing deep OS integration (Bluetooth, NFC, background sensors)
Pre-Conversion Checklist — Is Your Website Actually Ready?
Don't skip this step. A sluggish, broken website becomes a sluggish, broken app.
- Mobile responsiveness — does your site have a proper
<meta name="viewport">tag? Do buttons have tap targets of at least 48×48dp? - Page speed — check your Core Web Vitals. A site that loads in 5 seconds on mobile will also load in 5 seconds in the app.
- HTTPS — non-negotiable. Android 9 and above block plain HTTP traffic by default.
- Feature compatibility — some things need extra work in WebView: file uploads, camera access, pop-up windows, geolocation. We'll cover all of these later.
02Before You Open Android Studio — Planning & Requirements
Tools and Prerequisites
Here's what you need installed before anything else:
Android Studio
Download the latest stable version from developer.android.com
JDK 17 or higher
Android Studio usually bundles this, but check your SDK settings
Minimum SDK: API 24
For 2026 Play Store submissions, target API 34 (Android 14). Min SDK 24 (Android 7) for broad coverage.
Physical device for testing
The emulator is great for most things, but camera access, file uploads, and permission flows need a real phone
Defining Your App's Scope
Before you start, answer these questions. They'll determine which code you need later.
- Is this a single URL or a multi-section site with different domains or subdomains?
- Will users need to log in? (You'll want to make sure cookies are handled correctly.)
- Does the site need file uploads or camera access?
- Do you want push notifications?
- Do you need location/geolocation features?
The more of these you need, the more setup is involved — but we cover all of them below.
03Step-by-Step: Building a WebView App in Android Studio
Create a New Android Studio Project
Open Android Studio and choose New Project. You'll see two "Empty Activity" options:
- Empty Activity (Views) — the classic XML-based approach. Still valid and widely documented.
- Empty Activity (Compose) — the modern Jetpack Compose approach. This is the current default for new projects.
This guide covers both. For the package name (e.g., com.yourcompany.yourapp), choose something that matches your brand — it'll be permanent once you publish to the Play Store.
Add Internet Permission to AndroidManifest.xml
This is the single most common cause of a blank white screen in WebView tutorials. Don't skip it.
Open AndroidManifest.xml and add this line above the <application> tag:
<uses-permission android:name="android.permission.INTERNET" />Without this, your app has no permission to access the internet, and the WebView will just sit there staring at you with a blank face.
Add the WebView to Your Layout (XML / Views Approach)
In res/layout/activity_main.xml, replace the default content with this:
<?xml version="1.0" encoding="utf-8"?>
<androidx.swiperefreshlayout.widget.SwipeRefreshLayout
    xmlns:android="http://schemas.android.com/apk/res/android"
    android:id="@+id/swipeRefresh"
    android:layout_width="match_parent"
    android:layout_height="match_parent">

    <FrameLayout
        android:layout_width="match_parent"
        android:layout_height="match_parent">

        <WebView
            android:id="@+id/webView"
            android:layout_width="match_parent"
            android:layout_height="match_parent" />

        <ProgressBar
            android:id="@+id/progressBar"
            style="?android:attr/progressBarStyleHorizontal"
            android:layout_width="match_parent"
            android:layout_height="4dp"
            android:layout_gravity="top"
            android:max="100"
            android:visibility="gone" />

    </FrameLayout>

</androidx.swiperefreshlayout.widget.SwipeRefreshLayout>
The SwipeRefreshLayout gives users a familiar pull-to-refresh gesture. The ProgressBar at the top shows a loading indicator. Both are small touches that make the app feel much more polished than a bare WebView.
Load Your Website (Java)
Here's a complete MainActivity.java:
import android.os.Bundle;
import android.webkit.WebSettings;
import android.webkit.WebView;
import android.webkit.WebViewClient;
import androidx.appcompat.app.AppCompatActivity;

public class MainActivity extends AppCompatActivity {

    private WebView webView;

    @Override
    protected void onCreate(Bundle savedInstanceState) {
        super.onCreate(savedInstanceState);
        setContentView(R.layout.activity_main);

        webView = findViewById(R.id.webView);

        // Enable JavaScript (off by default — most modern sites need it)
        WebSettings settings = webView.getSettings();
        settings.setJavaScriptEnabled(true);
        settings.setDomStorageEnabled(true);

        // Keep navigation inside the app instead of opening Chrome
        webView.setWebViewClient(new WebViewClient());

        // Load your website
        webView.loadUrl("https://yourwebsite.com");
    }
}
JavaScript is disabled by default in WebView, which is why many sites appear broken without setJavaScriptEnabled(true). Most modern sites need it.
Load Your Website (Kotlin — Recommended for New Projects)
Kotlin is the preferred language for Android development. The same app in Kotlin is a bit cleaner:
import android.os.Bundle
import android.webkit.WebSettings
import android.webkit.WebView
import android.webkit.WebViewClient
import androidx.appcompat.app.AppCompatActivity

class MainActivity : AppCompatActivity() {

    private lateinit var webView: WebView

    override fun onCreate(savedInstanceState: Bundle?) {
        super.onCreate(savedInstanceState)
        setContentView(R.layout.activity_main)

        webView = findViewById(R.id.webView)

        webView.settings.apply {
            javaScriptEnabled = true
            domStorageEnabled = true
        }

        webView.webViewClient = WebViewClient()
        webView.loadUrl("https://yourwebsite.com")
    }
}
The apply block lets you configure multiple settings in one clean block — a nice Kotlin idiom.
The Modern Way: WebView in Jetpack Compose
If you're starting a new project in 2026, Compose is the recommended approach. You won't use XML layouts at all — everything is written in Kotlin with composable functions.
First, add the WebView dependency to your build.gradle:
implementation("androidx.webkit:webkit:1.11.0")Then your main composable:
import android.webkit.WebView
import android.webkit.WebViewClient
import androidx.compose.runtime.*
import androidx.compose.ui.viewinterop.AndroidView
import androidx.compose.foundation.layout.fillMaxSize
import androidx.compose.ui.Modifier

@Composable
fun WebViewScreen(url: String) {
    var isLoading by remember { mutableStateOf(true) }

    AndroidView(
        modifier = Modifier.fillMaxSize(),
        factory = { context ->
            WebView(context).apply {
                settings.javaScriptEnabled = true
                settings.domStorageEnabled = true
                webViewClient = object : WebViewClient() {
                    override fun onPageFinished(view: WebView?, url: String?) {
                        isLoading = false
                    }
                }
                loadUrl(url)
            }
        },
        update = { webView ->
            webView.loadUrl(url)
        }
    )
}
The AndroidView composable is how you embed traditional Android Views inside Compose. The factory block creates the WebView once; the update block runs whenever the composable recomposes.
Add WebViewClient: Keep Users Inside Your App
Without a WebViewClient, every link the user taps will open in Chrome instead of staying in your app. That's a terrible experience. The fix is a one-liner:
webView.webViewClient = WebViewClient()But here's a more useful version — one that keeps your own domain inside the app but opens external links (payment gateways, social media, etc.) in the browser:
webView.webViewClient = object : WebViewClient() {
    override fun shouldOverrideUrlLoading(
        view: WebView,
        request: WebResourceRequest
    ): Boolean {
        val url = request.url.toString()
        return if (url.contains("yourwebsite.com")) {
            false // Load inside WebView
        } else {
            startActivity(Intent(Intent.ACTION_VIEW, Uri.parse(url)))
            true // Open externally
        }
    }
}Handle Back Navigation Correctly
By default, pressing the back button exits the app even if the user navigated several pages deep. You want to go back through the browsing history instead.
The Modern Approach (AndroidX — recommended in 2026)
The old onBackPressed() override is deprecated. Here's the current way to do it:
// Kotlin (Views)
onBackPressedDispatcher.addCallback(this, object : OnBackPressedCallback(true) {
    override fun handleOnBackPressed() {
        if (webView.canGoBack()) {
            webView.goBack()
        } else {
            isEnabled = false
            onBackPressedDispatcher.onBackPressed()
        }
    }
})
In Compose, use BackHandler:
BackHandler(enabled = true) {
    if (webViewState.canGoBack) {
        webViewNavigator.navigateBack()
    }
}Full Working MainActivity (All Three Versions)
Here's each complete version in one place for easy reference.
Java (Views)
public class MainActivity extends AppCompatActivity {
    private WebView webView;
    private static final String SITE_URL = "https://yourwebsite.com";

    @Override
    protected void onCreate(Bundle savedInstanceState) {
        super.onCreate(savedInstanceState);
        setContentView(R.layout.activity_main);
        webView = findViewById(R.id.webView);
        webView.getSettings().setJavaScriptEnabled(true);
        webView.getSettings().setDomStorageEnabled(true);
        webView.setWebViewClient(new WebViewClient() {
            @Override
            public boolean shouldOverrideUrlLoading(WebView view, WebResourceRequest request) {
                String url = request.getUrl().toString();
                if (url.startsWith(SITE_URL)) return false;
                startActivity(new Intent(Intent.ACTION_VIEW, Uri.parse(url)));
                return true;
            }
        });
        webView.loadUrl(SITE_URL);

        getOnBackPressedDispatcher().addCallback(this, new OnBackPressedCallback(true) {
            @Override
            public void handleOnBackPressed() {
                if (webView.canGoBack()) webView.goBack();
                else { setEnabled(false); getOnBackPressedDispatcher().onBackPressed(); }
            }
        });
    }

    @Override protected void onPause() { super.onPause(); webView.onPause(); }
    @Override protected void onResume() { super.onResume(); webView.onResume(); }
    @Override protected void onDestroy() { webView.destroy(); super.onDestroy(); }
}
Kotlin (Views)
class MainActivity : AppCompatActivity() {
    private lateinit var webView: WebView
    private val siteUrl = "https://yourwebsite.com"

    override fun onCreate(savedInstanceState: Bundle?) {
        super.onCreate(savedInstanceState)
        setContentView(R.layout.activity_main)
        webView = findViewById(R.id.webView)

        webView.settings.apply {
            javaScriptEnabled = true
            domStorageEnabled = true
        }

        webView.webViewClient = object : WebViewClient() {
            override fun shouldOverrideUrlLoading(view: WebView, request: WebResourceRequest): Boolean {
                val url = request.url.toString()
                return if (url.startsWith(siteUrl)) false
                else { startActivity(Intent(Intent.ACTION_VIEW, Uri.parse(url))); true }
            }
        }

        webView.loadUrl(siteUrl)

        onBackPressedDispatcher.addCallback(this, object : OnBackPressedCallback(true) {
            override fun handleOnBackPressed() {
                if (webView.canGoBack()) webView.goBack()
                else { isEnabled = false; onBackPressedDispatcher.onBackPressed() }
            }
        })
    }

    override fun onPause() { super.onPause(); webView.onPause() }
    override fun onResume() { super.onResume(); webView.onResume() }
    override fun onDestroy() { webView.destroy(); super.onDestroy() }
}
Jetpack Compose
@Composable
fun WebViewApp() {
    val url = "https://yourwebsite.com"
    var webViewRef by remember { mutableStateOf<WebView?>(null) }

    BackHandler {
        webViewRef?.let { if (it.canGoBack()) it.goBack() }
    }

    AndroidView(
        modifier = Modifier.fillMaxSize(),
        factory = { context ->
            WebView(context).also { webViewRef = it }.apply {
                settings.javaScriptEnabled = true
                settings.domStorageEnabled = true
                webViewClient = WebViewClient()
                loadUrl(url)
            }
        }
    )
}04Adding Real App Features (Beyond the Basics)
Splash Screen Setup
Use the AndroidX SplashScreen API — it's the modern, single-step way to add a launch screen without creating a separate activity.
In your themes.xml:
<style name="Theme.App.Starting" parent="Theme.SplashScreen">
    <item name="windowSplashScreenBackground">@color/yourBrandColor</item>
    <item name="windowSplashScreenAnimatedIcon">@drawable/your_logo</item>
    <item name="postSplashScreenTheme">@style/Theme.YourApp</item>
</style>
Then in MainActivity.onCreate(), call installSplashScreen() before setContentView(). For icon sizing, use a vector drawable at 288×288dp with the actual artwork in the inner 192×192dp circle.
Dark Mode / System Theme Syncing
Most WebView tutorials don't mention this, and users on dark mode notice immediately.
To make WebView content respect the system dark mode setting:
if (WebViewFeature.isFeatureSupported(WebViewFeature.ALGORITHMIC_DARKENING)) {
    WebSettingsCompat.setAlgorithmicDarkeningAllowed(webView.settings, true)
}
This tells WebView to attempt automatic darkening of light web content. It's an approximation — it works on simple sites but can look off on complex ones. The proper fix is adding prefers-color-scheme media queries to your website's CSS. But the above code is a solid starting point with zero CSS changes.
File Upload Support
By default, WebView ignores file input fields. To make them work, you need a WebChromeClient:
private var fileChooserCallback: ValueCallback<Array<Uri>>? = null

val fileChooserLauncher = registerForActivityResult(
    ActivityResultContracts.GetContent()
) { uri ->
    fileChooserCallback?.onReceiveValue(uri?.let { arrayOf(it) } ?: emptyArray())
    fileChooserCallback = null
}

webView.webChromeClient = object : WebChromeClient() {
    override fun onShowFileChooser(
        webView: WebView,
        filePathCallback: ValueCallback<Array<Uri>>,
        fileChooserParams: FileChooserParams
    ): Boolean {
        fileChooserCallback = filePathCallback
        fileChooserLauncher.launch("*/*")
        return true
    }
}
On Android 13+, you no longer need READ_EXTERNAL_STORAGE for this flow — scoped storage handles it automatically.
Camera Access for Photo Uploads
Add this to your AndroidManifest.xml:
<uses-permission android:name="android.permission.CAMERA" />Then request the permission at runtime before the user tries to use the camera. Wire the grant result back into your WebChromeClient file chooser flow. Camera access must be tested on a real device — the emulator won't cut it here.
Location / Geolocation Support
Override onGeolocationPermissionsShowPrompt() in your WebChromeClient:
webView.webChromeClient = object : WebChromeClient() {
    override fun onGeolocationPermissionsShowPrompt(
        origin: String,
        callback: GeolocationPermissions.Callback
    ) {
        callback.invoke(origin, true, false)
    }
}
Also add to your manifest:
<uses-permission android:name="android.permission.ACCESS_FINE_LOCATION" />Important: if your app collects location data, you must disclose this in your Play Store Data Safety form and in your privacy policy.
Push Notifications via Firebase Cloud Messaging (FCM)
This is a three-step process:
- Create a Firebase project at console.firebase.google.com, add your Android app, and download
google-services.jsoninto your app's root folder - Add the dependencies to your
build.gradle:kotlinimplementation("com.google.firebase:firebase-messaging:24.0.0") - Create a service that extends
FirebaseMessagingServiceand overrideonMessageReceived()to show a notification
Web push (via your website's service worker) is a separate thing. FCM is native and works even when the app is closed — that's why it's worth the setup.
Pull-to-Refresh and Loading Indicators
Wire the SwipeRefreshLayout from earlier to your WebViewClient:
val swipeRefresh = findViewById<SwipeRefreshLayout>(R.id.swipeRefresh)

webView.webViewClient = object : WebViewClient() {
    override fun onPageFinished(view: WebView?, url: String?) {
        swipeRefresh.isRefreshing = false
    }
}

swipeRefresh.setOnRefreshListener {
    webView.reload()
}
Custom Error Pages (No Internet / 404 / Server Error)
When something goes wrong, a blank white screen is the worst possible user experience. Show a branded error page instead:
webView.webViewClient = object : WebViewClient() {
    override fun onReceivedError(
        view: WebView,
        request: WebResourceRequest,
        error: WebResourceError
    ) {
        val errorHtml = """
            <html><body style="text-align:center;padding:40px;font-family:sans-serif;">
            <h2>You're offline</h2>
            <p>Check your connection and try again.</p>
            <button onclick="history.back()">Go Back</button>
            </body></html>
        """.trimIndent()
        view.loadDataWithBaseURL(null, errorHtml, "text/html", "UTF-8", null)
    }
}
For fancier offline pages, bundle an HTML file in your assets folder and load it with WebViewAssetLoader.
Deep Linking and Android App Links
Deep links let you open specific pages of your app directly from a URL — useful for sharing, email links, and notifications.
There are two kinds:
- Custom URI schemes (e.g.,
myapp://page) — simple to set up, but not verified - Android App Links (e.g.,
https://yourwebsite.com/page) — verified against your domain; Google can also use these for app indexing in search results
For App Links, add an intent filter to your manifest:
<intent-filter android:autoVerify="true">
    <action android:name="android.intent.action.VIEW" />
    <category android:name="android.intent.category.DEFAULT" />
    <category android:name="android.intent.category.BROWSABLE" />
    <data android:scheme="https" android:host="yourwebsite.com" />
</intent-filter>
Then host an assetlinks.json file at https://yourwebsite.com/.well-known/assetlinks.json with your app's signing fingerprint. Google provides a generator in the Play Console.
05Security Best Practices for WebView Apps (2026)
Most WebView tutorials skip this entirely. Don't.
HTTPS Is Mandatory, Not Optional
Android 9+ blocks plain HTTP traffic by default. If your site isn't on HTTPS, it won't load. Some tutorials suggest adding android:usesCleartextTraffic="true" to your manifest as a workaround — don't do this in production. It's a security hole, not a fix. Get an SSL certificate (Let's Encrypt is free).
Avoiding Mixed Content Warnings
Mixed content is when your HTTPS site loads some resources (images, scripts, fonts) over plain HTTP. Audit your site with browser dev tools before converting it to an app. You can also control the WebView's behaviour explicitly:
// Only use this if you fully understand the risk
webView.settings.mixedContentMode = WebSettings.MIXED_CONTENT_NEVER_ALLOW
MIXED_CONTENT_NEVER_ALLOW is the safest option and the default on Android 5+.
The Dangers of addJavascriptInterface()
addJavascriptInterface() lets your JavaScript code call native Android methods. It sounds useful — and it can be — but it's also a potential attack vector. If your site (or any ad or iframe on it) gets compromised, an attacker could execute arbitrary Android code through that bridge.
Rules if you must use it: Only expose specific, tightly scoped methods with @JavascriptInterface. Only allow calls from your own trusted domain (use shouldOverrideUrlLoading to prevent navigation to untrusted URLs). Never expose anything sensitive (file access, user data, etc.).
Restricting Navigation to Trusted Domains
Your app should never become an open browser. Use shouldOverrideUrlLoading() to whitelist your own domain and send everything else to the system browser:
override fun shouldOverrideUrlLoading(view: WebView, request: WebResourceRequest): Boolean {
    val url = request.url.toString()
    return if (url.startsWith("https://yourwebsite.com")) {
        false // Stay in app
    } else {
        startActivity(Intent(Intent.ACTION_VIEW, request.url))
        true // Open externally
    }
}06Performance Optimization for WebView Apps
Enabling and Configuring Caching
WebView can cache resources locally, which makes repeat visits much faster:
webView.settings.cacheMode = WebSettings.LOAD_DEFAULTLOAD_DEFAULT respects your server's HTTP caching headers, which is the correct behaviour. The real performance wins come from setting proper Cache-Control headers on your server — that's where most "WebView is slow" complaints actually originate.
Reducing First-Load White Flash
The white flash on startup is a combination of: the app launching, WebView initialising, and your site loading. Reduce it like this:
- Use a splash screen that matches your site's background colour
- Enable caching so repeat loads are instant
- Set the WebView background colour before loading:
webView.setBackgroundColor(Color.parseColor("#FFFFFF")) // Match your site's bgWebsite-Side Performance Checklist
Your app's performance ceiling is your website's performance. Before publishing, make sure:
- Images are compressed and served in modern formats (WebP, AVIF)
- JavaScript and CSS are minified
- Lazy loading is enabled for below-the-fold content
- Third-party scripts (analytics, chat widgets, ad scripts) are deferred or removed where possible
- Core Web Vitals scores are green in PageSpeed Insights
Memory and Lifecycle Management
Forgetting to destroy the WebView can cause memory leaks. Always handle the lifecycle properly:
override fun onPause() { super.onPause(); webView.onPause() }
override fun onResume() { super.onResume(); webView.onResume() }
override fun onDestroy() {
    webView.stopLoading()
    webView.destroy()
    super.onDestroy()
}07Testing Your WebView App Before Launch
Device and OS Coverage Testing
The emulator is great, but it misses things. Camera, file uploads, and runtime permissions all behave differently on real hardware. Before publishing, test on:
- At least two different screen sizes (a compact phone and a larger one)
- Android 10 and Android 14 at minimum
- A real device for anything involving camera, file picking, or location
👉 Note: Before you can release on Google Play, you'll need to pass the 12-tester closed testing requirement — meaning at least 12 real people must opt in and test your app for 14 days. Plan this into your launch timeline.
Functional Test Checklist
| Feature | What to Test |
|---|---|
| Internet permission | Page loads without blank screen |
| JavaScript | Site functions normally (forms, menus, etc.) |
| Link handling | Internal links stay in app; external links open in browser |
| Back button | Goes back through history; exits on last page |
| Pull-to-refresh | Reloads the page correctly |
| File upload | File picker opens and file submits |
| Camera | Camera opens; photo attaches to form |
| Dark mode | App adapts to system theme |
| Offline | Error page shows instead of blank screen |
| Rotation | Layout adjusts correctly in landscape mode |
Common Errors Quick-Reference Table
| Symptom | Likely Cause | Fix |
|---|---|---|
| Blank white screen | Missing internet permission | Add <uses-permission android:name="android.permission.INTERNET" /> |
| Links open in Chrome | No WebViewClient set | Add webView.webViewClient = WebViewClient() |
| Back button exits the app | No back-press handling | Implement OnBackPressedCallback with canGoBack() |
| JS-dependent site broken | JavaScript disabled | Call settings.javaScriptEnabled = true |
| Works on emulator, not device | HTTP not HTTPS | Migrate to HTTPS (or temporary cleartext flag for dev only) |
| White flash on load | No matching background / no splash | Add splash screen + webView.setBackgroundColor() |
| File upload does nothing | Missing WebChromeClient | Implement onShowFileChooser() |
| Camera not working | Missing permission + handler | Add CAMERA permission + handle in WebChromeClient |
08Publishing Your WebView App to Google Play (2026)
This is the section most tutorials skip. Getting to Google Play takes a few more steps beyond "it works on my phone."
Generating a Signed App Bundle (AAB)
Google Play now requires the Android App Bundle (.aab) format for new submissions — plain APKs are no longer accepted.
In Android Studio: Build → Generate Signed Bundle / APK → Android App Bundle
You'll be prompted to create a keystore file. This is critically important: back up your keystore and remember the password. You need the exact same keystore to publish future updates. Lose it, and you'll have to create a new app listing from scratch.
Google Play Console Setup
Create your developer account at play.google.com/console (one-time $25 fee). Not sure how to set it up? Our step-by-step Google Play Console developer account guide walks you through every screen, including identity verification. For your app listing, you'll need:
- App title and description (don't keyword-stuff — Google actively penalises this)
- At least 4 screenshots in the correct dimensions for phone and tablet
- A feature graphic (1024×500px)
- A short description (80 characters)
- Content rating questionnaire answers
Privacy Policy Requirement
Every app on the Play Store needs a privacy policy URL — yes, even a simple WebView wrapper. If your app uses location, camera, or push notifications, your policy must explicitly cover these.
If you don't have one, use a reputable generator and host it on your website. Then link it in the Play Console under App Content → Privacy Policy.
Play Store Policy Considerations for WebView Apps
Google has tightened its stance on "wrapper" apps that offer no value beyond what the website already provides. An app that's literally just a browser window around a URL is at risk of rejection.
To clear the bar, make sure your app adds genuine native value:
- Push notifications — something the browser can't do natively on Android
- Splash screen and branding — distinct app identity
- Offline fallback page — graceful handling of no internet
- Android App Links / deep linking — proper integration with Android's share and navigation system
If your app does these things, you're in good shape. A pure naked-WebView wrapper with nothing else is what gets flagged.
Also make sure to fill in the Data Safety section accurately. Declare any data your app transmits: if you're using FCM, declare push tokens; if you're using location, declare it; if cookies persist login state, declare it.
09The No-Code Alternative — When DIY Isn't the Right Call
Not everyone wants to wrangle Android Studio for a weekend. That's fair.
Who Should Consider No-Code Tools
- Non-developers who need both Android and iOS without writing platform-specific code
- Agencies managing multiple client apps and needing speed
- Businesses where "a working app this week" beats "a perfect app in two months"
What No-Code Platforms Typically Include
The honest answer is: the same checklist from this guide, pre-built. Push notifications, custom splash screens, offline pages, and app store submission support are standard offerings. The trade-off is less control and a monthly subscription instead of a one-time build.
DIY vs No-Code Decision Table
| Factor | DIY (Android Studio) | No-Code Platform |
|---|---|---|
| Upfront cost | Free | Monthly subscription ($20–$100/mo typically) |
| Time to first build | Days to weeks | Hours |
| iOS support | Separate project needed | Usually included |
| Customisation | Complete | Limited to platform features |
| Maintenance | You handle SDK/API updates | Platform handles most of it |
| Scalability | Unlimited | Depends on platform |
If you need one platform, have some development experience, and want full control — this guide is the right path. If you need both Android and iOS immediately and can't write code, no-code is worth looking at.
🧮 DIY vs. No-Code Decision Calculator
10Frequently Asked Questions
Yes — but with caveats. Google allows WebView apps as long as they provide genuine native value beyond just wrapping a URL. Add push notifications, an offline fallback page, a proper splash screen, and App Links, and you'll be in much better shape. A bare-bones wrapper with nothing else is at risk of rejection.
Not by default. The WebView needs to load your actual website, so an internet connection is required. You can bundle a local offline fallback HTML page in your assets folder and show it when connectivity is lost — but your actual site content won't be available offline without significant additional work (like a service worker on the web side).
Yes, as long as your site uses HTTPS, you're handling cookies correctly (CookieManager), and you haven't introduced any addJavascriptInterface risks. WebView inherits the security model of your website — so a secure, HTTPS website is a secure WebView app.
Custom Tabs opens the user's actual Chrome browser with some branding customisation (your app's colour, a custom toolbar action). It's faster to implement than WebView and gets Chrome's full feature set — but you have less control over the UI and the user can see the address bar. Use Custom Tabs for occasional external content; use WebView for your core app experience.
No — that's one of WebView's biggest advantages. Content changes on your website (new pages, updated copy, new products) show up in the app automatically because the WebView just loads your live URL. You only need to submit an app update when you change something on the native Android side: permissions, SDK target version, UI changes, or new native features.
Yes. Firebase Cloud Messaging (FCM) can be added to an existing WebView app without touching your website code at all. It's a native Android feature, so it works entirely on the app side. See the FCM section above for setup steps.
Use the comparison table earlier in this guide and this rough framework: if your website is already good and you mainly want an app store presence, go WebView. If you need iOS and Android simultaneously and have budget, Flutter or React Native give you better performance and platform integration. If you want users to add your site to their home screen without a Play Store listing, look into PWAs. If budget and time are both very tight, a no-code WebView tool covers most bases.
11Conclusion
Converting a website to an Android app with WebView is genuinely one of the faster paths from "website" to "listed on Google Play." But as this guide hopefully showed, "fast" doesn't mean "simple" — there are a handful of things that most tutorials either get wrong or skip entirely.
Here's the short version of everything covered above:
Get the basics right first — internet permission, HTTPS, and a WebViewClient are non-negotiable
Back navigation and lifecycle management are where most WebView apps silently break
Security isn't optional — HTTP-only sites, addJavascriptInterface misuse, and unrestricted navigation are real risks
Performance lives mostly on the website — a slow site makes a slow app; Core Web Vitals scores translate almost directly
Publishing requires more than working code — a signed AAB, a privacy policy, and a filled-out Data Safety form are all mandatory
Google Play's 2026 stance on wrapper apps means you need to add genuine native value (push notifications, offline handling, deep links, branding) to avoid rejection
Jetpack Compose is now the recommended starting point for new Android projects, though the Views approach still works fine
Your next steps: run the pre-conversion checklist on your live site, build the app using the full code blocks above, test on a real device, and use the comparison table to decide whether to go DIY or hand it off to a no-code platform. Good luck — the Play Store listing is closer than you think.