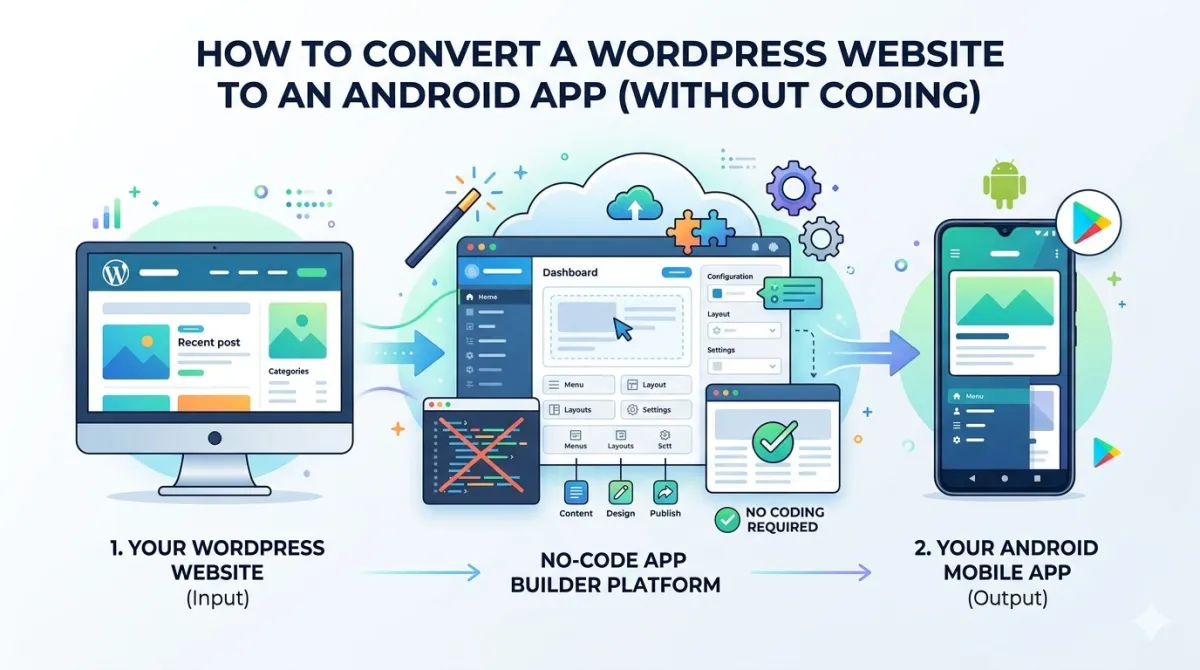
How to Convert a WordPress Website to an Android App (Without Coding)
You Already Have the Hard Part Done
Here's something kind of wild: you've already built a website. You've picked a domain, set up WordPress, added your content, maybe even wrestled with a page builder for a few weekends. That's genuinely hard work — and most of it translates directly to an Android app.
The problem? Most WordPress site owners never make that leap. They assume building an app means hiring a developer, spending $10,000–$80,000, and waiting months for something to ship. And honestly, for a lot of people, that's where the idea dies.
But it doesn't have to.
This guide covers everything you actually need to know: what your real options are, how to pick the right tool, a step-by-step walkthrough of the build process, and exactly what Google Play expects before they'll approve your app. We'll also be upfront about when converting doesn't make sense — because not every site needs an app, and pretending otherwise wastes your time.
Let's get into it.
What Does "Converting a WordPress Site to an Android App" Actually Mean?
Good question — because the answer isn't as simple as "your website, but in an app." There are actually three very different approaches, and they're not created equal.
The Three Technical Approaches
1. WebView Apps
Think of this as putting your website inside a picture frame and calling it an app. The app opens, and it just... loads your site. It's the fastest and cheapest option by a long stretch, but it's also the most limited. No real offline access, limited native features, and some app stores are getting pickier about thin WebView apps.
2. Progressive Web Apps (PWAs)
A PWA is a website that behaves like an app — users can add it to their home screen straight from the browser, no app store required. It's a great lightweight option, but it's more of a complement than a replacement. Push notifications on older Android devices can be patchy, and you won't get the credibility boost that comes from being in the Play Store.
3. Native-Synced Apps
Tools like AppMySite and MobiLoud connect to your WordPress site through the REST API and pull your content into a proper native Android interface. More setup involved, but the end result looks and feels like a real app — because it kind of is one.
Here's how those three stack up:
| Feature | WebView | PWA | Native-Synced |
|---|---|---|---|
| Speed to build | Fast (minutes) | Fast | Medium (hours) |
| Offline access | ❌ | Partial | ✅ |
| Push notifications | Limited | Partial | ✅ |
| Cost | Lowest | Free | Medium |
| Google Play eligible | Yes (with caveats) | No | Yes |
| Feels like a "real" app | Somewhat | No | Yes |
One important heads-up: a lot of no-code app builders produce WebView apps but advertise them as "native." That's... a stretch. Know what you're actually getting before you pay for anything.
What Your App Will (and Won't) Inherit from WordPress
Your posts, pages, categories, tags, and menus can all sync automatically — that's the magic of the WordPress REST API. But a few things get messy in translation:
Works well:
- Blog posts and pages
- Category and tag archives
- Basic WooCommerce product pages
Worth testing carefully:
- Custom page builder layouts (Elementor, Divi) — these can look a bit off in a WebView
- WooCommerce checkout flows — payment gateways can behave strangely inside an app
- Forms and newsletter sign-ups
Often doesn't carry over:
- Complex JavaScript interactions
- Third-party chat widgets
- Sticky headers that do clever things on scroll
Should You Actually Convert Your Site? (An Honest Take)
Not every WordPress site needs an app. Here's how to figure out which side of that line you're on.
Who Benefits Most
- Blogs and news sites — readers who come back daily or weekly are exactly who apps are built for
- WooCommerce stores with repeat buyers — an app icon on someone's home screen is a constant, gentle reminder your store exists
- Membership sites — logged-in experiences feel much more natural inside an app
- Local businesses with loyal regulars — one-tap access beats typing a URL every time
- Online course platforms — structured content works brilliantly in a mobile app format
When It's Not Worth Your Time
- Brochure websites — if someone visits once and never comes back, an app adds nothing
- Sites with a broken mobile experience — an app wraps your mobile site as-is. It won't fix bad design; it'll make it worse
- Desktop-heavy audiences — check Google Analytics first. If 85% of your traffic is on desktop, your users clearly aren't screaming for a mobile app
- Sites dependent on desktop-only features — complex data tables, drag-and-drop editors, that kind of thing
Worth knowing: Apps typically see 3x higher conversion rates than mobile websites — but only when the app actually provides a good experience. A bad app is worse than no app.
Website vs. App — What Changes for Your Users?
| Website | Android App | |
|---|---|---|
| How they access it | Type a URL or Google it | Tap an icon on their home screen |
| Home screen presence | ❌ | ✅ |
| Push notifications | ❌ | ✅ |
| Offline access | ❌ | Sometimes ✅ |
| Google Play discoverability | ❌ | ✅ |
| Feels premium | Depends | Yes |
The goal isn't "website or app." It's layering a dedicated mobile touchpoint on top of what you already have.
Before You Build Anything — Get Your WordPress Site Ready
This is the section most guides skip, and it's the most important one. A bad website becomes a bad app. Full stop.
The Mobile Readiness Audit
Don't do this in Chrome DevTools. Open your site on an actual Android phone and look at your five most-visited pages. Check for:
- Text that requires pinching to read
- Buttons that are too small to tap comfortably (Google recommends minimum 48×48px tap targets)
- Horizontal scrolling — this should never happen
- Images that break the layout on smaller screens
Then run your site through Google PageSpeed Insights and look at the Mobile score specifically. Aim for 70+. Below that, your app is going to feel sluggish regardless of what tool you use.
Speed Optimisation Checklist
- Compress and lazy-load images — plugins like ShortPixel or Smush handle this in a few clicks
- Defer render-blocking scripts — especially painful inside a WebView
- Enable caching — WP Rocket or W3 Total Cache are solid options
- Check your TTFB (Time to First Byte) — above 600ms on mobile and your app will feel slow
- Consider a CDN — Cloudflare's free tier reduces loading times for users who aren't near your server
Security and Technical Prerequisites
A few things that will trip you up if you don't check them now:
- HTTPS is non-negotiable — Google Play requires all app content to load over a secure connection
- WordPress REST API must be enabled — security plugins like Wordfence or iThemes Security sometimes block this by default. Check before you start.
- robots.txt — make sure it's not accidentally blocking your API routes
- Caching plugins — whitelist your REST API endpoints so the app doesn't get served stale content
Navigation and UX Cleanup for App Context
Apps have less forgiving users than websites. People expect things to work quickly and obviously.
- Trim your top-level menu to 5 items or fewer — nobody scrolls through 12 nav items on a phone
- Reduce aggressive pop-ups — they're tolerable on desktop; inside an app they feel hostile
- Fix broken internal links — there's no address bar in an app to catch a dead end
- Test every form on mobile: contact forms, newsletter sign-ups, checkout flows, all of it
Choosing the Right No-Code Tool
Here's the honest comparison nobody else seems to want to give you.
The Four Main Options
Option 1 — WebView Wrappers (e.g. AppsGeyser, AppMakr)
Paste your URL, get an APK. Fastest and cheapest. Limited native features. Good enough for a simple content blog. Risky for anything that needs a polished, interactive experience.
Option 2 — WordPress-Native Builders (e.g. AppMySite, MobiLoud)
Connect via plugin and REST API, build a native-ish UI. More setup, significantly better results. The right choice for WooCommerce stores and membership sites.
Option 3 — PWA
Lightweight, no app store needed, zero cost to set up. Great as a first step or a complement. Not a Play Store app.
Option 4 — Custom Development
Maximum control. $10,000–$80,000+. Only makes sense for complex, highly custom functionality. Not what this guide is about.
Tool Comparison
| AppMySite | AppsGeyser | MobiLoud | PWA | |
|---|---|---|---|---|
| App type | Native-synced | WebView | Native-synced | Web-based |
| Free tier | Yes | Yes | Trial only | Yes |
| WordPress plugin needed | Yes | No | Yes | No |
| iOS support | Yes | No | Yes | Yes |
| Google Play ready | Yes | Yes (caveats) | Yes | No |
| Best for | Stores, blogs | Simple blogs | Complex sites | Quick start |
Matching the Tool to Your Situation
- Content blog, tight budget → A WebView tool with a clean mobile theme is often enough
- WooCommerce store → Go native-synced (AppMySite or MobiLoud) for reliable checkout handling
- Want to skip the app store entirely → PWA is worth exploring as a fast first step
- Managed WordPress host with API restrictions → Check tool compatibility before signing up for anything
Most tools offer a free tier or trial. Build a test version before spending money.
Step-by-Step: How to Convert Your WordPress Site to an Android App
This workflow applies broadly across tools, with notes where things differ.
Step 1 — Create Your Account and Start a New Project
Sign up on your chosen platform (most free tiers don't require a credit card). When naming your app, use your actual brand name — this becomes your Google Play listing name, so choose it carefully.
Select "WordPress" or "Website" as your source type. The distinction matters on some platforms.
Pro tip: Have your app icon ready as a 1024×1024px PNG before you start. You'll need it sooner than you expect.
Step 2 — Connect Your WordPress Website
- WebView tools: Paste your homepage URL. Done. Just make sure it's HTTPS.
- Native-synced tools (e.g. AppMySite): Install the platform's WordPress plugin, generate an API connection, and authorise it using WordPress Application Passwords.
Verify the connection is working by checking that your posts and pages appear inside the builder dashboard.
If your REST API is blocked, here's the fix in Wordfence: go to Firewall → Brute Force Protection and turn off REST API blocking.
Step 3 — Design Your App's Branding and Navigation
- Upload your app icon (1024×1024px PNG, no rounded corners — Google Play adds those itself)
- Create a simple splash screen in your brand colours — keep it clean and fast
- Set up your bottom navigation bar with 3–5 items matching your site's primary sections
- Choose a colour theme — most tools pull your site's primary colour automatically, but verify it looks right
One thing to avoid: don't use images or logos you don't own in your splash screen or icon. Google Play can and will reject apps for intellectual property violations.
Step 4 — Configure Key Features
Push notifications
Enable these and connect them to Firebase Cloud Messaging (most no-code tools handle this integration for you). Set up at least one welcome notification for new installs.
Login and registration
If your site has user accounts, test the login flow inside the app thoroughly. Enable social login (Google or Facebook) if your tool supports it — it dramatically reduces sign-up friction.
Search
Enable in-app search and run a few test queries to make sure results are relevant.
Comments
Decide whether to show WordPress comments in the app. For blogs, this can be a surprisingly strong engagement feature.
Analytics
Connect Google Analytics 4 or Firebase Analytics before you launch. You'll want app-specific data separate from your website traffic.
Step 5 — Sync Content and Configure Post Types
Verify that posts and pages sync correctly and appear in the right categories. If you use Custom Post Types (via CPT UI or Advanced Custom Fields), check whether your chosen tool supports them — this is a major difference between platforms.
For WooCommerce stores: test product pages, category pages, the cart, and the checkout before you go any further. This is the step that catches the most problems.
Step 6 — Test Inside the Builder's Preview Tool
Use the platform's emulator or live preview for a first-pass check. Look at navigation flow, home screen layout, article readability, and image loading.
Important caveat: emulators aren't perfect. Treat this as a rough check, not a final sign-off. Real device testing comes next.
Step 7 — Generate the APK (or AAB) Build
Trigger the build from your platform's dashboard. WebView APKs are ready in minutes; native-synced builds can take 10–30 minutes.
Download the APK for sideload testing. But also note: Google Play now requires AAB (Android App Bundle) format for new app submissions. Confirm your tool produces this before you commit to a paid plan.
Step 8 — Test on a Real Android Device (Non-Negotiable)
Enable "Install from unknown sources" in your Android settings to sideload the APK.
Then test every critical user journey:
- Homepage → article → category → search
- Contact form → newsletter sign-up
- (If applicable) product → cart → checkout → account login
Test on at least two Android versions if you can. Android 11 and Android 13 cover the majority of active devices.
Also test on mobile data, not just WiFi. If it feels slow on 4G, your users will feel it too.
Document any issues, fix them at the WordPress level, and rebuild.
Publishing Your App to Google Play
Setting Up Your Google Play Developer Account
- One-time $25 registration fee
- If you're publishing for a business, use an organisation account — it shows your company name on the store listing
- Google now requires identity verification, which can involve a D-U-N-S number for business accounts in some regions
- Account approval takes 2–7 days — start this the same day you start building, not after
Preparing Your Store Listing
App title (30 characters max)
Include your primary keyword naturally. Example: "BrandName – News & Updates"
Short description (80 characters)
Make the value proposition immediately clear. One sentence, benefits first.
Full description (up to 4,000 characters)
Lead with benefits, not features. Write for a real person scanning on their phone, not for a keyword bot.
Screenshots (2–8 required)
Use real screenshots from a real device. Not mockups. Not templates. The actual app experience.
Feature graphic (1024×500px)
This banner appears at the top of your store listing. It's prime real estate — use it to communicate your brand at a glance.
Privacy policy
Mandatory. Must be hosted on a live URL. If you don't have one, tools like Termly or iubenda can generate one in minutes — publish it on your WordPress site.
Understanding Google Play's Policies Before Submission
Read these so you don't get surprised:
- Minimum functionality: Your app must provide a meaningful experience. A WebView wrapping a single static page with no navigation is at risk of rejection.
- Spam policy: Don't submit multiple near-identical apps. Google has tightened up on templated WebView apps since 2022.
- Data safety section: You must declare what data your app collects. This is a hard requirement. Leaving it incomplete is one of the most common reasons for rejection.
- Age rating: Most content and business apps will be rated "Everyone."
What to Expect After Submission
- First-time review: 3–7 days typically
- If rejected, Google gives you a specific reason — most first-time rejections are fixable
- After approval, your app goes live and becomes searchable within 24–48 hours
- Set up Internal Testing and Closed Testing tracks for future updates before they go to production
After Launch — Making Your App Work for Your Business
Getting on Google Play is the beginning, not the finish line.
App Store Optimisation (ASO)
Getting discovered in the Play Store is its own skill set, distinct from web SEO.
- Use tools like AppFollow or Sensor Tower's free tier to find relevant, high-volume keywords for your Play Store description
- Update your description periodically — the Play Store index refreshes regularly
- Encourage early users to leave honest ratings and reviews — apps with 10+ genuine 4-star reviews see significantly higher install rates
- A/B test your icon and screenshots using Google Play Console's built-in Store Listing Experiments feature
Push Notifications — Your App's Biggest Advantage
This is the feature that makes an app genuinely more powerful than a website. Use it wisely:
- 1–3 notifications per week is a reasonable starting cadence for a content site
- Link directly to the specific post, product, or page — not your homepage
- Segment by user behaviour if your tool supports it (e.g. re-engage users who haven't opened the app in 7 days)
- Don't send generic or irrelevant notifications. This is the single biggest reason people uninstall apps.
Analytics and Monitoring
- Set up a separate "App" data stream in Google Analytics 4 — don't mix it with your website traffic
- Watch: daily/monthly active users, session length, screen flow, crash rate
- Monitor Android Vitals in Google Play Console — crashes and ANRs (Application Not Responding errors) affect your Play Store ranking
- Check your uninstall rate monthly. A high rate signals a content or UX problem worth investigating.
Common Mistakes (And How to Avoid Them)
Converting a mobile-broken site
The single biggest mistake. The app wraps your mobile site as-is. Fix the site first.
Skipping real device testing
The emulator said it was fine. The real phone disagreed. Always sideload and test.
Ignoring the Data Safety form
This one causes a surprising number of first-time rejections. Fill it out carefully and accurately.
Going overboard with push notifications
Daily promotional blasts are the fastest route to mass uninstalls. Be thoughtful.
Using a stock or placeholder app icon
A generic icon signals low quality — to users and increasingly to reviewers.
Not setting up analytics before launch
Without a baseline, you have no way to know if the app is actually working.
Choosing a tool based on price alone
The cheapest WebView wrapper might produce an app that Google Play rejects for minimum functionality violations. False economy.
Expert Tips Worth Stealing
Build before your audience needs it
Launch early to a small internal group — staff, loyal readers, existing customers. Gather real feedback before you go public.
Keep your site and app visually consistent
Users who already know your website should feel instantly at home in the app. Confusion drops when the two feel like the same brand.
Use deep links in notifications
Send users directly to the relevant post, product, or page — not to your homepage.
Update quarterly, minimum
Google Play deprioritises apps that haven't been updated in over a year. Even small version bumps signal that you're actively maintaining the thing.
Treat your store listing like a landing page
Your Play Store description, screenshots, and feature graphic are doing real sales work. Invest time in them.
Consider a PWA as a dry run
If you're not sure about the app store process, a PWA lets you test mobile engagement before committing to the full conversion workflow.
FAQs
Do I need coding skills to convert my WordPress site to an Android app?
No. The no-code tools covered in this guide handle the technical heavy lifting. The closest thing to a "technical task" most users face is enabling the WordPress REST API if a security plugin has blocked it — and that's a settings toggle, not code.
Will my app update automatically when I publish new content on WordPress?
For native-synced tools (AppMySite, MobiLoud): yes. New posts, pages, and content changes propagate to the app automatically via the REST API.
For WebView tools (AppsGeyser): also yes, because the app loads your live website directly.
The exception: changes to your app's navigation structure, branding, or settings require a new build and resubmission to Google Play.
How long does it take to get published on Google Play?
Here's a realistic timeline:
| Stage | Time |
|---|---|
| Building the app | 30 minutes to a few hours |
| Google Play Developer account setup | Up to 7 days |
| Google Play review after submission | 3–7 days (first submission) |
| Total realistic timeline | 1–2 weeks |
Start your developer account the same day you start building. Don't wait.
What's the difference between a WebView app and a native app — and does it matter?
A WebView app loads your website inside an Android app shell. It's essentially a branded browser window. A native-synced app has its own Android interface, pulling your WordPress content in via API — it looks and behaves like a proper app, even on slower connections.
For most content sites and small businesses, a well-executed WebView app is entirely sufficient. Native-synced is worth the extra cost for stores, membership sites, or apps that need offline functionality.
Can I convert a WooCommerce store into an Android app?
Yes, but it needs more careful testing than a simple blog.
Test your full checkout flow — cart, payment, confirmation — on a real Android device. Payment gateway scripts can behave unpredictably inside a WebView. Native-synced tools handle WooCommerce more reliably in general.
Confirm that your payment provider (Stripe, PayPal, etc.) works correctly inside an in-app browser context before you submit anything.
Will Google Play reject my app?
Not automatically. Apps built on real, content-rich WordPress sites with proper navigation, a functional user experience, and a complete store listing get approved regularly.
The most common preventable rejection causes:
- Incomplete Data Safety form
- Missing privacy policy
- Placeholder or generic store listing content
- App that's too thin to offer a meaningful experience
How much does it cost?
| Cost | Amount |
|---|---|
| Google Play Developer account | $25 (one-time) |
| No-code app builder (free tiers available) | $0–$49/month |
| Custom development (for context) | $10,000–$80,000+ |
Most no-code tools have a free tier to build and preview. Publishing usually requires a paid plan, typically $9–$49/month depending on the tool. Total minimum to go live: around $25 plus your builder subscription.
Your WordPress Site Is Already Halfway There
Here's the honest takeaway: the biggest barrier to getting your WordPress site onto Android isn't technical ability. It's knowing which approach fits your situation, preparing your mobile experience properly, and understanding what Google Play actually needs before they'll approve you.
Quick decision summary:
- WebView tools for speed, simplicity, and tight budgets
- Native-synced tools for WooCommerce stores and membership sites
- PWA as a lightweight complement or a no-store-needed starting point
For most content sites and small businesses, a well-built WebView app is entirely sufficient and the fastest path to the Play Store.
Four things to do right now:
- Run the mobile readiness audit on your site — open it on a real Android phone today
- Create your Google Play Developer account now, not when your app is done
- Choose your tool based on your site type, not just the price tag
- Test on a real Android device before you submit anything
Want Someone Else to Handle All of This?
If you've read this far and your honest reaction is "I just want someone to do this for me" — that's a completely valid place to land. Building an app has a real learning curve, and your time has value.
AppOfWeb is a done-for-you conversion service where you hand over your WordPress URL and the team handles everything: development, Google Play publishing, and ongoing maintenance. No plugins to install, no APKs to manage, no developer account to navigate alone.
They also offer a free demo build — you can see exactly what your WordPress site looks like as an app before committing to anything.
Check out appofweb.com/#pricing to explore plans, or start with the free demo to see your site as an app first.